

Notes on building smarter websites for actual humans.

How to Add Restaurant Online Ordering to Your Squarespace Site (and Keep More Profit)
Adding online ordering to your restaurant’s Squarespace site doesn’t have to mean rebuilding from scratch or losing profits to delivery apps.
If you’ve ever tried to add online ordering to a restaurant website, you already know the pain points: either you’re handing over a chunk of your profit to a third-party app, or you’re rebuilding your entire site just to make it work.
Neither is ideal, especially if you already like your Squarespace site and just want an easy way for customers to place orders directly with you.
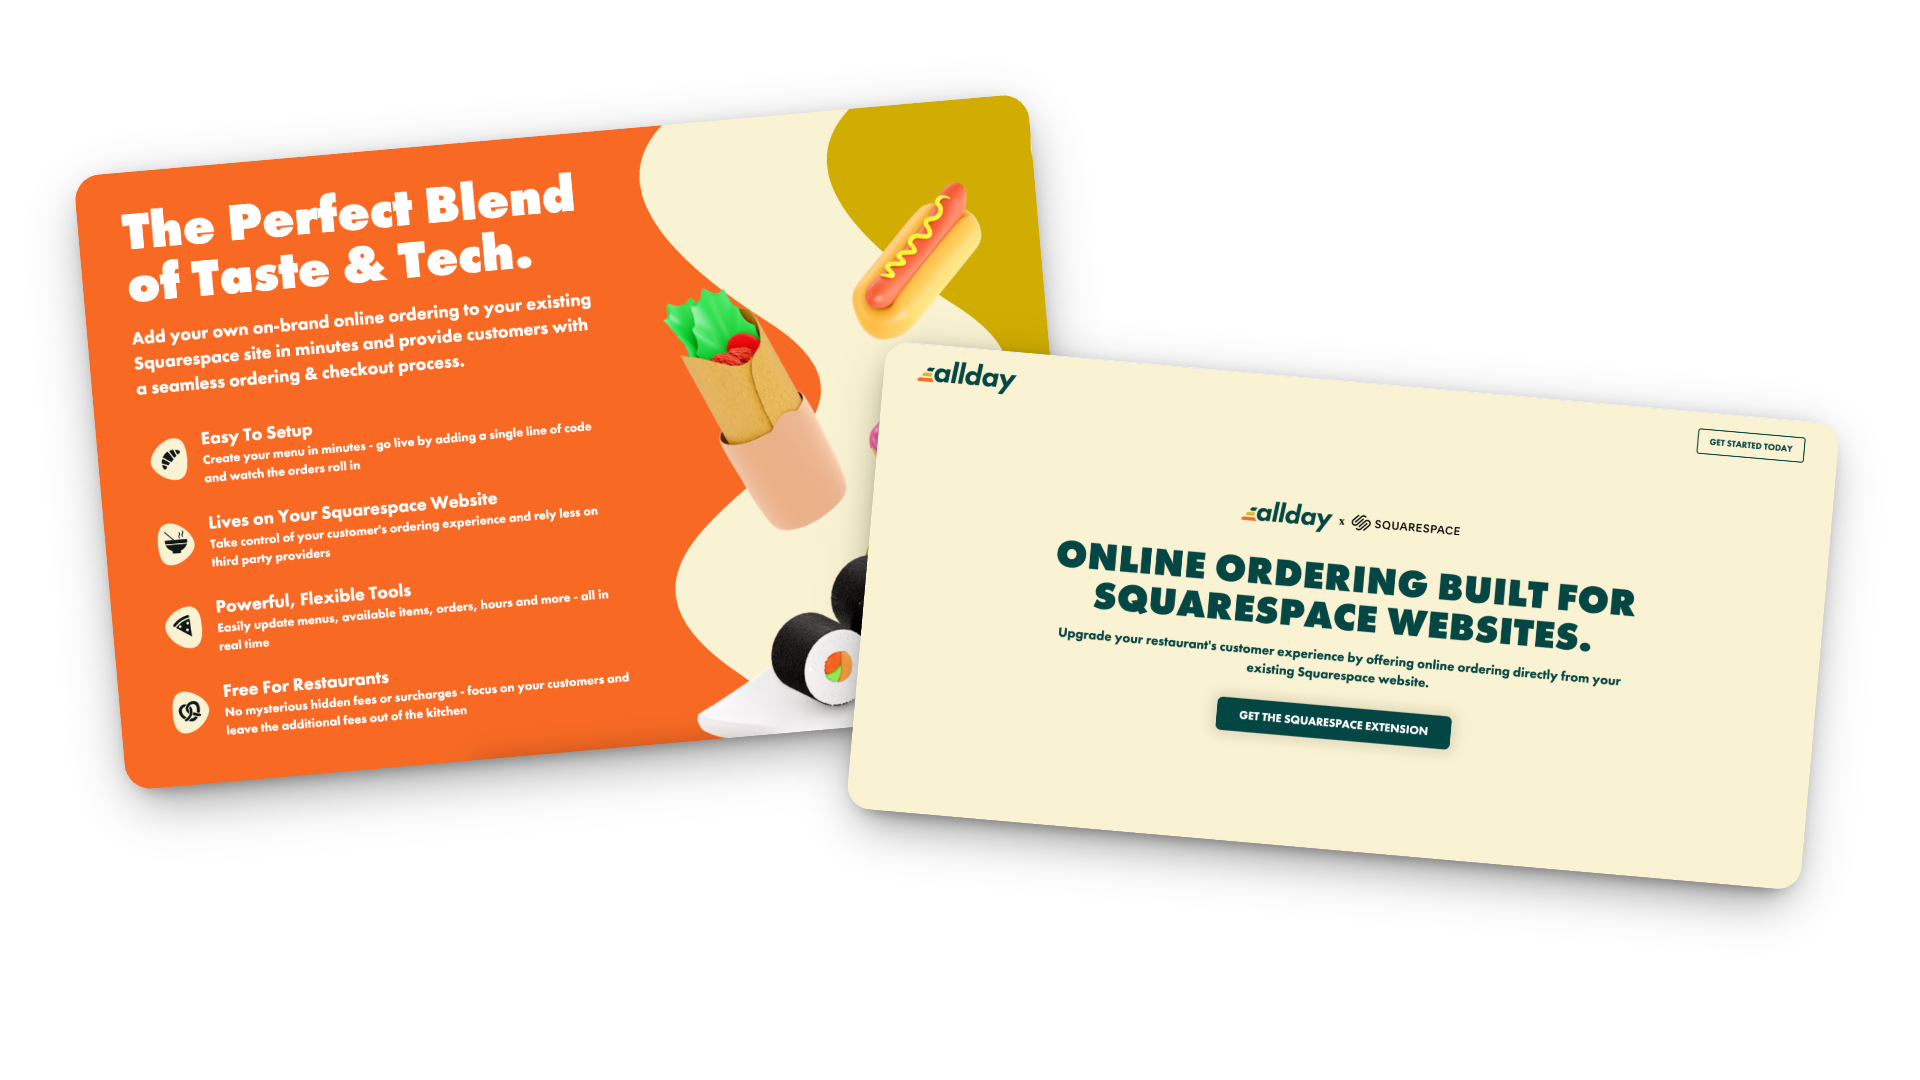
That’s where Allday Ordering comes in. It’s a new Squarespace extension that lets you add online ordering right to your existing site - no new platform, no technical chaos, and no middlemen taking their cut.
I’ve been testing it on a few projects lately, and I’m genuinely impressed by how simple it is to set up and how well it integrates with the way small restaurants actually run. So in this post, I’ll walk you through what it does, who it’s best for, and how to make it work harder for you.
What Allday Does (and Why It’s Worth a Look)
Here’s the gist: Allday connects directly to your Squarespace website and adds a complete online-ordering experience - one that looks and feels like part of your brand.
Customers can:
Browse your menu
Customize their order
Check out without ever leaving your site
You keep your design, your data, and your margins.
Setup is easy too: just add a small code snippet, configure your menu, and go live. Seriously so simple!
How the Pricing Works
Here’s my favorite part: it’s actually transparent.
For restaurants: completely free.
For customers: a flat $2 fee per order (clearly shown at checkout).
Processing: standard Stripe fees (2.9% + 30¢).
Contracts: none 🚫
Plus, you can start, pause, or cancel anytime. And because everything runs through your own website, you keep the customer data - meaning you can actually build relationships instead of renting them from delivery apps.
Who Allday is Best For
In my opinion, Allday is a great fit for:
Independent restaurants that want to modernize without switching systems
Cafés and bakeries that sell daily specials, pre-orders, or meal kits
Catering services and pop-ups that need flexible menus
Small restaurant groups that want a consistent setup across multiple locations
Basically, if you’re already using Squarespace and want a way to accept online orders that feels native to your site (and not like a clunky bolt-on), this is worth exploring.
How to Make Online Oredering Work Harder for You
This is where the magic really happens. Adding online ordering is great, but optimizing how people use it can make a big difference in your sales.
Make “Order Now” Impossible to Miss
Add it to your header, footer, homepage hero, and anywhere else customers tend to land. If they have to hunt for it, they’ll give up and go back to DoorDash.
Use Mouth-Watering Photos
A couple of great shots of your best-sellers go a long way. You don’t need a full menu gallery — just enough to make people hungry.
Keep the Menu Tight
Too many options = decision fatigue. Focus on what you can fulfill quickly and consistently. Clear categories and smart modifiers (“Add chicken +$2”) help too.
Promote Direct Ordering Everywhere
Remind customers they can order directly from your site. Add a quick line to your emails or posts:
“Skip the apps — order directly from our website and help us keep prices fair.”
Use QR Codes Strategically
Add them to menus, packaging, and in-store signage that lead straight to your ordering page. Repeat customers will thank you.
Pay Attention to the Data
Because you own your analytics, you can actually see what’s working — top dishes, busy hours, repeat orders, and even drop-off points. Use that info to improve your menu and marketing.
Integrate with Your Email List
If you use Flodesk (like I do) or another email tool, send simple reminders:
“New week, new menu — order ahead now.”
“Early access to our seasonal menu — pre-order today.”
Test and Adjust
Watch how customers interact with the page. Are they clicking “Order Now” right away, or scrolling first? Do certain items always sell out? Tiny layout or wording tweaks can have a big impact.
Keep It Fresh
Menus change, seasons change, and so do your customers’ habits. Make updating your online ordering part of your regular routine — swap in seasonal dishes, highlight new items, or feature a “staff favorite” now and then.
Bonus Tip: Not only does this keep regular customers engaged, it also signals to Google that your page is active (which can help with SEO).
Restaurant Ordering on Squarespace FAQs
-
Install the official Allday extension, add your menu, set your pickup/delivery options, and embed “Order Now” buttons on your site. It takes less time than you’d think.
-
It’s free for restaurants. Customers pay a small flat fee ($2 per order), plus standard Stripe processing.
-
Yep! You can set different menus, hours, and fulfillment options for each.
-
Yes! Everything happens right on your Squarespace site, so your fonts, colors, and overall style stay consistent.
-
I’d recommend it for small to mid-sized restaurants, cafés, bakeries, catering businesses, and pop-ups - basically anyone who doesn’t want to hand off their customer experience to a third-party app.
-
Visibility + communication. Make the ordering button clear, mention it in your emails and social posts, and highlight the benefits (lower fees, faster pickup, direct support for your business).
Bottom Line
Adding restaurant online ordering to your Squarespace site doesn’t have to be complicated or expensive. With Allday, you can keep your website, your brand, and your customer relationships intact - all while giving your diners a smoother, more personal way to order.
If you’re ready to give it a try, you can get started here. I’ll help you set it up and make sure it looks and functions exactly the way you want.
Because really, you should be focused on your menu - not a middle man.

Flodesk + Squarespace Commerce: A Real Look at The New Integration
Flodesk’s new integration with Squarespace Commerce means no more Zapier hacks. Now you can sync customers instantly, trigger post-purchase workflows, and build smarter automations - without extra tools.
If you’ve ever strung together Squarespace and Flodesk with a series of zaps and a prayer, I know you’ve thought: surely there must be a better way? Good news: Flodesk now offers a direct integration with Squarespace Commerce. No Zapier or duct tape necessary. But real talk: there are still a couple of kinks to iron out and some pitfalls you’ll want to look out for. Let’s break down exactly what you can do, the smart ways to take advantage of this update, and what you still can’t, so you can plan your automations confidently.
What This Integration Actually Enables
Finally! Here’s what you can now do with Squarespace x Flodesk:
Customer Sync: Automatically import all customers into Flodesk as a segment.
Post-Purchase Triggers: Launch workflows the moment a purchase completes - just pick Squarespace as the trigger in Flodesk (Makes a purchase → On the store …), then optionally filter by product.
Powerful Workflow Capabilities: From cart purchase to final email, Flodesk handles the workflow logic. Use delays, conditions, and design strategic sequences to ask for reviews, cross-sell, or welcome repeat buyers. (More on this below!)
What It Still Doesn’t Do :(
No Abandoned Cart Emails: Squarespace's API doesn’t support the detection of abandoned carts, so recovery sequences still aren’t possible. No tool outside of Squarespace’s own email campaigns can trigger upon cart abandonment yet.
No Real-Time Form Opt-In Sync: New sign-ups via Squarespace forms are only synced to Flodesk every six hours, unlike purchases, which sync instantly. IF you need form submissions to sync instantly that’s not a problem though - just embed your Flodesk forms like normal vs. using the integration.
Doesn’t Replace Squarespace Transactional Emails: This integration does not replace the automated Squarespace customer notifications, such as the order confirmation email or shipping confirmation email. Those are transactional and are handled by Squarespace. Flodesk handles the relational follow-ups. You can’t turn off Squarespace’s system emails, so make sure you customize and brand them (more on that in this post).
What Gets Sent via Squarespace vs. Flodesk Cheat Sheet
Via Squarespace
Order confirmation (via Customer Notifications)
Shipping confirmation (via Customer Notifications)
Abandoned Cart (via Campaigns)
Via Flodesk
Product-specific emails or workflows
Customer-specific emails or workflows
Wildcard
Review Request email - your pick on this one! Just make sure that if you enable the automatic Squarespace review email that you don’t set one up via Flodesk and vice versa.
How the Integration Works Behind the Scenes
When you connect, a segment is automatically created and named after your Squarespace store URL. You can rename it after the fact without breaking the sync.
The initial import includes all customers who’ve opted into marketing.
Ongoing sync runs automatically every six hours for form opt-ins. Purchases sync immediately and are marked as either Unconfirmed (if not opted into marketing) or Active (if opted-in).
How to Connect Squarespace & Flodesk
Ok, so you’re into this? Making the connection is super easy! Just go to Account settings > Integrations, click Connect on the Squarespace card, and follow the prompts!
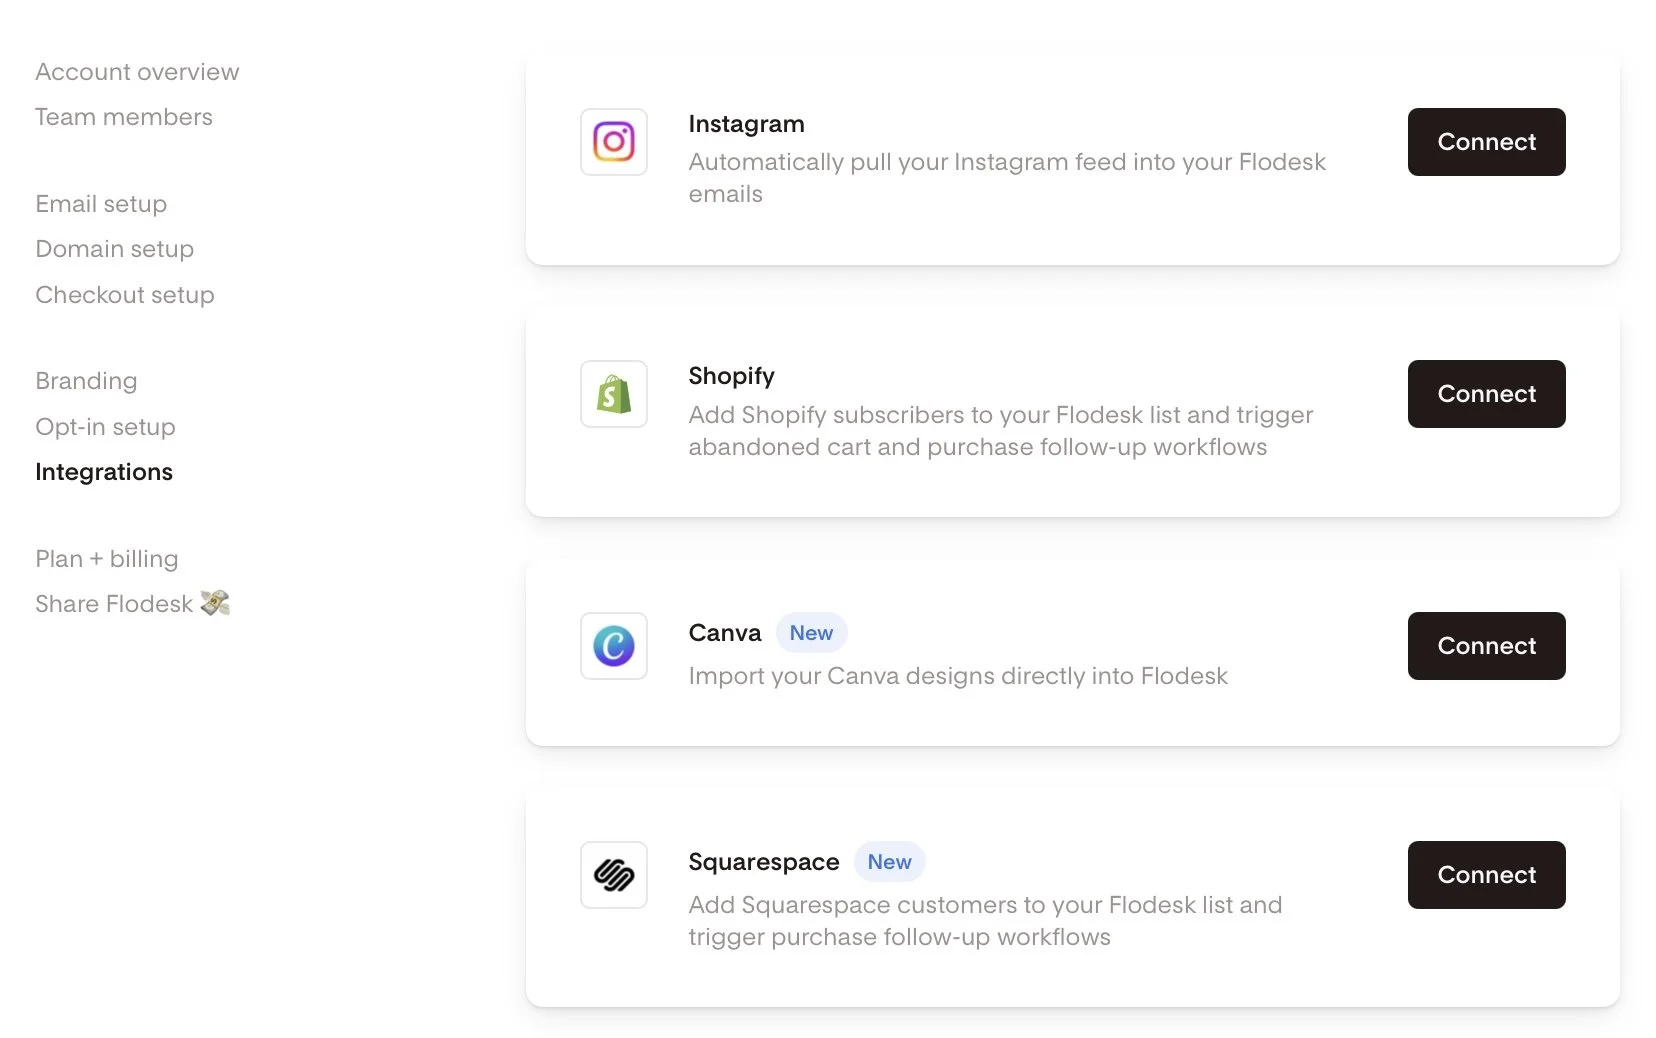
Screenshot of Flodesk and Squarespace integration
How to set up a Squarespace Purchase Follow-up workflow in Flodesk:
Alternatively, if you haven’t done that yet and you’re in the middle of building out a workflow, you can also do it right there by choosing Squarespace as a trigger in a purchase follow-up workflow.
Head to the Flodesk dashboard under Workflows → + New → Purchase follow-up.
Select Your Trigger: Choose 'Makes a purchase' and select your Squarespace store.
Product-Specific Workflows: Filter by product if needed. Note that each workflow currently supports filtering for one product, requiring a specific workflow for each.
Build Your Customer Journey: Incorporate time delays, conditions, and multiple emails to craft a personalized customer experience.

Setting up a workflow in Flodesk
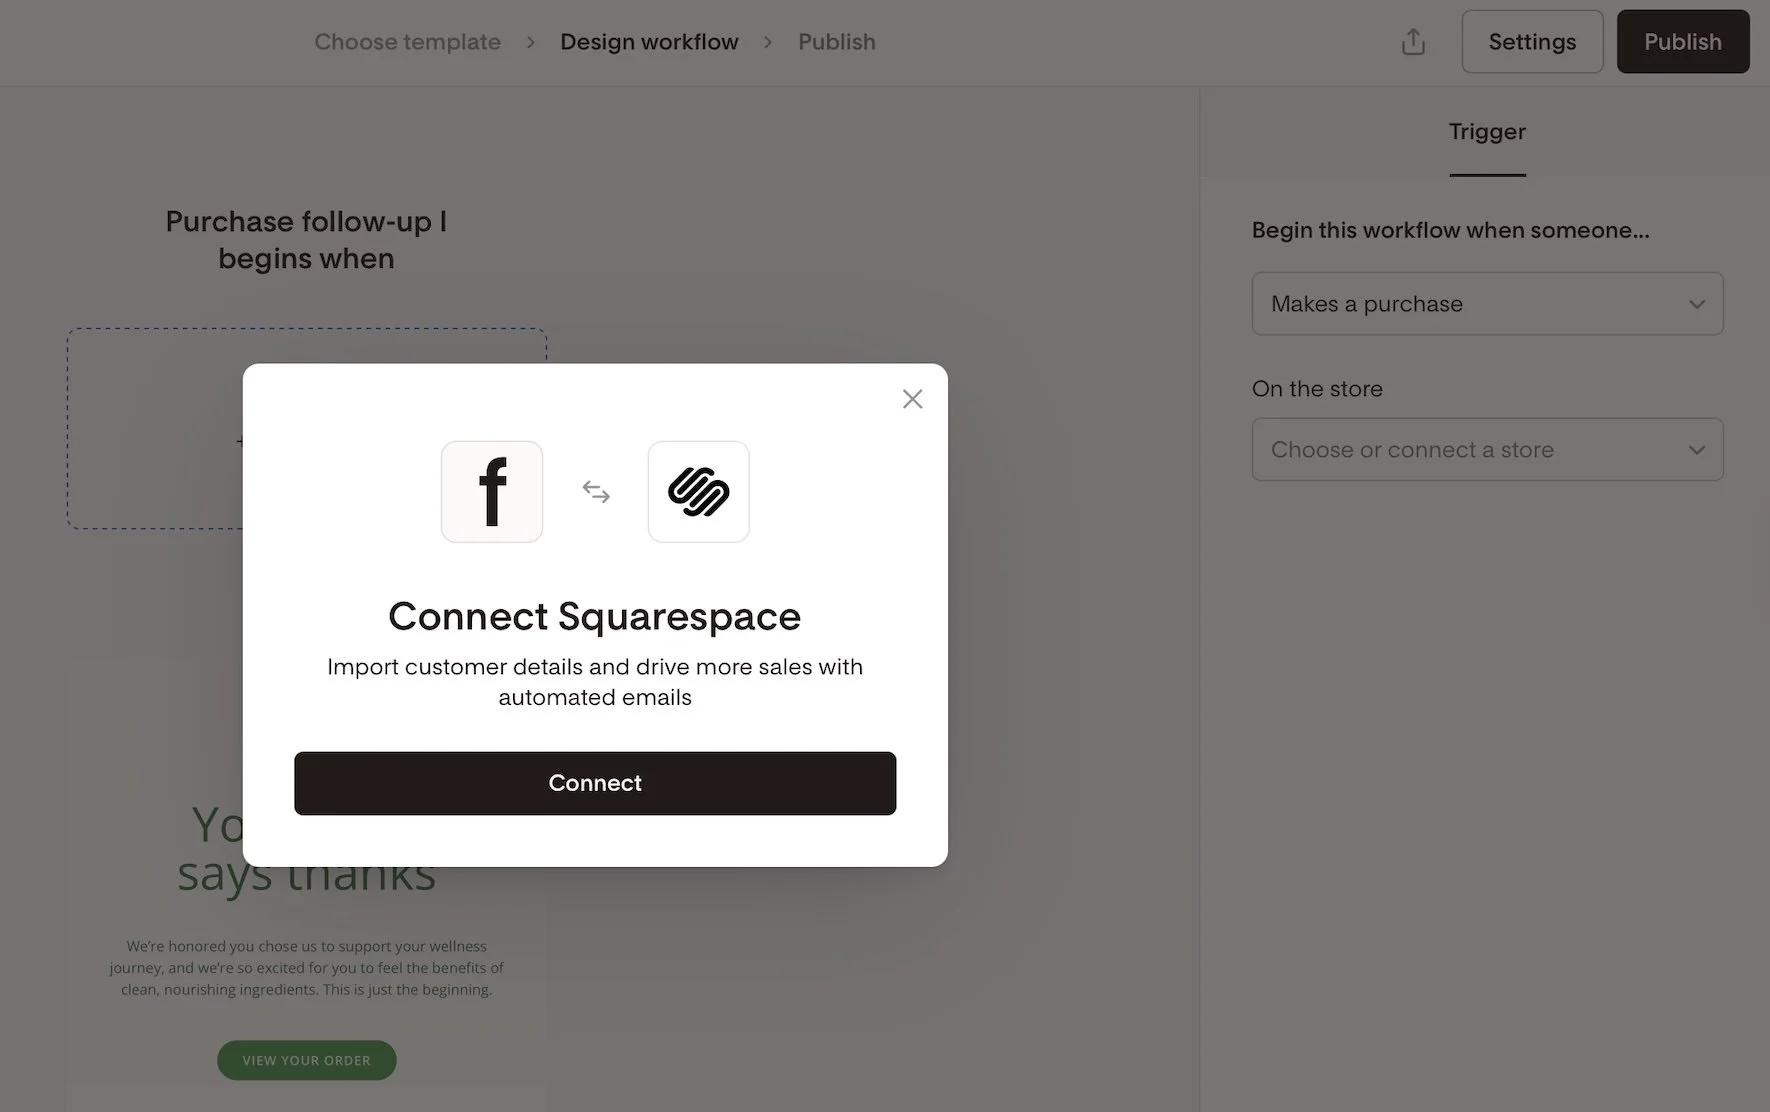
Connecting Squarespace as an integration in Flodesk
Creative Workflow Implementation Ideas:
Not sure where to start with commerce-related workflows? Here are some ideas to get the wheels spinning!
Thank-you email after a purchase
Detailed how-to-use instructions for a product
Address common product or service FAQs
Upsell or cross-sell related products
Send a review request email post-delivery
Offer an exclusive discount for repeat buyers
Invite customers to join a membership, subscription, or community
Implement seasonal or collection-based follow-ups
Squarespace x Flodesk FAQs
-
Nope. Everything you can currently do (customer sync and purchase-triggered workflows) happens natively.
-
Not currently - Squarespace doesn’t send that kind of trigger through the API.
-
Form opt-ins every six hours; purchases are synced instantly. If you need forms to sync instantly though, just embed a Flodesk form!
-
In a dedicated segment named after your store URL - you can rename it later if you’d like.
-
Absolutely - but note that each workflow only supports a single product filter. So if you want to send 3 unique automated emails for 3 specific products, just set up 3 workflows in Flodesk.
-
Flodesk workflows could overlap. To avoid duplicates, disable Squarespace post-purchase emails if you’re using Flodesk for follow-ups.
-
On Squarespace, go to Settings > Selling > Checkout and toggle Email Signup ON. You can also customize the text displayed in the signup box by clicking on Email Signup Settings.
Bottom Line
This new integration is exactly what so many Squarespace sellers have been hoping for. Now, you can finally say goodbye to Zapier, create purchase-triggered workflows, and send out beautiful follow-up emails—no complicated workarounds needed. While things like abandoned cart emails and instant form syncing are still on the wish list, this update is a big step forward for building stronger customer relationships right inside Squarespace.
If you’re excited to try it out, you can sign up using my Flodesk affiliate link. Not only will you get access to these handy new features, but you’ll also be supporting more tutorials like this one in the future. It’s a win for your business and helps our whole community grow!

eCommerce Email Marketing Tips & Strategies
From building lists to drafting campaigns, I've got the insider tips to start serving up eCommerce email marketing realness that has your customers coming back for seconds.
From building lists to drafting campaigns, I've got the insider tips to start serving up eCommerce email marketing realness that has your customers coming back for seconds.
My Take on eCommerce Email Marketing
Email marketing retains its crown as one of the most effective yet underutilized tools for connecting with customers. But it doesn’t have to be complicated or spammy. I’ve picked up tons of insider tips and strategies to help you serve up savvy campaigns that engage subscribers and drive real results.
First, mindset matters. Despite recurring claims of its demise 🙃, email is still going strong with higher conversion and ROI than most digital marketing channels (see full stats here). The reality is customers actually want to hear from brands they love! The key is providing ongoing value through your messaging, not constant sales pitches.
With the right mindset covered, focus your efforts on automation and personalization. Here are some ideas to get you started:
Welcome new subscribers with a friendly onboarding series. Guide fresh leads through valuable content while offering an initial discount to encourage sign-up conversions.
Set up workflows to target customers based on behaviors like abandoned carts. Strategic post-browse or cart recovery messaging prompts purchase completion with timed offers.
Leverage purchase data to recommend relevant products. Further monetize existing buyers through intelligent cross-sells while nurturing product affinity.
Surprise and delight! Send birthday promos, customer appreciation sales, or exclusive sneak peeks. Simple personal touches make subscribers feel special and eager to buy again and help you stay top of mind.
Squarespace makes sending marketing emails easy through their built-in marketing automations, allowing you to easily create sequences based on subscriber behaviors or schedule one-off email blasts to announce promotions. You can even customize order confirmation messaging based on products purchased with just a few clicks. However, if you want to go a step further and do some advanced segmentation and targeting, ConvertKit and Squarespace Commerce integrate so naturally that they make the perfect pair.
When executed strategically, email marketing forms the backbone of any ecommerce marketing strategy. Optimize message relevancy, provide ongoing value, and honor subscriber consent, then watch as your list becomes one of your most valuable business assets for customer retention and lifetime value boosting. I’m excited for you to uncover the full potential of this channel for your brand!
Blog Posts about eCommerce Email Marketing


Videos about eCommerce Email Marketing

Common eCommerce Email Marketing FAQs
-
An effective welcome email series guides fresh subscribers through valuable content while offering an initial discount to encourage engagement. Maintain momentum by sending 3-5 emails over the first week covering:
A genuine thank you and overview of upcoming email content
Tips, tricks and recommendations based on subscriber source
Links to blog posts, how-to guides, or other resources
Exclusive promo code for first purchase to prompt action
With Squarespace email campaigns or ConvertKit, you can easily set up automated sequences or scheduled messages personalized with merge tags like {firstname} to help things feel personalized!
-
Did you know roughly 75% of online shopping carts are abandoned before checkout? That adds up to nearly $4 trillion in lost ecommerce sales every year. But with targeted messaging, you can recover 10-15% of abandoned cart revenue easily.
Strategic abandoned cart recovery emails deployed within 24 hours prompt purchase completion by clearly highlighting original items left behind coupled with urgency-inducing perks like discounts or free shipping.
Best practices include:
Refresh cart contents with product images/details
Limit copy to focus solely on finishing transaction
Offer time-sensitive promo code or free gift
Share testimonials reinforcing purchase decision
Leverage Squarespace’s automation tools to trigger abandoned cart emails based on active cart session length. Then use Squarespace’s built-in eCommerce analytics to track recovery rates and optimize messaging for increased sales.
-
Core email automations cover the entire subscriber lifecycle. Must-haves like welcome series and abandoned cart recovery can increase conversions. While post-purchase follow-ups and special occasion messaging boost engagement and lifetime value.
Additional automations to consider:
Browse abandonment for high-interest site visitors
Customer win-back for period inactive subscribers
Waitlist notification for out of stock products
-
Determining optimal email frequency is a careful balance. Send too often and subscribers get annoyed. Too seldom and they forget who you are. Typically best practice is to aim for:
2-4 emails per month for a general subscriber list
Weekly for very engaged followers signed up for things like newsletters
Only on special occasions for one-time purchasers
The key is providing value, not cluttering inboxes. Use email as an opportunity to share advice, build community and make emotional connections. Then track engagement metrics in your email marketing platform of choice to see what works best for your audience.
These analytics will usually tell you what you need:
Open and click-through rates
Bounce or abuse reports
Unsubscribe volume
Upticks in site traffic or sales around sends
Let your data determine the ideal pace and tweak things if you see fatigue setting in. The goal is inbox anticipation, not annoyance!
Top 3 eCommerce Email Marketing Resources

ConvertKit
My number one favorite email marketing platform! Super powerful yet still easy to use and (bonus!) plays super nice with Squarespace Commerce.

Squarespace Email Campaigns
If you’re looking to keep everything under one roof, Squarespace’s built-in email capabilities are simple but extremely effective.

Flodesk
For the design-minded, this one’s for you! It has some built-in commerce capabilities and it’s easy to link to Squarespace via Zapier.
7 Proven Email List Building Tips for Squarespace Shops
Discover 7 effective strategies to grow your email list and boost sales on your Squarespace eCommerce site. Learn how to attract subscribers and drive customer loyalty.
If you're running a Squarespace Commerce site and haven't tapped into the power of email marketing yet, you're missing out on some serious revenue potential. Trust me, as a seasoned Squarespace expert and eCommerce strategist, I've seen firsthand how a well-crafted email strategy can skyrocket your sales and customer loyalty.
But here's the thing: Before you can start crafting compelling email campaigns, you need to build a list of eager subscribers ready to engage with your content and offers. Luckily, with a few savvy strategies and some irresistible incentives, you can transform your Squarespace site into an email list building powerhouse.
So, grab your favorite beverage, get comfy, and let's dive into my top 7 tips for growing your email list like a pro. These tried-and-true tactics have helped my clients boost their subscriber count and drive real results. Let's get started!
Offer an irresistible sign-up incentive - A discount code or offer of free upgraded shipping on their first order can be just the motivation people need to sign up for your emails. This strategy works especially well for new, small, or lesser-known brands that may need an extra nudge to encourage potential customers to try their products.
Leverage Squarespace's promotional pop-up feature - Grab your browsing shoppers' attention and drive sign-ups by utilizing Squarespace's built-in promotional pop-up tool. Customize the design and messaging to align with your brand and offer a compelling reason to join your list.
Include an email opt-in form in your website footer - Ensuring you have an email sign-up form in your footer means it will appear on every page of your site, maximizing conversion opportunities. Keep the form simple and straightforward, highlighting the key benefits of subscribing to your list.
Incorporate email sign-up into your checkout process - Make joining your email list a seamless part of your Squarespace checkout process. Add a checkbox or opt-in field to your checkout page, making it easy for customers to subscribe while completing their purchases. For more tips on optimizing your checkout, check out my post on creating a seamless checkout experience.
Create exclusive, gated content upgrades - Develop valuable content pieces related to your products or niche, such as guides, checklists, or insider tips. Position these resources as "VIP customer access" materials, requiring an email address to unlock them. This approach helps build your list while providing genuine value to your audience.
Pitch your list in post-purchase emails - After a customer makes a purchase, use the auto-confirmation email to highlight the benefits of joining your email list and include a sign-up link. This is a great opportunity to engage with customers who have already shown interest in your brand. If you want to take your post-purchase emails to the next level, check out this post on customizing transactional emails.
Experiment with creative calls-to-action - To find what resonates best with your audience, test different calls-to-action on your email sign-up buttons. Try phrases like "Join the VIP List," "Become an Insider," or "Get Exclusive Offers" instead of generic phrasing like "Subscribe." Track which CTAs drive the most conversions and optimize accordingly.
Actionable Takeaways
Choose an enticing sign-up incentive that aligns with your brand and target audience
Set up a pop-up and footer opt-in form on your Squarespace site today
Brainstorm a valuable content upgrade you can offer as a "VIP" opt-in incentive
Test at least 2 different CTA phrases on your sign-up buttons this week
FAQs
-
Aim to email your list at least once a month to keep your brand top-of-mind, but not so often that you overwhelm your subscribers. Consistency is key!
-
Mix it up with a blend of valuable content, exclusive offers, product updates, and behind-the-scenes peeks into your brand. Focus on providing value, not just pushing sales.
-
Keep an eye on your open rates, click-through rates, and conversion rates. If you're not seeing the results you want, don't be afraid to experiment and try new approaches.
Bottom Line
There you have it – 7 powerful strategies to supercharge your email list growth on Squarespace. Remember, building a thriving list takes time and consistency, but with these tips in your toolkit, you'll be well on your way to cultivating a community of loyal subscribers who can't wait to hear from you. So, pick a strategy, implement it on your site, and watch your list and your sales grow! You've got this!
Take the Extra Step: Customizing Your Store’s Email Notifications
Let your customers know that they matter to you beyond the sale by bringing your brand into their inbox. Customizing the default emails your site sends is a quick way to create a personalized experience and Squarespace offers lots of options to quickly and easily edit all the stock emails in one place.
Updated Dec 2023
Customer email notifications are one of those things that often get overlooked or skipped by eCommerce novices. They assume the defaults will work just fine and don’t do much beyond maybe adding a logo. This is a giant missed opportunity! Taking just a small amount of time to customize your store’s email notifications lets your customers know that you care about their experience beyond the sale and goes a long way in helping build brand credibility.
Customers get email notifications for a whole bunch of different activities they may take on your site including when they buy something, create an account, join a membership area, or even make a donation! Squarespace recently updated the entire email editor to provide more design and personalization options so it’s a great time to revisit this even if your site’s been live for years.
WATCH THE VIDEO
GET THE DETAILS
How to Personalize Your Emails
Something that’s a great time-saver is the ability to set some global styles that will apply to ALL the emails that your site sends. (Also points for keeping branding consistent!) To get to the settings, just click on COMMERCE > CUSTOMER NOTIFICATIONS. To change the style options, just click the EDIT EMAIL button in the Global Email Styles preview pane. Business settings are under the… Business Settings link. Here’s a summary of all the possibilities and some important things to note:
Global & Business Settings
Global Email Styles
In terms of style, you have lots of control. You can edit colors, fonts, buttons, and the header & footer appearance.
Colors - I would recommend keeping a white/light background so that your emails are always easy to read. Then, just add in your signature brand color as buttons, below. Choose colors that match the ones in your Site Styles exactly.
Fonts - You’re only allowed to select from certain custom-paired font packs and cannot use custom fonts in emails (more on this at the end of the email if you need an explanation on why). You can change things like font sizes and text & link colors to suit your brand but you’ll need to pick a font pack that feels like your brand even if the fonts aren’t exactly the same. A good tip if you used one of the font packs in your Site Styles for your website, just pick a similar themed one for your emails; i.e. serif, sans, or mixed.
Buttons - You can change the style, alignment, colors & font of the buttons that appear in your emails. Don’t think too hard on this and just make them match your site’s settings!
Header & Footer- You have lots of options to be able to set your email headers & footers up so they don’t look so “default-y” 🙃 Play around with some great preset layout options but then choose colors and fonts that match the other choices you’ve made, above. I always think it’s a good idea to choose to display your logo in emails - it makes things look really official and personalized vs just having your site title. Or, you could choose to show your site title in the header and your logo in the footer! Another great footer option that you should enable if you are active on social media is including social links!
Don’t worry if this seems like a lot of options. The best part about taking the time to just edit the global email settings is that you only have to do it once and it automatically applies to everything!
Business Settings
You’ll want to make sure that you’ve added your business info by clicking on SETTINGS > BUSINESS INFORMATION from the home screen. This will feed that info into the email notifications section. Don’t omit this information because not only is it helpful to your customers, in some places it’s actually legally required to include in the footer. Here are a few tips when it comes to the business settings in this section:
The “From” email address should absolutely be a custom, branded email address. Do NOT use a Gmail, Yahoo, or other free email address! Not only does this look unprofessional but it can also affect email deliverability issues. You don’t want to end up in everyone’s spam box!
The “Reply-To” email should be whatever inbox you or your team check the most often. You want to be able to read and reply to customer emails quickly. If you’re setting up an email alias for all your shop emails (ex: shop@yourdomain.com) that’s not your main inbox, I would suggest also setting up forwarding on that email. This could be simple (all shop emails go to X person/dept) or more complex using a tool like Zapier.
💁♀️ Note: if you send test emails to yourself to check out how things look, they are all going to come from “no-reply@squarespace-mail.com” but that’s just for testing! Your actual reply-to email will be used for real emails sent from your site!
Customize With Merge Tags
Before we get into all the different types of emails you can customize, a quick review of merge tags! Honestly, these are the key to making sure your customers feel loved and appreciated. It’s like getting a piece of snail mail that isn’t junk! Here are the different elements you can insert into your emails:
Customer first name - abandoned cart, product restock, customer account welcome, password reset & password updated emails
Linked site title - all emails
Order number - order confirmed, order refunded, order fulfilled, and digital download emails
Subscriber first name - subscription canceled and subscription authorization required emails
Subscription name - subscription canceled, subscription authorization required and subscription payment declined emails
Donor first name - donation confirmation emails
To add a merge tag, just highlight the text you want to customize and click the arrow icon in the formatting bar. Then just select the tag from the options. Here’s what it looks like:

💡 Merge Tag Tip! You can also work merge tags into subject lines or the email preview text to make emails really feel personalized and stand out in your customer’s inbox!
Descriptions of All The Email Types
Ok, now for the fun part! I promise that this may seem like a TON of emails to have to work on but for the most part, you’re going to let the default language and global style settings do most of the work and then just pepper in some personalization and merge tags here and there so that your emails stand out from the rest. I’ve listed out all the emails below and then added some ideas for how to customize them where I feel like it would be most impactful.
🤓 Remember in general I wouldn’t mess around at all with styling individual emails; do that at the global level! This is just focusing on the content or the actual wording of the emails.
💡 Tip! Squarespace is going to automatically fill in things like order numbers, order details, transaction info, tracking info, etc. into the various emails so you don’t need to add any of that info on your own. Along those lines, keep the personalized copy you add as general as can be as the same email(s) will be sent for all of your products/orders even if you sell lots of different things.
🚩 I’ve bolded the emails below that I think are most important so if you’re short on time, customize these ones first and come back to the others. I’ve also noted some emails as self-explanatory which is… self-explanatory.
General Orders
Order confirmed - this is arguably the most important email your site will send to a customer. It has the potential to go way beyond just providing a record of their order. A great confirmation email reassures the customer that they made a great choice, expresses gratitude for their business, and opens up the 1:1 conversation between them and your brand. It allows you to use your brand voice beyond your website and welcome customers into the fold. You can do things like asking them to follow you on social media or provide additional value by directing them to additional content on your site that relates to what they ordered. If you customize nothing else, do this one.
Customizing Product Emails by Product Type
Update! Since this post was first published, Squarespace released the option to create custom order confirmation emails based on the product purchased. This means that if you sell a mix of physical, digital & service products your order confirmation emails can have a custom copy for each one. This is super helpful because it means that if you want to include special information about shipping or lead times that would make sense for an order for a physical product but not for a digital good or service you can do that. It may make sense to include a link to your scheduler in a service email order confirmation or download instructions for a digital good order. Lots of possibilities! To customize these from the Customer Notifications panel go to General Orders > Order Confirmed > Edit > Add an optional custom message based on product type.
Order fulfilled - this is the email that’s going to include the tracking information that you’ve added (or your Squarespace shipping extension has added) to the order. Get people excited for what’s on the way by including an opening sentence or two thanking them for their order and getting them hyped for the delivery.
Ready for Pickup - if you offer a local pickup option, this email is sent instead of the “order fulfilled” email, above. Use this email to provide locals with precise pickup information. Some suggestions are to repeat the hours you’re available for pickup orders, your address, and what’s required to pick up their order. For example, you might require a photo ID or just for them to show you their order confirmation on their phone. If your location has any special parking instructions or a special area for curbside pickups be sure to note that as well.
Order refunded - self-explanatory
Digital downloads - if you sell digital products, apply everything I said for the order confirmation email, above, to this email instead.
Donation confirmed - if you’re a nonprofit or an organization that accepts donations, apply everything I said for the order confirmation email, above, to this email instead.
Payment declined - haha never a fun email to get but you could lessen the sting by injecting some humor into the situation!
Product not available - this email only gets sent if the product inventory drops to zero while an order is processing. If you’re releasing product drops that often sell out or have lots of traffic competing for a small amount of product, this one can be worth customizing. Otherwise, default is probably ok because for most sellers this will not ever end up ever being sent out.
Point of Sale
Order receipt - think of this as the in-person version of the order confirmation email so if you sell via Squarespace POS you could add some pizazz here. I think it’s less important than strictly eCommerce order confirmations because the customer presumably had some sort of in-person interaction with your brand but it’s still an opportunity to continue the conversation or make a good impression.
Refund receipt - self-explanatory
Customer Engagement
Abandoned Cart - according to this recent study, roughly 3 out of every 4 shoppers will leave a site without completing check out. Enabling - and customizing! - your abandoned cart email can help you recover 10% or more of that otherwise lost revenue. I think a strategic abandoned cart email cuts straight to the point so I wouldn’t add too much in the way of copy but your subject line and an opening header or sentence could really make things stand out in a crowded inbox. Don’t forget that you can use merge tags in email subject lines and preview lines!
Waitlists - if you’ve enabled waitlists for sold out, back-ordered or not-yet-launched products, this email is what will let people know when a product they were interested in is available for purchase. Note: these emails aren’t automatically sent by the system; you’ll need to indicate that you’re ready to send them by going to COMMERCE > WAITLISTS.
Customer Accounts
Account created - if you’ve enabled customer accounts, I think this is a good email to give a little love to. Add some personality and let people know what to expect and what they can do to manage their own accounts.
Reset password - self-explanatory
Password updated - self-explanatory but keep in mind that the reset password link expires after 24 hours.
Gift Cards
Gift card issued - this is admittedly not the best-looking feature on Squarespace BUT you can make the best of the situation by at least adding some exclamation points!? Yay! A gift!!
Gift card voided - self-explanatory
Subscription Orders
Subscription canceled - self-explanatory, but make sure they know if there is any fine print just to cover your bases
Subscription verification needed - self-explanatory
Payment failed - self-explanatory but see the payment declined email, above. (TL;DR when in doubt, make a joke.)
Member Areas
Membership Welcome - if you’re using the awesome new Squarespace Member Areas feature, this email is the equivalent of an order confirmation email (minus the transaction info, that’s sent separately). This email is your opportunity to offer valuable “getting started” type info, suggest the best next steps, and let people know how to contact you or manage their membership. Don’t make it too long but know that a lot of people will save or bookmark emails and refer back to them later!
Membership Canceled - express some sadness if you must but please don’t do that thing where you guilt/shame people for canceling. Just confirm what happened and move on.
What You Can’t Do
Just a reminder of a few requests that come up occasionally that are not possible:
You can’t turn off any of the emails to stop them from sending. If you are wanting to do this, I would suggest working through WHY. There may be something about the way you have the product or service set up or your own internal process that needs to change if you’re thinking about needing to do this.
You can’t change the default portions that automatically populate i.e. order details, transaction info, tracking info, etc. This is for a good reason - it saves you time! Just like above, if you’re thinking about trying to edit these types of things I would look instead at your fulfillment process or internal business systems first.
Change styles on an email-by-email basis. Another time-saver. Set these things at the global level and be done with it.
Use custom fonts. The reason for this is that the fonts need to be universal so that they display nicely in all different email providers. Custom fonts can be tricky and you’re better off picking something similar but standard even if it’s not a perfect match. Some brand designers will even provide recommended system fonts to use for situations like this since it’s pretty common.
Other Site Emails
While all of the emails above may seem like a lot, there are actually even more emails that your site can send depending on what other features you’re using. These features are:
Squarespace Scheduling
Squarespace Email Campaigns
Afterpay payment plan emails
Email notifications to the store owner & contributors about orders and low inventory
The thing to remember on these emails is that you’ll need to set them up and style them in addition to any of the customer notification emails described in the main part of this post. Most of them have similar options for things like adding a logo to the email header or customizing button colors, etc. but they may not look 100% the same. Just do your best to make them look as cohesive as possible and don’t sweat the small stuff on this. It’s ok if these emails look like sisters instead of twins.
Squarespace and ConvertKit: The Dynamic Duo for Your Online Business
Unleash the power of Squarespace and ConvertKit! They're the ultimate tech combo that turbocharges your online business. Discover how this dynamic duo takes your eCommerce email marketing to new heights.
There's a dynamic duo in the tech world that's been flying under the radar for too long: Squarespace and ConvertKit. They're like the perfect pair, just as inseparable as peanut butter and jelly or Batman and Robin. Squarespace is the master of providing a seamless selling experience, while ConvertKit swoops in with its superpowers in email marketing. Together, they create an unstoppable force that can turbocharge your online business and take it to new heights. Forget about ordinary, these two are extraordinary when combined.
Seamlessly Sell with Squarespace Commerce
Squarespace Commerce is renowned for its user-friendly interface and stunning templates that make setting up an online store a breeze. But when you combine Squarespace Commerce with ConvertKit, you unlock a world of possibilities. With Squarespace Commerce, you can showcase your products, securely handle transactions, and effortlessly manage your inventory. And with ConvertKit, you can automate post-purchase emails, recommend related products, and keep your customers engaged long after they've made a purchase.
One of the standout features of Squarespace Commerce is its integration with popular payment gateways, such as Stripe and PayPal. This ensures a seamless checkout experience for your customers, increasing trust and reducing cart abandonment. By connecting ConvertKit to Squarespace Commerce, you can leverage these selling capabilities and send targeted emails to customers based on their purchase history, interests, or other criteria. This level of personalization and segmentation can significantly improve the effectiveness of your email campaigns and drive repeat business. With an email list, you’re no longer reliant on social media!
Unleash the Power of ConvertKit's Email Marketing
While Squarespace does offer its own email campaigns feature, there's no denying that ConvertKit takes email marketing to a whole new level. With ConvertKit, you'll have the ability to create highly targeted and personalized email sequences that are triggered by specific customer actions. This means you can send product-specific emails to your customers, nurturing them throughout their buying journey and increasing the chances of repeat purchases.
ConvertKit's automation feature allows you to set up workflows that automatically send emails based on customer behavior, such as purchases or website interactions. This helps you deliver timely and relevant content to your subscribers, boosting engagement and driving sales. With ConvertKit, you can say goodbye to generic email blasts and hello to personalized, conversion-focused communication. (Not sold on ConvertKit yet? Check out this post where I break down my top 3 email marketing platform picks.)
How to Connect Squarespace and ConvertKit: Simple Step-by-Step Guides
Now that you're ready to harness the power of this tech combo, let's walk through how to connect Squarespace and ConvertKit.
Two Options for Collecting Subscriber Info
Option 1: Embedding a ConvertKit Form onto Squarespace
This option is perfect if you'd like to use ConvertKit's forms for collecting subscriber information. The best part is even though you can customize and tweak each form within ConvertKit, you also have freedom to customize these forms with your very own custom CSS on Squarespace.
In your ConvertKit account, create a captivating form that captures the information you need from your website visitors. You can customize the fields and design to align with your brand.
Copy the provided embed code from ConvertKit. Don’t worry, it’s just one line of code - you can’t mess this up!
Head over to your Squarespace website and navigate to the page where you want to add the form.
Edit the page, then add a Code Block.
Paste the ConvertKit embed code into the Code Block.
Save your changes, and like magic 🔮 your ConvertKit form seamlessly integrates into your Squarespace website.
Option 2: Adding Squarespace Subscribers to ConvertKit
If you'd like to use Squarespace's own forms for collecting email addresses instead of embedding a ConvertKit form, don't worry! You can still easily send the subscriber data to ConvertKit. All you have to do is create a Zapier account, which you can sign up for absolutely free. Just remember that to access the API and use this integration, a paid ConvertKit plan is required. With Zapier, you can automate the process of transferring subscriber data from Squarespace to ConvertKit, ensuring a seamless and efficient workflow for your email marketing efforts.
Connect your Squarespace form to Zapier:
Click on your Squarespace form and go to the Storage tab.
Click on the Connect button next to "Zapier".
Save your work and go back to your Home Menu.
Navigate to Settings > Advanced > Developer API Keys.
Click on Generate Key and name your key. Check the "Forms" box.
Click on "Generate Key" and Copy Key to copy the API key.
Set up the Zapier trigger step (Squarespace):
Go to zapier.com and create a new automation workflow or "Zap".
Choose Squarespace as the Trigger App and New Form Submission as the Trigger Event.
Connect your Squarespace account with Zapier using the API key.
Select the Squarespace form you want to send subscriber data to ConvertKit for.
Test the trigger to ensure everything is set up correctly.
Configure the Zapier action step (ConvertKit):
Choose ConvertKit as the Action App.
Select the desired Action Event (e.g., Add Subscriber to Form, Add Tag to Subscriber). For example, you may have a form called "Freebie XYZ." When someone signs up through that form, ConvertKit can tag them as "Freebie XYZ". This tag allows you to trigger various automations and sequences. This allows you to serve your subscribers a customized experience, tailored just for them!
Connect your ConvertKit account to Zapier.
Map the Squarespace subscriber data to ConvertKit's subscriber fields.
Test the Action to confirm it's working as expected.
Name your Zap and turn it on to activate the integration.
This integration eliminates the need for manual importing or exporting of subscriber lists, saving you time and ensuring accurate data.
How to Capture Squarespace Customer Info in ConvertKit
The ConvertKit + Squarespace Commerce integration allows you to send product-specific, post-purchase emails to your customers, nurturing them and encouraging repeat purchases. By setting up automations in ConvertKit, you can create a personalized customer journey that keeps your audience engaged and increases their lifetime value. With ConvertKit's analytics and reporting tools, you can also track the performance of your email campaigns and optimize your marketing efforts for maximum results.
Using The ConvertKit + Squarespace Commerce Integration
Generate an API Key in Squarespace:
Go to Settings > Advanced > Developer API Keys in Squarespace.
Click the 'Generate Key' button.
Give your key a name and select 'Orders' > 'Read and Write' under Permissions.
Click 'Generate Key' and then 'Copy Key' to save the API key.
Connect the Integration in ConvertKit:
In ConvertKit, go to Automations > Integrations.
Click on Squarespace.
Paste the API Key from Squarespace into the API Key field in ConvertKit.
Click Next and then click the 'Sync Squarespace orders to ConvertKit' button.
Click Next again, and now you can track your Squarespace Commerce purchases from within ConvertKi
Now, here's the icing on the cake: this integration doesn't require any coding or complex workarounds. It's designed with small business owners and startups in mind, making it accessible to everyone. Give Squarespace and ConvertKit a try today and see how they can transform your eCommerce email marketing. With this dynamic duo by your side, you'll have the tools to grow your online business and engage your customers like never before.

10 Simple Ways to Prep Your eCommerce Shop for the Holidays
Getting ready for holiday sales doesn’t have to be overwhelming! The 10 simple things on this list will help you make sure that you’re ready for the influx of orders and inquiries that come with running an eCommerce business this time of year.
If you’re looking to make sure that your site and store are all prepped and ready for online sales this holiday shopping season, you’re in the right place! Even though I personally tend to prefer a strategic product drop or flash sale that doesn’t depend on seasonality, it never hurts to make sure that your site is in tip-top shape. The 10 simple things on this list will help you make sure that you’re ready for the influx of orders and inquiries that come with running an eCommerce business this time of year!
1. Make sure you’re using Squarespace to track your inventory.
And that your inventory counts are accurate and up to date! Correct inventory counts can help you know what you need to order more of, what you should discount or put on sale, prevent overselling, and create a sense of urgency to buyers. If you sell on multiple platforms or need to sync inventory into Quickbooks for accounting purposes, try Trunk (review in this post) which keeps everything synced up automatically!
2. Customize your store’s notification & cart abandonment emails.
While this is something you want to do anyways, making sure that your emails are personalized is a great tip around holiday time. Including special information about shipping timelines or return policies can help reduce the number of customer service inquiries you receive so that you and your team can focus on fulfillment instead. Personalizing your shop’s emails can also help you build a sense of community around your brand, helping boost loyalty and repeat business. And don’t forget about your cart abandonment email! Updating it so it feels relevant to the season can make it stand out and provide a gentle little nudge to come back to your site and complete their purchase. For more on customizing your Squarespace eCommerce emails, click here!
3. Connect a shipping extension to your site to make fulfillment easier.
I mean, unless waiting in line at the post office on Christmas Eve is your thing I guess? 🤷♀️ A shipping extension is basically the friendly little office assistant you never knew you always needed. The right one will select the best courier, generate labels for you and automatically update Squarespace to mark the order as fulfilled with the tracking number. You can check out this post for a review of all the available shipping extension options on Squarespace but my fave by far is Easyship.
Bonus: sign up for a new account using code GWZMUM and get a $20 account credit. Thanks, Easyship!
4. Offer FREE shipping.
The reason behind this is simple: shipping fees kill conversions. Even if you don’t want to include free shipping as part of your strategy year-round, adding a free shipping tier will help you be more competitive during the holiday shopping season. You don’t have to give it all away, though! Use an automatic discount to limit free shipping on only orders over a certain amount. This will help boost conversions AND increase average cart value! (For more on this topic, check out How to Set Up a Profitable Shipping Strategy on Squarespace.)
5. Set up local pick-up.
If recent years have taught us anything it’s that the number of people shopping online for the holidays has totally inundated carriers like UPS, FedEx, and USPS. To prevent shipping delays causing major holiday disappointment, offer your local customers the option to pick up their online orders in person. This means they can shop right up until the last minute (something they can’t do from other online retailers who’ve had to cut off shipping for the season) and could also lead to some last-minute in-person buys. Win-win! For more on exactly how to set this up, check out this post.
6. Update your FAQ page.
I love a great FAQ page. Done right, it can help your customers find instant answers to their questions and reduce customer service inquiries about basic or routine things, freeing you up to focus on more important issues. Setting up an FAQ page on Squarespace is easy (here are some tips on how to do it!) but the most important thing is obviously the content. Anticipate the needs of your customers and make it easy for them to have everything they need to feel comfortable shopping with you.
7. Add an announcement bar to highlight shipping & promo info.
Among all the built-in features to help you sell on Squarespace, I really love using an announcement bar around holiday time to keep people up to date on shipping cutoffs, promos, or any other relevant information that might motivate them to buy. If you have a lot of info, don’t try to cram it all into your announcement bar. Instead, use that real estate to link out to your FAQ page or a landing page dedicated to holiday info.
8. Offer gift cards.
Of all the things you can sell on Squarespace, gift cards are probably the easiest to set up and make perfect sense for the holidays! While I usually move gift cards to the bottom of the heap in larger stores, during the holidays I would actually do the opposite and move them right to the top! You can even feature them in a pop-up or in a prominent place on your homepage to make them a convenient option for people looking to give an easy gift.
9. Be smart about your discounts & sales.
Even though the holiday season can feel like a total frenzy doesn’t mean that you shouldn’t take the time to be methodical in what you put on sale or what discounts and promos you plan on running. All of this is a long way of saying don’t just go marking things down or making up offers willy nilly. Start by making sure you understand how discounts work on Squarespace and then make sure to check your Squarespace commerce analytics panel.
10. Hit up your mailing list!
You’ve put in all this hard work and now it’s time to tell everyone all about it! Stats always say that it costs way less to sell to an existing customer than to acquire a new one and there’s no time like the holidays to take care of your VIPs! If you’ve been using customer profiles to track your customers and their activity throughout the year, it’s easy to add frequent customers or big spenders to a special segment of your email list. Send them things like special offers or advanced notice of sales via Squarespace Email Campaigns -- everyone loves feeling like they’re in the insider’s club!

11 Lead Magnet, Offer & Freebie Ideas to Grow Your Email List
Smart, strategic ideas for lead magnets, offers and freebies that go beyond the typical to help you build your email list.
One of your best business assets may be something you don’t suspect. It’s not your website or your super-secret trademarked process or even your brand recognition or goodwill. It’s your email list! And if you’re not using your website to actively build a list, you are leaving money on the table.
Like I’ve mentioned before, you can’t count on social media to connect with your audience, and done right people are not annoyed or bothered by getting emails. Here are some quick email marketing stats (all stats from here.):
72% of consumers say that email is their favorite method of communication with companies they do business with. '
81% of US online shoppers are more likely to make additional purchases, either online or in a store, as a result of emails based on previous shopping behaviors and preferences.
66% of consumers have made a purchase online as a direct result of an email marketing message
Why Email Works
If you’re running an online business or have something to sell (your products, your services, even your time!) - the chances are good that it’s going to take more than one contact with a potential customer to get them to fork over some cash. Do you know what odds aren’t good? Hoping that the client comes back to your site on their own to check you out multiple times. So, email gets you in front of people who have already expressed at least some moderate amount of interest in what you have to offer on a timeline you can control.
Here’s the secret: you’ve got to sweeten the deal
Sorry but no one is signing up to your list just because they’re hoping to get an email from you at some point. Email isn’t that magical. But people want to feel connected to brands they are interested in so let potential subscribers know that discounts and the VIP treatment awaits and they’ll be more than happy to sign up! And, of course, while this post is all about how to grow your email list don’t forget that email marketing success is really about sending consistent content that’s of high value to your subscribers. Just think of all the ways you can be a resource to your customers or how you can help them get the most out of their purchases from you. (Related post: 4 Post-Sale Emails Every eCommerce Site Needs)
Lead Magnet, Offer & Freebie Ideas
We’ve all seen the sign up boxes offering a discount off our first order and those are good but I want you to think about how you can set up a sign up box with a message that 1) aligns with your brand and 2) isn’t just about dishing out discounts left and right. I do think that a welcome discount code can be good so I’ll share with you exactly how to set that up below but remember the goal is to think of ways that you can give something of value to subscribers and start to build a relationship with them. We’re not just looking for one-time signups who will unsubscribe as soon as they get their coupon code here!
Offer a Free Gift with Purchase. I especially like this over a pure discount because it doesn’t de-value your products.
Offer a free gift with purchase by creating a coupon code for one of your smaller “add-on” type items. To prevent people from taking advantage of things, just set a dollar limit. (i.e. Free XYZ with any purchase of $$$ or more.)
Offer free shipping - but only for first-time customers who spend $X
Offer a discount code that only applies to certain shop categories like your best sellers to encourage people to try you for the first time
Offer a “digital gift card” instead of a coupon code - it feels more special!
Offer a companion guide to your products. For example, if you sell genuine Italian leather goods, offer a free guide on how to take care of leather accessories.
Send free samples. For example, if you sell candles pop a free wax melt in the mail so people can try out your scents!
If you sell services or digital goods:
Use a free Canva template to create a workbook, cheatsheet, checklist, or printable that aligns with your larger services.
Offer a teaser of what to expect from your larger offering i.e. just the first chapter of your ebook (with a link to buy the full one at the end, obviously)
Giveaway access to a “resource library” of files (ex: Grab my 10 favorite business checklists!)
Create an email “mini-course” that triggers upon signing up
Offer a free trial or way to engage with you at low/no risk for a limited period of time
Whatever you decide upon, you’re sure to start seeing new list signups start flowing in!
How to Set Up an Automated Welcome Offer
Create/set up your freebie. It doesn’t have to be fancy! (See below for ideas if you’re struggling to think of what to offer.)
Add a newsletter block or popup to your site. Most people throw their newsletter signups in the footer but, hey, go crazy and put them wherever! Don’t feel like you can’t pop a signup mid-page if it makes sense. Or, if you’ve got something cool you don’t want people to miss, use the popup feature!
Don’t ask for more info than you need to. Email address only or email + name, max. That’s it.
In your email marketing system, create an automatic “welcome” email that goes out to anyone who has just signed up for your list and includes the offer within the body of the email, or use a link/button to attach a download.
Not sure which email marketing software to go with? Check out Email Marketing Platform Showdown (ConvertKit vs. Flodesk vs. Squarespace Email Campaigns) for my recommendations!

Squarespace Feature You Should Be Using: Product Reviews
One of the best eCommerce tools you can use is built right into Squarespace and I bet you're not even using it yet. What is it? Product reviews! Find out how to get started sending review requests and displaying them on your site.
Anyone else here scroll right on past product descriptions half the time and head straight for the reviews/comments? 🙋♀️ There’s just something about getting an outsider’s take on things that feels so much more trustworthy. I mean, sure YOU love your products but what do the real people think?
Good news: collecting reviews for the physical, digital or service products that you sell on Squarespace could not be easier! But this is a feature that I see people sometimes skip setting up. It’s definitely worth the few minutes to be able to start collecting that valuable feedback from satisfied customers to share with the world. (p.s. Showing reviews on your product pages is a great way to boost sales!) Here’s how to do it.
How to Turn on the Product Reviews Feature on Squarespace
I told you this was going to be simple! To start sending out review request emails and displaying reviews on your site, from the home menu in Squarespace click COMMERCE > PRODUCT REVIEWS. From there:
Toggle REQUEST REVIEWS on to send an email request for a review 14 days after every purchase of physical, digital or service products in your shop.
Toggle EMAIL NOTIFICATIONS on if you’d like to receive an email notification every time someone leaves a review.
That’s the basics! There are a few more settings and options that you’ll want to set up or customize to your liking which I’ll get to in a second but first, what happens when someone leaves a review on your Squarespace site?

What leaving a review on Squarespace looks like for your customers.
How Squarespace Product Reviews Work
Once you’ve turned reviews on, here’s how things work:
14 days after you fulfill each order, customers will receive an automated email asking them to leave a review. (You can - and should! - customize this email - more on that below!)
In addition to (or in lieu of) a written review, people can also rate products between 1 and 5 stars.
How to Customize the Squarespace Product Review Request Email
The stock email that Squarespace is going to send out once you toggle reviews on is pretty boring and generic looking. You’re going to definitely want to jazz it up with your own branding and maybe even customize the copy so it has some of your company’s personality.
To edit the Product Reviews email specifically, from your home menu click COMMERCE > CUSTOMER NOTIFICATIONS > CUSTOMER ENGAGEMENT > PRODUCT REVIEW REQUEST. From here you can change the text from the default to something more personalized.
To change the way emails look in general you’ll head to COMMERCE > CUSTOMER NOTIFICATIONS > GLOBAL EMAIL STYLES. In this section you can change things like fonts and colors in the email, add your logo or social media icons, and other things that will change the way ALL emails sent from your site look. (For more on customizing all of your shop’s email notifications, check out this related post: How to Customize Your Store’s Email Notifications.)
How to Change The Way Reviews Are Shown
Product reviews are shown on product details pages below all other content. You have a few options on how to display reviews on your site:
Show Product Reviews Only - This option will show only reviews related to each specific product on that product’s details page. So reviews for Product A will only show on Product A’s page, reviews for Product B only on that page, etc. The star rating shown is an average of the rating for just the product in question. I would recommend this option once you have a lot of reviews for each product.
Show Store Reviews Only - This option will display ALL the reviews you’ve received regardless of which product page you are on. This means that on any given product page you’ll see a mix of reviews for Product A, Product B, etc. The star rating shown is an average of the ratings for all products in your shop. I would recommend this option if you’re just getting started and don’t want it to look like your products don’t have any reviews.
Show Both Product & Store Reviews - This option will allow people to toggle between a tab that shows just reviews related to the product they are looking at and a second tab that shows all reviews received from your shop. This is a good option if you’re wanting to show that customers also really like other products you sell since the product thumbnails shown with each store review are clickable to those specific product pages.
To select the display option that works best for where you’re at right now, from your home menu click COMMERCE > PRODUCT REVIEWS and in the “Display” section click on the dropdown menu to select from one of the options above. You can change this at any time so select what works for now and update later as you’d like!
What to Do When You Get a Bad Review
Eek! Ok, I know it seems like the end of the world but bad reviews happen to all of us and you should definitely not live in fear of a bad review. You should also not let the chance of a bad review prevent you from asking for feedback in the first place!
If you’re confident in your products, customer service and the overall experience of shopping with you then you know the occasional bad review probably says more about the reviewer than you. Perhaps they just had a bad day or something happened that was outside of your control like a shipping delay. Assuming you’ve done all you can to make things right, just chalk the occasional bad review up to that person not being your ideal customer and move on with your life.
How to Manage Reviews
All of the above being said, you’ll probably want to still go in and hide any less than stellar reviews. I would only do this for things that are truly nasty or untrue; objective reviews that are less than 5 stars may have feedback or comments that future customers find helpful such as how to pick the right size or what they could do differently to expect a better outcome. Sometimes the 3 and 4 star reviews are the best ones because they seem real and honest!
For anything else, from the Product Reviews panel click on VISIBILITY next to the review you’d like to hide and change from PUBLIC > HIDDEN. Click on HIDE to Confirm.
Squarespace Product Reviews FAQs
-
Yes - long winded reviewers get cut off at 1500 words.
-
Yes. Customers can only review a purchase within 120 days of receiving the review request email.
-
No - and it’s not recommended to do so, especially if it’s a negative review. You don’t want to seem argumentative. Instead, I would just go in and hide the review and send the customer a personal email to try to resolve the issue. To hide a review, follow the steps in the “How to Manage Reviews” section, above.
-
If someone places an order for multiple products from your store, they will only receive one review request email but they can review and rate each item individually.
-
Not at this time. Review request emails will only go out for purchases made from your online shop.
-
Yes… but only within the last 14 days. For any customers who purchased before that, you could always reach out with a personalized email asking for feedback. One off testimonials can then be incorporated elsewhere on your site which is still a good thing.
-
No. Only reviews received directly from customers via the email review request form can be managed and displayed via Squarespace. This helps the credibility of the reviews on your site since they are all verified purchases.
-
Nope but you can hide them using the steps in the “How to Manage Reviews” section, above.
-
You cannot resend review request emails and this is probably for the better. I would say that the best reviews come from people who are willing and eager to respond quickly when asked the first time. Resending requests could seem spammy and might actually impact the feedback you receive. If someone doesn’t respond, just let it go and focus on your other, more engaged customers.
-
Not at this time. Keep in mind that review request emails are sent out 14 days after you mark an order as fulfilled. If you sell physical products, this gives enough time for shipping and allows the customer to use the product a bit before reviewing. For digital or service products, 14 days is a good window where the experience is still fresh in their minds but it’s not too soon as to be annoying.
-
Yes! I detail everything you need to know about moving from Etsy to Squarespace including how to import reviews in this post.
-
You can embed reviews widgets from third-parties onto your Squarespace site but honestly? I think it looks kind of janky and that it's ok if all your reviews aren’t aggregated in one place. Let Facebook reviews live on Facebook and website reviews on your website. You could always do like I recommended above and add some static text to your site quoting a few select really awesome third-party reviews if you really wanted to include that copy on your site. Otherwise, I would focus on building well-rounded reviews across a variety of platforms as this could be good for SEO.

How To Set Up an Affiliate Program for Your Squarespace Shop
Word of mouth marketing should definitely be part of your eCommerce toolkit so I’m sharing all the benefits, the differences in types of programs and my #1 tool to make it all happen on Squarespace like a dream.
Affiliate marketing is a “trend” that has turned into an industry mainstay. It really is such a great way to market your eCommerce business! Don’t worry if you don’t already have a referral or affiliate marketing program set up or aren’t sure where to start. In this post, I’m going to first remind you why you should definitely give this a go, then make sure you know which type of program to set up (affiliate or referral), and finally give you my #1 recommended tool to make the whole thing super easy breezy on Squarespace! Let’s go!
Why try affiliate or referral marketing?
So you don’t have all your marketing eggs in one basket! If I had a dollar for every eCommerce store owner who described their marketing plan as something along the lines of “I’m just going to post on Facebook” 🙈… well, let’s just say that I’d have a lot of dollars. But what happens when the algorithm doesn’t go your way, when Instagram crashes for the day again, or when Google ads stop working? Well, nothing will ever beat how effective it is to hear a friend say that you absolutely MUST try something. Rewarding your loyal fans and customers for every time they do what they do, well - that’s algorithm-proof.
So you can expand your reach on a limited budget. The other thing about paying for ads or boosting posts is that you’re fronting the costs on the mere hope that they will turn into sales. But with affiliate or referral marketing, you don’t pay unless you make a sale. It’s a win-win! Affiliate marketing also allows you to control your costs since it’s easy to know exactly what you’ll be spending on marketing for every dollar you make and can just build it into your budget accordingly. If you don’t have a lot of money to spend on marketing, I’d put it towards building an affiliate or referral program and email marketing first before I ever spent a dime on social media.
To boost brand awareness amongst your key demographic. Because all the web traffic in the world doesn’t mean a thing if the people visiting aren’t actually potential customers. And you know who may know people who could be your potential customers? That’s right, your current customers. Instead of trying to figure out how to build a fake buyer persona and replicate it in Google AdWords (mind numbing, if you ask me) - why not just… have your current customers do it for you? They know your people better than anyone!
Referral Programs vs. Affiliate Programs
Ok, before we get into which affiliate program is best for Squarespace let’s sort out the differences between referral programs and affiliate programs. Because they’re both kind of the same but very different and it’s just nice to know what’s what. Also, don’t worry, because my favorite tool can do both!
Referral Programs
A way to reward your current loyal customers who share about your brand.
Examples:
Refer a friend and save 5%!
Give $20, Get $20.
Get $10 off for every friend you refer.
Get a free sticker for referring a new client.
Affiliate Programs
A way to incentivize influencers (and micro-influencers!) to promote your brand.
Examples:
Receive 10% recurring commission on every new subscription.
Get $10 for every referral to our store.
Share your affiliate link and receive $5 for every sign up.
Use your affiliate code and receive 20% commission from every sale.
As you can see, both referral marketing and affiliate marketing are very similar. Both reward people for sharing about your business. The difference is that referral marketing is geared towards working with people who are also your customers and affiliate marketing would be more appropriate if you have fellow industry leaders or influencers that you’re hoping to partner with to build your brand. Both have their place and you may, in fact, someday use both strategies! To get started you may decide that one fits more with your current goals than the other.
Which affiliate program is best for Squarespace?
There are lots of affiliate marketing platforms out there that you could certainly try out but you know what? I’m not even going to bother linking all of them here. I’m going to help you cut to the chase and just go with the best: Peach’s (<— affiliate link). Here’s why:
You can set up either a referral program OR an affiliate program (or both!)
It’s made FOR Squarespace and integrates like a dream.
It’s super easy to use and their customer support is A+
It helps you keep everything organized and on (almost) 100% auto-pilot
There are lots of ways to customize to set up the perfect program for your business needs.
No commission fees!

You can try Peach’s free for 14 days. After that, their referral software is $49-149/mo and the affiliates one is $59-$199. Well worth the price for either one or both for how powerful these tools are!

Email Marketing Platform Showdown (ConvertKit vs. Flodesk vs. Squarespace Email Campaigns)
Email marketing should absolutely be at the top of your marketing strategy but what platform should you go with if you’re selling on Squarespace? In this ultimate showdown software battle, we’ll check out my top 3 faves and help you find the right fit for your business.
Updated December 2023
I’ve talked alot before about the virtues of email marketing. We’ve covered why email beats social media, how to use email marketing to increase customer lifetime value, and lots of other things that all boil down to this: email marketing needs to be a part of your eCommerce strategy.
And not just a small part. Like, actually - a pretty big part. Some quick stats for the uninitiated:
Email generates $42 for every $1 spent. A 4,200% ROI is CRAZY, and also means this is a marketing strategy that you should absolutely be using, and using better.
Roughly half of all consumers want to hear from their favorite brands on a weekly basis.
Marketing and advertising emails influence the buying decision of more than half of customers.
Email is 40% better at converting compared to social media.
TL;DR - email marketing is super effective, customers want to get emails from you and they are willing to make purchases as a result of receiving an email from you.
Now for the big question: what email marketing platform to go with - especially if you’re using Squarespace for eCommerce? I’m comparing my top three faves below but first, a quick note about the emails your site sends automatically.
Non-Marketing Emails
There are some eCommerce emails that your Squarespace site is going to send automatically, no email marketing platform required. These are things like:
Order confirmation emails
Shipping confirmation emails
Abandoned cart emails
Waitlist notification emails
Etc.
You can find out more about these types of emails in this post, which also covers how you can customize them to match your brand and how you can personalize them to improve customer experience.
These emails don’t require you to receive any special consent or approval from your customers since they are sent as a result of an action they’ve already taken on your site: making a purchase (or not), or signing up for an out of stock email reminder, for example.
On the other hand, the emails we’re going to be talking about sending from an email marketing platform below are emails that are above and beyond the basics. These are emails that welcome people who sign up to your list with a special coupon code or offer, marketing promos that shout out a new product drop, or sales emails that invite past customers to revisit your shop.
Getting Approval to Send Emails
Anti-SPAM laws help protect people from getting junk they didn’t sign up for by outlining who you can send to and what needs to be included in each email. Luckily, all the email marketing platforms out there help make this easy by not allowing you to send emails to people that haven’t given their approval and by including an unsubscribe link in the footer of every email, amongst other protections. The important thing to note here is that customers can opt in/out of marketing messages while still receiving things like order confirmation and abandoned cart emails that are sent automatically from Squarespace.
Comparing Platforms
All this being said, all email marketing platforms are not created equal. There are definitely reasons why you may want to choose one over the other and the one that works best for you may be the worst choice for someone else. That’s why we’re going to look at the top 3 choices (ConvertKit, Flodesk and Squarespace Email Campaigns) within the lens of eCommerce and also as a Squarespace user.
Here’s the criteria that I think matters most:
Ease of use
Looks
Automations
Integration
Cost
Let’s jump in!

Squarespace Email Campaigns
I’m kicking off our email marketing platform battle with Squarespace’s built-in option: Squarespace Email Campaigns. There have been a lot of improvements to this feature since it first launched a few years ago making it a great option if you’re needing something relatively simple that has all the features you need and none that you don’t.
Ease of use - You literally cannot get any easier than Squarespace Email Campaigns. You can connect any newsletter block to your list with just one click. It’s super easy to style your emails to match the rest of your site since everything is in the same place. Adding content to emails is also a breeze; things like text, image and button blocks are as simple to use as those on your regular site. The fact that it looks and works just like the rest of your website is one of Squarespace Email Campaigns stronger selling points if you feel like the last thing you need is to learn yet another piece of software!
Looks - Squarespace emails look pretty great! There are lots of pre-styled templates you can use as a jumping off point but it’s also easy to make your own branded templates that you can re-use again and again to keep things consistent. Pulling in assets from your website like your logo, some images and your color palette is as easy as pressing one button but the font choices for emails are purposefully kept to a limited selection to make sure that your emails come through into pretty much every email tool and on any device. You can create nice-looking email layouts that feature your site’s content (or new content that you upload) and the options for controlling how each block displays are pretty intuitive.
Automations - You’ll need to be on the Core plan or above to have access to automations that allow you to create things like welcome emails or other emails based on subscriber or customer activity. You can create series of emails triggered by an event but those emails aren’t as organized or visual as those on ConvertKit or Flodesk. Squarespace Email Campaigns also doesn’t yet have some advanced workflow things like being able to tag people based on activity or route them down different paths based on variable conditions.
Integration - You can add product and blog info right into emails without needing to copy/paste links or other info which is AMAZING. And it should go without saying that because this is a tool that’s built right into Squarespace that there’s no need to fuss with embed codes or trying to figure out how to get different programs to play nice and talk to one another. One of the stronger points is that for simple purchase follow-up emails, you can use product purchases as a trigger for an automation due to the fact that this tool is built right into your eCommerce website. Having everything in one place sure is nice!
Cost - It costs nothing (nada, zip, zero!) to use Squarespace Email Campaigns to build your email list and you can also send your first three email campaigns for free. After that, the pricing tiers start at $5/mo and go up to $48/mo (Starter Plan and Max Plan, respectively - paid annually). Most people will want to skip the Starter plan though because it doesn’t offer email automations which I think are absolutely necessary for any eCommerce business. Beyond that, there is no difference between the other plans aside from how many campaigns and emails you’re allowed to send monthly (you’re allowed unlimited subscribers). If you’re just starting out, I recommend the Core plan which is super reasonable at just $10/mo and allows for up to 5 campaigns and 5,000 emails.
Overall Thoughts
There’s a lot to love about this simple email marketing solution and if you’re just getting started it should definitely be on your radar as a great all-in-one tool.
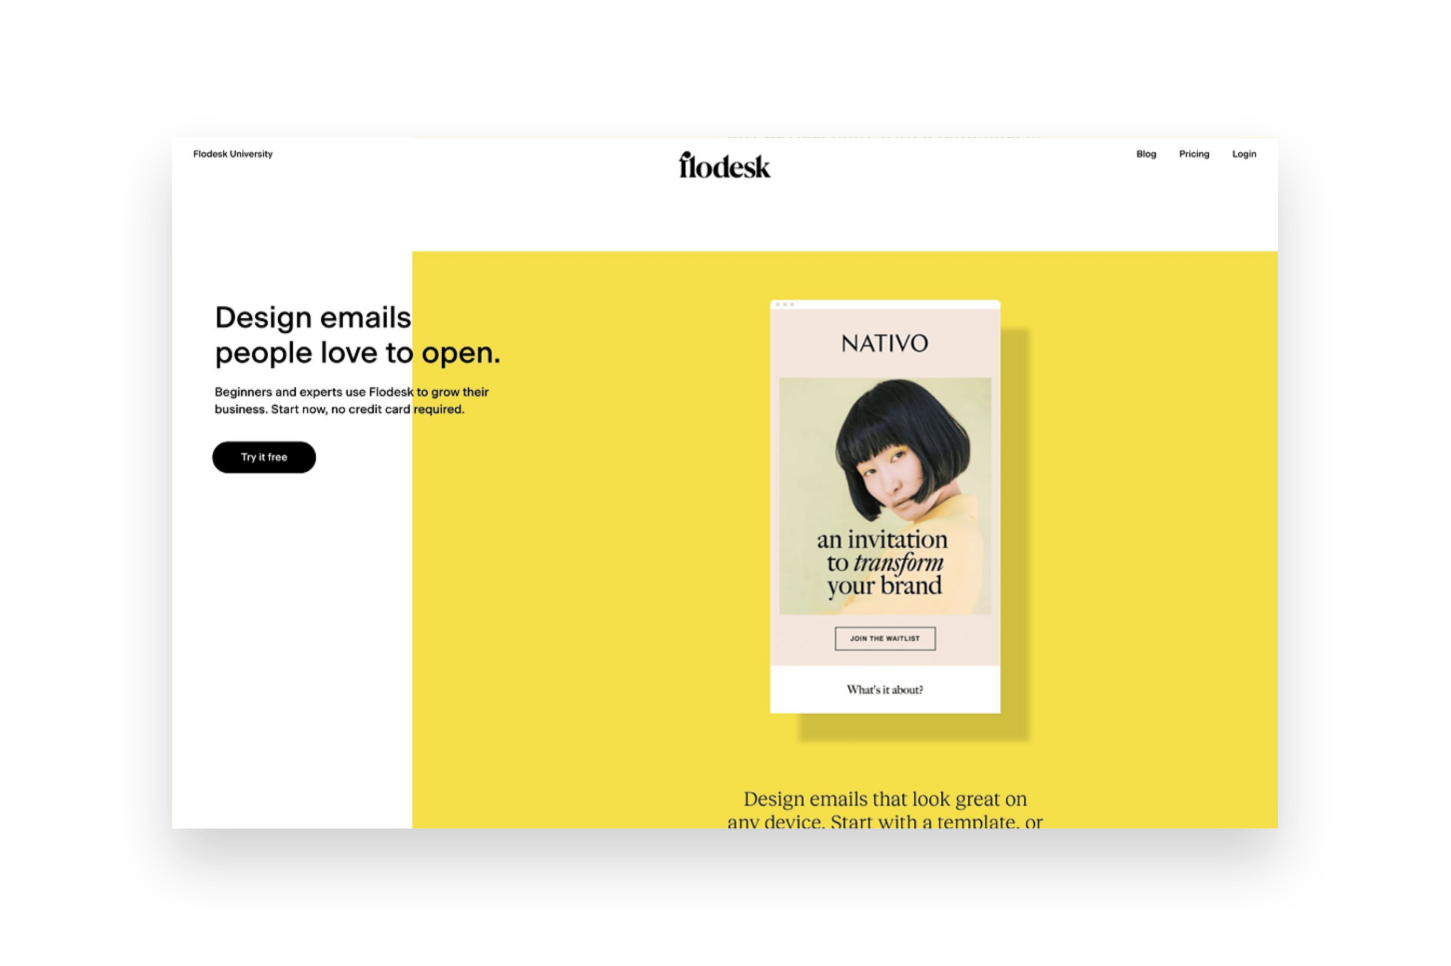
Flodesk
Flodesk is a relative newcomer to the email marketing arena but - hoo boy - did they come in like a wrecking ball! Everyone seemed to fall in love instantaneously with their great-looking templates and the simple pricing setup. Flodesk is a great option for beginners and more advanced marketers alike and it’s easy to incorporate into Squarespace. That said, it’s not without it’s own quirks and issues.
Ease of use - Based just on the simplicity of the interface alone, Flodesk is a dream to work with. It’s clean, modern and minimal which is a breath of fresh air over some other platforms that seem to make things unnecessarily cluttered. So for that alone, Flodesk wins points in my book. The interface is broken down into four parts: Emails, Forms, Workflows & Audience. Emails are where all the one off, newsletter-type emails live. Forms are where you can create either forms or landing pages to embed onto Squarespace for collecting sign ups. Workflows are where you can create visual automations like welcome sequences. And, lastly, Audiences is where you can create mailing list segments.
Looks - All of the pre-made forms, email layouts and layout blocks for within emails are very visually appealing and that’s a lot of what attracts people to Flodesk. You can also save some settings like your logo and custom color palette so that it’s easy to make sure those aspects are on brand every time. The one thing that kind of drives me crazy about Flodesk though is one of the most important: fonts! Every single time you add new blocks or copy in new text (which is likely going to be every single email you send since who sends the same thing each time?) you need to redo the font settings. This can either be really time consuming (if you actually take the effort to do it) or result in sloppy looking emails (if you don’t).
The other thing to note about the super pretty layouts is that a lot of your email will get converted into an image when it shows up in people’s inboxes. There are some studies out there that show that this can negatively impact deliverability rates and/or increase the chances of your email getting filtered into the promos tab or marked as spam. This is just a word of caution that while the layouts look really good that relying too much on them can mean that your emails also don’t have actual “readable” text in them that could be an accessibility issue.
Automations - Flodesk workflows are actually pretty powerful considering the interface is so simple - you may not realize all that you’re really able to do! Workflows are kicked off when someone is added to a segment and can include as many emails as you like set apart by any time delays you specify. Unlike Squarespace Email Campaigns, all the emails for a specific action are kept in one place which makes it easy to organize. You also have lots of advanced thing like conditional actions which are things like if/then rules based on whether someone clicks a link or has opened up the message that was sent prior.
What’s not so easy is setting up automations based on commerce activity, such as those on Squarespace that allow you to send emails after someone buys a certain product, for example. However, they recently launched a new Checkout add-on that allows you to set up sales pages and checkout pages, add upsells, accept payments and follow up instantly. This could be a pretty cool option if you’re not needing a full platform such as Podia to sell digital goods.
Integration - There are two ways to integrate Flodesk & Squarespace. The first is by embedding the code that’s automatically generated by Flodesk into a code block on Squarespace which is as easy as copy-and-paste! The second is by setting up Zapier so that you can use Squarespace forms but then map those submissions to various Flodesk segments. The latter option is great if you want to make sure your forms still always match the rest of your website 100%. An other option if you do use Podia is that Flodesk is now a native integration for that platform making it super easy to connect those two pieces!
Cost - The pricing on Flodesk is crazy simple: it’s a flat rate $38/mo and it includes unlimited everything, forever. You do get a month free if you pay annually and all new sign ups also come with a 30 day free trial of the software. This pricing set up is great because you’ll never pay more as your list grows and all the features are included so long as you’re a subscriber. The Checkout add-on can be purchased separately from email or in a bundle with it and increases the cost accordingly. (Bonus: use my link here to save 50% on your Flodesk subscription!) All this being said, there are more affordable plans with both Squarespace & Convertkit - especially for those with smaller lists.
Overall Thoughts
Flodesk is a good option if you’re looking for something that has a great user interface and if image-based emails are important to you. It integrates well with Squarespace but more so for traditional email marketing & list building than for eCommerce-specific automations.
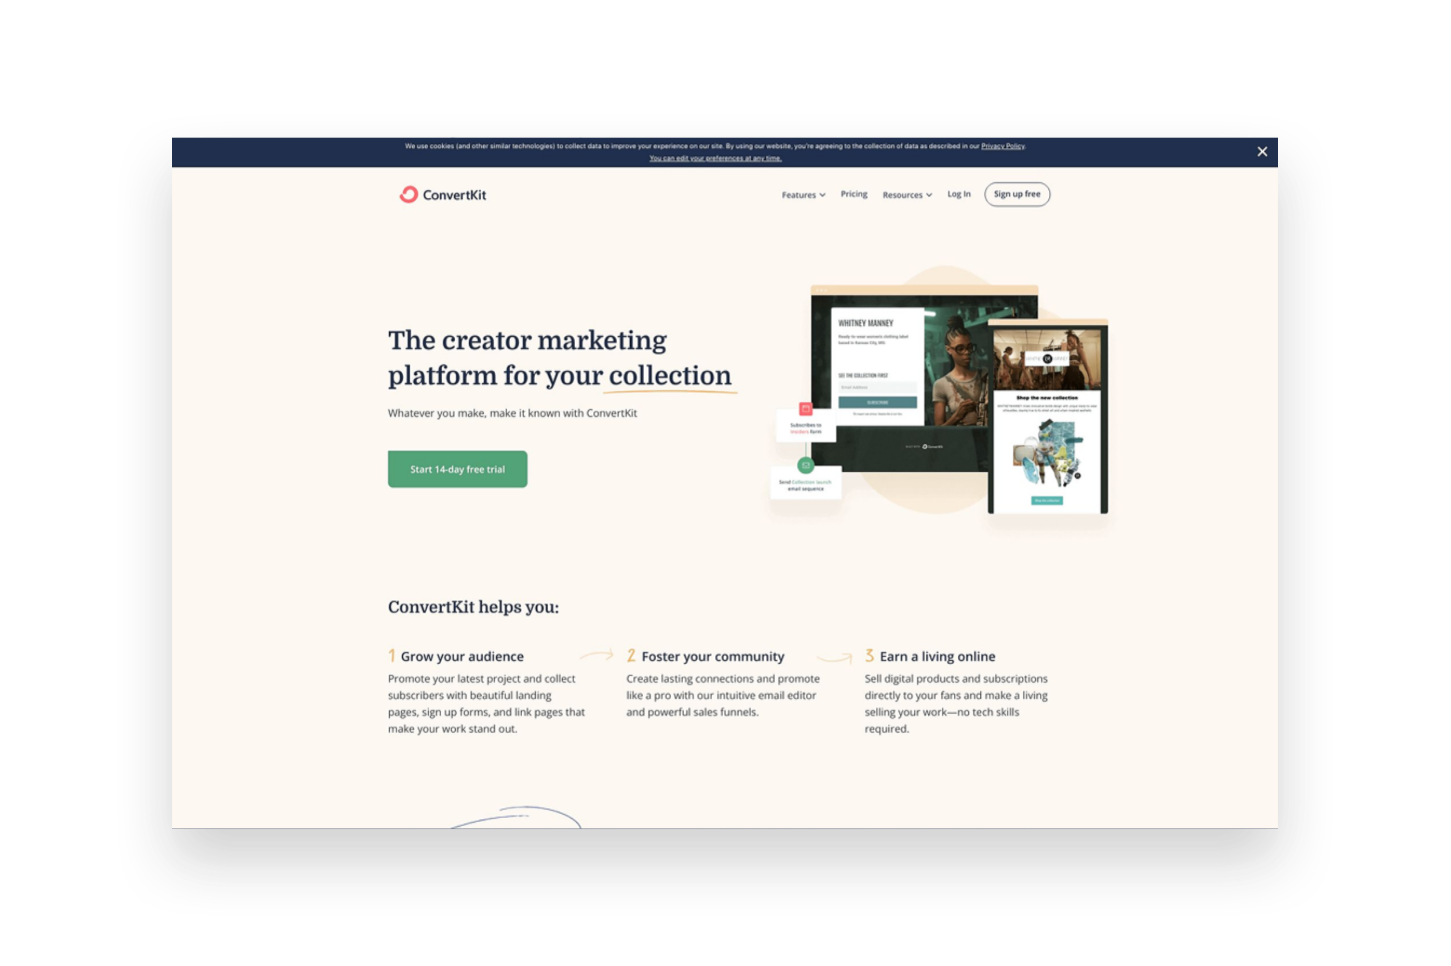
ConvertKit
ConvertKit is an OG in the email marketing space and it shows. It has a robust suite of tools available to email marketers of all sizes and super powerful tools to help you automate and sell online. It has a bit of a bad rep for creating “ugly” emails but stay tuned because there may be a little method to the madness!
Ease of use - Even though Convertkit has been around for a long time, they still work on releasing improvements to the product which I really appreciate! For example, when I first tried Convertkit back in the day the interface was a little confusing and overwhelming but today it’s clean, simple and well-organized. It’s easy to see all the tools and understand how they relate to one another and even things like their email templates have received a nice facelift! The main dashboard is broken up into 4 main parts. The first is “Grow”, which houses all your subscriber info, forms and landing page. “Send” is where you can find broadcasts, sequences, email templates and snippets. “Automate” has visual automations, rules, integrations & RSS. And, lastly, “Earn” has products, tip jars, and payouts. Whew! So you can see that there are so.many.tools to choose from!
Something else worth noting is that of all the programs reviewed in this post, I find the dashboard of Convertkit the most helpful. It’s so easy to see stats and analytics at a glance!
Looks - Ok, on to the contentious topic of ConvertKit’s looks. And this is not in regards to the platform itself which is really great-looking but instead about the emails it sends. I mentioned above that ConvertKit tends to have a reputation for creating somewhat “boring” text-based emails. However, ConvertKit’s founder makes a very strong argument for this type of email (you can read more about it here) and I think that so many people have made a turn towards overly visual emails these days that text-based emails may have an even stronger appeal than they did almost a decade ago. All this is not to say that you can’t create nice-looking emails in ConvertKit because you actually can, just know that they will be somewhat less flashy than those created in either Squarespace Email Campaigns or Flodesk. You can still add nice images, brand colors and fonts - all the bare components of those other platforms - they’re just going to be a little more simple overall.
Automations - ConvertKit probably has the most powerful automations of any of the tools we’re looking at in this post! So much so that it actually breaks them down into two parts: Sequences and Visual Automations. Sequences are the simpler of the two and they can be compared to workflows in Flodesk. Sequences are a series of emails set off by an event such as signing up for a freebie or opting in to receive email updates. Visual Automations are Sequences on steroids and have some of the same features as Flodesk workflows but then 1,001 other options as well. You can do things like filter subscribers based on conditions, take actions based on when products/services are purchased, create multiple paths into the automation, add/remove subscriber tags, etc. If any of this all seems overwhelming, ConverKit also has automation templates that you can just duplicate and customize for everything from creating a paid newsletter to promoting and upselling other products.
Integration - ConvertKit integrates with Squarespace in much the same way as Flodesk, with one major notable addition. For basic things, you can either embed ConvertKit forms right into your Squarespace website using a code block or use Zapier to pull info into Flodesk from Squarespace forms and newsletter blocks. Where things get really cool though is the Squarespace Commerce API integration with ConvertKit. IT. IS. AWESOME. Once connected, this means that you can pull purchase activity from Squarespace into Flodesk and use it to tag subscribers, trigger automations - all sorts of things! You can even track revenue data for each subscriber and also see previous purchase history. ConvertKit also has integrations with tools like Teachable, Stripe and Podia so if you use any of those in other parts of your business it would be a great place to pull all your eCommerce data together on the marketing front.
Cost - ConvertKit has a free plan that would be great if you’re just getting started out and have a list of 300 subscribers or fewer. However, most people will want to subscribe to the Creator plan at $9/mo (if paid annually) in order to send automated emails and sequences. Plans go up to $49/mo if you have 3,000 subscribers, or more if you have more. There’s also a Creator Pro plan that includes things like subscriber scoring, advanced reports and a newsletter referral system that starts at $29/mo.
Overall Thoughts
If you’re as serious about email marketing as you are about selling online, ConvertKit should be at the top of your list of tools! It’s powerful where it needs to be and simple where it matters; it’s clear that everything about it is geared to convert.
Bottom Line
The good news is that in our email marketing software epic showdown battle, you really can’t go wrong. But you can definitely do… more right? Here’s how I think things shake out:
Choose Squarespace Email Campaigns … if you’re just getting started with both eCommerce and email marketing.
Choose Flodesk … if you’re focused on building your list but don’t necessarily need it to be based on Commerce activity.
Choose ConvertKit … if email marketing is the corner piece of your marketing strategy and it’s important to you that it’s integrated with all the places you sell online.

Don't Bank on Social Media: Why You Need to Build an Email List
Hot take: social media is not your small biz best friend. Here are four big reasons why building an email list is a much smarter eCommerce marketing strategy in the long run than banking on a social media following for traction.
A website is a must-have when it comes to business but it's not a standalone tool. Even though your website is going to help you look legit, help you sell your products or services, and is totally great for SEO - no website is an island. The cheese does not stand alone!
This means that your site needs to do all the eCommerce things, connect to your active social media accounts, and help you build your email list.
What’s an Email List?
This is the list of people (customers, clients, leads, people who like your blog, probably your mom) who have agreed to give you their email address in exchange for something of value that you have to offer. This could be informational like a newsletter filled with helpful tips or something more actionable like a freebie download or a discount on a future purchase from you.
Why Not Just Social?
Facebook and Instagram are okay enough tools to connect with others and get outside your initial sphere of influence but if this is where all the attention goes, what are you really building? Aside from physical business assets like equipment or inventory or your Macbook - your book of business is what it's all about. It's your contacts, your relationships, your everything.
So if all your interactions with your most valuable business asset are on social media, what happens when new platforms crop up, algorithms change, people leave? What happens when services crash and access to new leads dries up? How do you connect? Would you be starting from zero again?
Instead of waiting until that happens, I want you to start thinking now about how to build your amazing future-proofed online business. The best part is that you can still hang out on social media if you want but you know that you'll just be using those platforms as tools to drive new contacts you meet back to the real heart of your brand - your website and, yes, your email list.
4 Reasons Why You Need an Email List
So you can own your own contacts. Remember this is your #1 business asset! If you interact with your people only on social media, guess what you have? Nothing. Nada. Zip. Zero. This is no bueno, my friend. Take ownership of what's yours!
So you can stop worrying about algorithms. There are lots of competing stats out there on this but it's estimated that only 6-10% of your followers are actually seeing your posts. That is also no bueno. But guaranteed that if you pop up in their inbox with something of value for them that they will pay attention. This keeps your company top of mind for them and also allows you to build more personalized brand experiences. Let your competitors waste their time getting lost in the feed. You'll be right there in your customer’s inbox!
So you can show off your expertise. Notice the bit of emphasis from that last point: so you can provide something of value for them. That's the secret sauce. And it's super simple. In an email, you can get personal and provide tips, advice, tools, and resources that help establish you as an expert in your field. People want to learn and if you can solve a small problem for them for free (instead of just worrying about getting likes) they will turn to you when they're ready to make a bigger purchase.
It’s the best bang for your marketing buck! Email marketing can feel overwhelming at first since it definitely takes a bit of upfront work — but the payoff is so worth it! Email marketing brings in more ROI than SEO, display, advertising, and other forms of digital marketing. Studies have shown that for every $1 you spend on email marketing, you can expect an average return of $42.

UX Tips for Every Phase of the eCommerce Journey
Explore specific ideas and recommendations to get the most out of the Squarespace tools available to you. Learn how to translate your customer’s needs to specific website content and design elements to improve user experience for every phase of the customer journey.
This is the second post in a 2-part series about how to create a user-focused eCommerce website. If you missed Part 1 where I show you how to quickly and easily identify information that your customers need to know and walk you through how to map it to the decision-making process you can check it out here. In this step, we pick up where we left off with some concrete ideas on translating your customer’s needs to specific website content and design elements to improve your eCommerce UX.
Understanding what customers need to know and when they need to know it will help you cater to people in each phase of the decision-making process so you’re not coming out guns blazing while people are still getting to know you or not providing the right CTAs when it comes time to close the deal.
More importantly, becoming super focused on the needs of your customers is your opportunity to stand apart from big box stores and mega online retailers who have to lump everyone into one mass, generic “buyer persona” and aren’t able to niche down and be as laser-focused or as personalized as you can be. This is your chance to really shine and make sure that your website has content and CTAs that cater to people in each phase of the decision-making process. As a reminder, these are the 4 phases of the decision-making process:
Awareness → Consideration → Decision → Post-Purchase
In this post, we’re picking up where we left off using the list of what my Fake Plant Co. customers need to know and when they need to know it. For a refresher, here’s the list we made using the activities from part one along with the phases I mapped them to:
What types of plants are available (Awareness)
Why our plants are better than the kind from their local big box store (Awareness)
How we ship plants without killing them (Consideration)
Where plants are grown and sourced (Consideration)
How to decide which plants are best for them (Consideration)
What we do to guarantee their happiness (Decision)
How to place an order and what happens next (Decision)
How to care for their plant purchases (Post-Purchase)
How they can subscribe or join our plant membership club (Post-Purchase)
Let’s jump into how I can translate this road map into specific content areas and website design elements for maximum impact on an eCommerce website!
Awareness
In this phase, people are just discovering your brand and trying to quickly determine whether you’re what they’re looking for. You usually only have a few seconds to capture someone’s attention and convince them to stay. Here are some website features you can incorporate that cater to people in this phase:
Make sure you have a clear and unique header area (the info that’s “above the fold”) to capture people’s attention visually.
Include a tagline or “brand bio” that tells people about your business in one simple phrase or sentence.
Include simple navigation that highlights the categories of your shop without a whole lot of other clutter or unnecessary links.
Add a bold CTA - either a button or an announcement bar - that links to content that addresses the biggest objection you need to overcome or the main action you want people to take when first landing on your website.
Example
For my Fake Plant Co. I mapped the following two pieces of content to this phase:
What types of plants are available
Why our plants are better than the kind from their local big box store
Here’s how I could address each of them with my site’s content and design:

Since I know that most people’s first question is really going to be why they should even care to buy from Fake Plant Co. versus just hitting up their local big box store I would address that head on in the header section above the fold. In this case, I added it to the copy along with a compelling tagline. Right away, it's made clear to visitors that Fake Plant Co. will provide them with more personalized service at lower prices than they could get somewhere else. That takes care of quickly answering a couple big objections right up front!
After that, I think people would be most interested in just getting an idea of what type of plants are available so I would make sure that the top navigation (the links at the top of every page) feature the shop categories.
Now, when someone new lands on the homepage I know that I’m giving them what they need to know without them having to do any scrolling or clicking which is great!
Consideration
In the Consideration phase, people already kind of have a gist of what you’re all about and are thinking more seriously about making a purchase. They may still have some lingering doubts or questions but they like what they’ve seen so far! Here’s how you can cater to them with your website content and layout:
Highlight features and selling points midway down your homepage.
Create a FAQ page and link to it in your website footer (the links that appear at the bottom of every page).
Create educational content to help people feel guided and supported in their purchase.
Example
For Fake Plant Co. I mapped the following three pieces of info to this phase:
How we ship plants without killing them
Where plants are grown and sourced
How to decide which plants are best for them
And here’s how I could incorporate those things into my site design:

On the homepage, I would turn the things I want people to know into an easily scannable list. It doesn’t take a lot of words to help people learn about the company or address concerns or objections. In this section that I would include about midway down my home page, I turn questions I know a lot of people have while considering a purchase into features. This section has fewer than 50 words but has a major impact in moving people towards making a purchase.

Another feature that I could incorporate that would help people who are still pondering a purchase is a section that provides access to a free PDF guide that covers all the types of plant that Fake Plant Co. sells and helps people identify good picks based on lighting conditions, care needs and whether the plants are safe around kids or pets. Not only does information like this help people feel confident about their purchase it’s also a great way to build an email list!
Decision
So you’ve introduced yourself and provided all the right info people need to think about making a purchase and guess what? You convinced them! You may think that once you get here that it’s as simple as slapping in an “add to cart” button and sailing right across the finish line. But your work (and the customer journey are just barely half over) so it’s not time to let off the gas.
Remember that it may not be until several sessions in before customers decide to make a purchase so you can’t count on them remembering how to pick up where they left off - you need to explicitly guide and show them!
With those things in mind, here are some ideas for this section:
Use product tags and categories to help people move around your shop.
Enable the shop category sidebar and breadcrumbs.
Enable the Squarespace related products feature.
Highlight any guarantees directly on product pages.
Bonus: Product Pages & Checkout
Luckily, Squarespace takes care of a lot of the hard work of creating a smooth checkout experience for us but there’s always room to personalize and optimize. Here are two posts that provide even more detail if you want to dive even deeper:
Example
I identified two things that I thought people really needed to know during the decision phase for Fake Plant Co.:
What we do to guarantee their happiness
How to place an order and what happens next
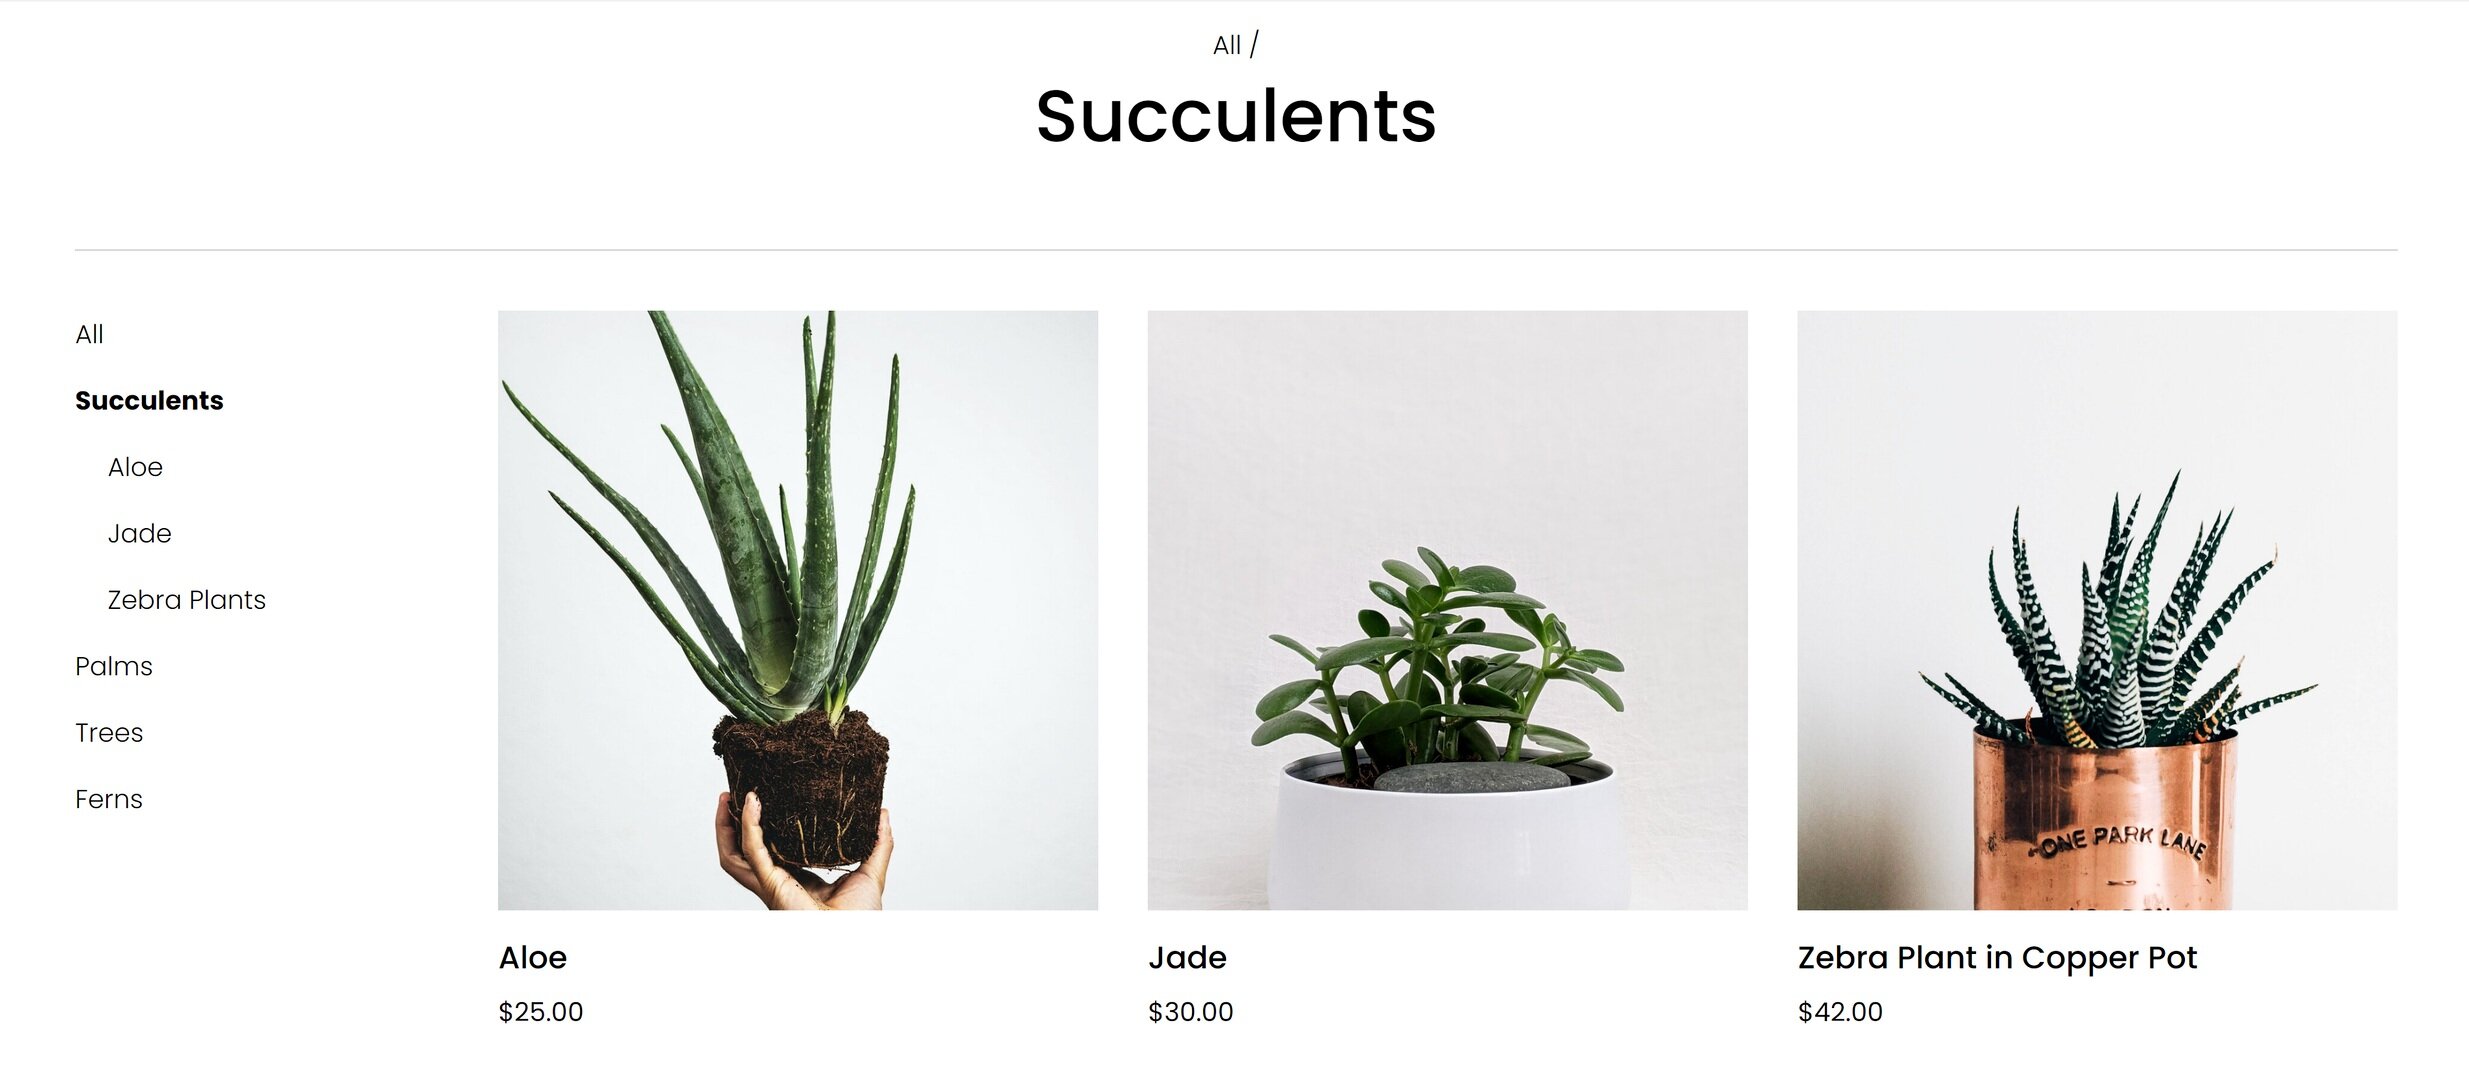
Since in this phase it’s important to make sure that people can easily find the products they are looking for, I would make sure that each of my products was assigned a category (and a subcategory, too, if that’s relevant). On Squarespace you can have up to three levels of nested categories to help people quickly find exactly what they’re looking for.

It can also be beneficial to repeat any brand promises that you may have made early on in the customer journey right on the product page where customers can see them without having to click away. Because I think that some people may still be a bit nervous about buying plants online, I referenced Fake Plant Co’s “Plant Happiness Guarantee™” right in the product description. I obviously would have detailed this elsewhere on the site (home page, FAQ page) but just referencing it here would be a good reminder to shoppers that their satisfaction is important to Fake Plant Co.
Post-Purchase
Depending on who you ask, it can be up to 25x cheaper to retain an existing customer than to acquire a new one. Knowing this, I always wonder why small eCommerce businesses with presumably limited marketing budgets seem more concerned about new customer acquisition than finding ways to build better relationships with past and existing customers ¯\_(ツ)_/¯ That’s a mystery we’re going to have to solve another day!
In the meantime, here’s how you can make sure your customers don’t fall off the map post-purchase:
Enable the option to sign up for email newsletters at checkout.
Send regular email communications out. (Bonus: use customer profiles to cater communications just to those who’ve purchased in the past to really personalize the experience!)
Provide options via tools like Member Areas or Squarespace Scheduling to create an ongoing relationship with past customers.
Example
Here are some opportunities I identified for Fake Plant Co. to connect with customers after their purchase:
How to care for their plant purchases
How they can subscribe or join our plant membership club

Since I already have all my customer’s data right inside Squarespace, sending super targeted post-purchase emails to customers using Squarespace Campaigns would be a no-brainer. Big companies rarely follow up on purchases in such a personalized way so it’s a great opportunity to use the tools at your disposal to easily connect in a meaningful way.

I think some of the most successful small businesses think beyond simple eCommerce transactions and consider ways to build lasting relationships with their customers. Fake Plant Co. could leverage Squarespace’s membership areas technology to provide super-personalized service with a side of bonus recurring revenue! Win-win!
Bottom Line
Carving out areas on your website that cater to customers on each phase of their journey isn’t just smart web design - it’s absolutely necessary to be competitive online. Small and medium businesses are rarely able to compete with Amazon or Walmart when it comes to price, fulfillment capabilities, or purchasing power. But they (and you!) have so many opportunities to connect with customers on a much deeper and more personal level.
Stop thinking about what you sell as a mere commodity and start thinking about the opportunities you have to create an experience for your customers that no one else can replicate. After all, being super focused on your niche is really the best UX tip!

How to Launch Your Website… Even If You Don’t Have Anything to Sell Yet
Get a head start on building your audience and generate a buzz by launching your website before you’ve got anything to sell. These simple solutions will help you get more customers, charge higher prices, and generate more leads when you’re ready to flip the “eCommerce” switch!
Updated July 2021
There’s that saying that sometimes progress matters more than perfection and I have to say that it really rings true when it comes to launching a new website. I often see new entrepreneurs struggle to know when to “go live” with their idea or find out that they’ve been putting off launching a website because they are waiting until everything has all come together to do so.
The beauty of modern web platforms like Squarespace is that they are infinitely scaleable. This means they can grow with you but this also means that they’re ready to work even if you don’t have anything - or everything - ready to sell just yet. You might be wondering what to put on a website for a business that is still in the pre-launch stage in which case… keep reading! The best news is that these methods are proven to help you:
Get more customers,
Charge higher prices, and
Generate more leads when you are ready to flip the “eCommerce” switch!
First Step: Set up a Coming Soon Page with an Email Opt-In Form
A coming soon page with a simple description of who you are and what you’re all about makes for a great stand-in for a full home page. After all, people do business with other people so there’s no time like the present to introduce yourself.
The secret to making this successful is to include an email/newsletter opt-in form so that the page isn’t a complete dead end. Email marketing is the highest converting sales channel above all others so start building your list and come launch day, you’ll have a long list of people who are already eager to buy what you’re selling.
Don’t overthink what needs to go on this page. A few sentences about your or the company + a rough overview of your general industry and how you plan on being different than the rest are all you need. The goal is to create a place that your business can start to call home.
Create A Freebie or Lead Magnet That Previews Your Product or Service
You’ll have a much better time getting people to give you their email addresses if you also include the promise of a small freebie or offer. This would be most effective if this is a small teaser of your future product or service but it could also be a coupon code that they can use once your store launches or a resource that your target demographic would find helpful.
Setting up an automated email to deliver your freebie doesn’t have to be an expensive or complicated process. My preferred tool for this is built right into Squarespace: Email Campaigns! This is a great option because it’s completely free to build your list of any size and when you are ready to start sending emails you can send your first three for free.
Send Regular Updates of Your Progress
Not only is this great accountability to help keep you on track and focused on launch day, but it can also help create a sense of excitement and community around your brand that you can build on later. Remember, email is the #1 tool in your sales arsenal so any work you do building your list on the front end will pay dividends after you go live.
Helpful Email Marketing Tips for Beginners
Consistency is important so if you email your list every Friday for 3 months and then ghost them for the next three, they’re going to retaliate by marking your messages as spam when you decide to show back up. The frequency that you send messages out doesn’t matter as much as just creating a schedule you can commit to.
Use your emails as a way to casually poll or gauge interest in your products or services. Basically, if you want to know what your target audience wants, just ask them! Most people will gladly provide you with feedback or answer a simple question or two if they feel like they’re helping you create a solution that solves their problems.
Give behind-the-scenes updates and previews of what’s happening in your business even if it feels mundane or overly personal. Remember, people are there because they’re interested in what you have to offer. Show them what you’re working on even if it’s not perfect yet!
If all else fails and you don’t feel like you have much to say of your own yet, start training subscribers to look to you to be the expert in whatever it is you do by sending industry updates or links to other information on the web you think they’ll find valuable. This will help build trust with future customers that you’re willing to share about products and services that aren’t your own in order to help them.
Start a Blog
Blogging seems like it’s going to be overwhelming but it’s a great strategy to adopt for any new business. There’s no time like the present to get in this great habit! Use some of the same advice from the emails section above and create a consistent posting schedule that’s something you can stick to. Post on industry topics if you don’t have much of your own stuff to share just yet.
I’ll also tell you that there’s a secret behind-the-scenes bonus to getting your website live early even if it’s just a coming soon page + a blog: you’ll start building domain authority and SEO street cred right away! This is awesome because SEO is definitely a long game proposition. Any head start you can give yourself will really take the pressure off trying to get noticed once you launch your site and have the added pressure of needing to see the sales start rolling in.
Create waitlists for products or offer pre-sales
Pre-launching products by letting customers know that they are coming soon is a great way to validate your ideas and build on that growing email list you’re already working on. It also can generate a little bit of buzz - similar to when people excitedly wait for the release of the latest book in a popular series or try to score early access to concert tickets.
You have a couple of different options for this and I think the best one depends on how close you are to launch day. If you’re pretty far out, Squarespace makes it easy to create product waitlists where customers can sign up to be notified by email when products they are interested in become available. Once you get closer to launch, you could allow people to actually preorder - just make sure you are super clear about when products will be shipping to avoid frustration or confusion!
For more on the built-in selling tools available to you on Squarespace, check out this post.
Bottom Line
The bottom line here is that it’s ok to launch a super small, scaled-back version of what your future website will actually be. Doing so allows you to start building your audience, testing ideas, getting feedback, and building habits that will help ensure your success whenever you are ready to fully launch. Remember that progress matters more than perfection and just start! Every eCommerce business started as someone’s simple idea and it’s ok to flesh it out bit by bit as things come together. Since adding features and content to a website is so easy these days, there shouldn’t be any fear about waiting to get all your ducks in a row before just diving right in.

How to Set up Product-Specific Email Automations with Squarespace Campaigns
I love that Squarespace Campaigns allows you to send emails based on what people buy - it’s just such a great way to create a personalized experience with your shop! Learn how to set up your first product-specific email automation (or series of emails) plus get some ideas on how to really use this feature to its full potential.
I love tools that make life simpler and that means choosing programs and platforms that offer the most functionality possible. Squarespace is definitely where it’s at on that front because of Squarespace Campaigns, their built-in email marketing platform. And one of the things I like best is that Squarespace Campaigns offers the ability to send super-targeted, automated emails based on purchase behavior. If you want to get a primer on Squarespace Campaigns in general check out this post but here we’re going to get into sending product-specific emails because I think it’s cool enough that it’s worthy of a post all its own!
Customer Activity Automations
Squarespace emails that are triggered after someone purchases a product on your site are called “customer activity automations” and the thing to keep in mind is that the emails we’re talking about here are separate and in addition to the standard Order Confirmation and Shipping Confirmation emails that get sent out. (For more on those, check out this post.) So, just remember that these emails are ones that are set up via Squarespace Campaigns as follow-ups to the standard order communication emails that are managed in Commerce > Customer Notifications. Here are some things to note on Customer Activity Automations:
They are tied to products on your site and triggered when people buy those specific products.
Sending this type of email doesn’t automatically sign customers up for your mailing list. (That is something you can ask people to do during checkout though!)
People can unsubscribe from customer activity emails from you but that doesn’t unsubscribe them from any email lists they may have also signed up for.
This type of email does count towards the monthly send limit that your plan allows but isn’t counted as a campaign.
Now that you’ve got a good idea of what these emails are and how they work in general, here’s how to set one (or a few!) up plus some ideas on how to really use this feature.
Setting Up A Triggered Email
You’ll start by clicking on the “Create” button and then selecting “Automation.”
On the next screen, click on the Customer Activity tab and select from one of the three options.
Hint: there’s nothing different about any of the actual behind-the-scenes set up to any of these options, you’re just picking one because Squarespace will then display templates for you to choose from that fit what you select. If you plan on re-using one of your own templates it doesn’t really matter what you pick here at all!

Once you’ve selected from one of the premade templates or chosen one of your own, the email editor screen will open up. You’ll create, edit and style your email like normal. However, on the “Email” tab to the right you’ll also see the automation options available to you.

The top section is already set for you indicating that the automation will be sending after a purchase is made so the only things left to take care of are 1) which products this email should be connected to and 2) when to send it.
Products - you can select as many or as few products as you want to be connected to this email. If the content of your message is pretty generic (it could apply to any product someone purchased from you) there’s also a quick option to just toggle it on for “Any Product”. Other than that, you just click on the specific product(s) that you want to connect. Hint: although at the moment you can’t trigger based on shop categories you CAN use the search box above the product list to search by category. This makes it fast to filter down and see products that are just in that category even if you do have to select them one-by-one!
Timing - You can choose from any of the preset time delays or choose your own. Emails can be scheduled as far as 60 days out after the date of purchase. Also, although you can technically choose to send your automated email “immediately” after purchase I would recommend not doing so. The reason is that the standard order notification email gets sent immediately after purchase as well and getting two emails back-to-back might seem confusing or spammy. Even if you’re wanting to send an initial “thanks for your purchase” email, I would schedule it for at least 1-2 days out so that it feels more personal. You can also then use that email as an opportunity to get people excited that you’re working on their order or that it should be shipping/arriving soon, etc. (More on that below!)
When you have everything set up the way you like it be sure to hit “Activate Automation!”
Sending Multiple Emails Per Purchase

Here are some automations I have set up on my own site.
Now that you’ve seen how easy it is to set up an email triggered by a product purchase, you may have some ideas about other follow-up emails you want to send too! It’s easy to see all of your automated emails in one place by clicking on Automations from the main Campaigns screen. Here, you’ll see an overview of all the automated emails you have set up - including ones that are triggered by both subscriber activity AND customer activity. For this reason, I recommend giving your emails helpful names and even numbering them if you have to. Customers won’t see these names (they’re just for you!) so these are just a way for you to keep track of what emails do what!
If you want to set up an email series triggered by the purchase of your signature product, you’ll just repeat the steps above to create each individual email. In the Timing settings, you’ll then define when you’d like each email to send. I love this setup compared to some other email marketing platforms that require you to create duplicate workflows for each product series. In Squarespace Campaigns if everyone gets the same initial email but different second emails, you only need to create the initial email once and just tell it to apply to any product purchase. You can then set up your next emails based on either a specific product or a group of products.
Product-Specific Email Ideas
Squarespace provides templates for the following types of post-purchase emails for a reason - they’re all great ideas for ways to follow up with your customers after the sale!
Say Thanks to Customers
Recommend Additional Products
Send a Coupon to Customers
In addition to these ideas, here are some that go even further in creating an exciting brand experience for your customers. (Note that some of them require you to set up some things outside Campaigns as well, such as using Customer Profiles or Zapier.)
Let customers know when similar products or services go on sale
Send a delivery confirmation email asking if they received everything ok
Ask for feedback or a testimonial/review
Send an email that includes the most common product-specific FAQs right in the body to save them having to hunt them down on their own
Send links to product use/care guides to help them take care of or get the most out of their purchase
If your product is something they would run out of or need more of, follow up to remind them it’s time to purchase again
If your product is a service, send emails to remind them to log in or access your resources
Hopefully, these ideas spark some of your own that are specific to your own brand and what you’re selling! The most important thing is to just think of emails like this as a way to extend the brand experience. And just because they’re automated doesn’t mean that they shouldn’t feel personal! In fact, this is a great way to really make a lasting impression on each and every customer or client to encourage them to keep coming back for more. If you liked this post, be sure to also check out this one: 4 Post-Sale Emails Every eCommerce Site Needs!

4 Post-Sale Emails Every eCommerce Site Needs
Email marketing isn’t just about asking people to buy something -- it’s also a great way to interact with people after the purchase! Adding these 4 types of post-sale emails will help you take things from basic and automated to personal and engaging.
Of all the marketing options available to you as an eCommerce business owner, the one I think worthy of most of your time and attention is: email marketing. That’s right. Not social media. Not paid ads. Not influencer marketing. Nope, the thing worth most of your attention is probably one of the most straightforward.
The funny thing is that I’ve been hearing naysayers say for… oh, I dunno, at least the last 15 YEARS that email is dead and every year they’re proven wrong again and again. According to this study even though there are lots of marketing tools available to you if you look at effectiveness, email marketing reigns supreme with an ROI of 4400%. There are lots of reasons to not bank on social media but I would say that kind of ROI really should speak for itself.
The biggest mistake eCommerce businesses make when it comes to email marketing is assuming it’s all always about the sale. But there are lots of other reasons to send emails! Here’s a quick list to get you thinking outside the box when it comes to the types of emails you have in the queue. Of course, if you use something like Squarespace Email Campaigns, you can have these all automated, making life even easier!
Thank You Emails - Go beyond a basic order confirmation email and include a heartfelt thank you! After all, you just convinced someone on the internet to type their credit card information into a form. The least you can do is not be a robot. Taking the time to customize your shop’s email notifications to inject a little of your brand’s personality into the stock layouts and content will go a long way in starting to build brand loyalty.
Delivery Notifications Emails - People expect a shipping notification to know when their orders are going to arrive at their door. Luckily Squarespace makes it easy to send these out automatically along with the shipment tracking information! I say to take this a step further than that and send another follow-up email when their order is delivered. You can easily do this with a shipping extension like EasyShip + Zapier.
Product or Service Information Emails - Don’t assume that everyone reads your site or FAQ pages word for word and send out some helpful information on how to get the most out of your products after they’ve arrived. This could include helpful things like helpful PDF downloads if your product is very technical or even just links to blogs or video content about how to use or care for their purchase. If what you’re selling isn’t a thing at all but a service or something customers experience instead, send emails reminding them about their purchase and how to get the most out of it.
Surprise & Delight Emails - Another thing I love about customer profiles on Squarespace is how easy it makes it to send super-targeted emails. Use this tool to your advantage and send special promo codes, offers, or free gifts to your VIPS. You can narrow customer groups down based on how long people have been customers, how many purchases they’ve made, or even how much they’ve spent in total with you. Since you know that these are your most loyal fans make sure they feel seen and recognized!
Bottom Line
Email marketing isn’t just about asking people to buy something -- it’s also a great way to interact with people after the purchase! Adding these 4 types of post-sale emails will help you take things from basic and automated to personal and engaging. The best part is that for the most part this can all be done using Squarespace’s built-in tools!

Using Squarespace as Your CRM, Part 2: Crash Course on Updated Member Profiles
Learn how to view, understand and manage your relationships with your website visitors and customers using Squarespace Profiles. Armed with the right information and some key strategies, you’ll be able to more effectively grow your business and communicate more effectively.
I love checking out my blog’s analytics because it tells me what you are interested in learning and one of my most popular past blog posts is this one all about using Squarespace as your CRM. There have been quite a few notable updates and improvements to how customers are managed and organized so I thought an updated version was called for! All of the info in the original post is still possible, but it’s pretty quick and surface-level compared to this deep dive. Check out that post for an overview of CRM-like activities you can take on Squarespace and then come back to this post for a crash course on how to take things to the next level!
When it comes to eCommerce, there’s lots of info out there about things like pricing, shipping, inventory, and marketing but less on what really matters: customers! One of the great things about Squarespace is that it offers one place where you can see everything about your customers, mailing list subscribers, and members or donors so that you can really dig into how people are engaging with your brand.
The built-in tools in the Squarespace Profiles panel are so powerful but I think they are probably underutilized by most shop owners. In this post, we’ll dig into the details so that you can learn how to view, understand and manage your relationships with your website visitors and customers. Armed with the right information and strategies, you’ll be able to more effectively grow your business. Let’s dig in!
How to Get There & Main Panel Overview
From the home menu > PROFILES. From here you can choose to see everyone all lumped together in one list, or filter the view to see just subscribers, customers, members, or donors. Keep in mind that some people can be subscribers but not yet be customers and vice versa. You can also see on the main list who has opted in to receive marketing from you and who has created an account on your site without needing to click into anyone’s individual profile. (One thing to note throughout this post is that all info about “subscribers” assumes that you use Squarespace Email Campaigns, which you can learn more about in this post.)
Individual Profiles
Each person who has interacted with your site in one of the following ways automatically gets a profile created for them:
They make a purchase of any kind (regular product, subscription product, membership, etc.)
They create an account
They sign up for one or more of your mailing lists
They opt-in to receive marketing messages from you
They make a donation
If you click on someone’s name, you’ll get into their individual profile. This contains the following info:
Name
Email Address
An overview of engagement with your site
Tags
Notes
From inside an individual profile, you can also click on the customer or subscriber cards to get more details.
Customer Details

The Customer Details card
For people who have bought from you, a Customer Details card will be visible in their profile.
Clicking into it will show you the following info:
Total amount spent
Date of their last order
Average order amount
Total number of orders
Last addressed used
Default payment method (if they have one)
A listing of all their orders, which is clickable through to the Orders panel where you can do things like mark orders as fulfilled, resend notifications, add specific order notes, etc. (For more on what you can do there, check out this post.)
Note: if you are using Member Areas, anyone who purchases a membership will also show up as a customer! This is helpful to know because you can technically then access this person on both your “Customer” and your “Members” lists; they are just going to give you a different look at the same interaction. The Member Details card contains their membership status, the date they first became a member, how many member areas they have access to, and a list of exactly which member areas those are.
Subscriber Details
If people are subscribers, their profile will include a card just like the Customer Details card above except this one will drill into details like:
Subscriber status
How long they’ve been a subscriber
How many lists they are subscribed to
Exactly which lists they are subscribed to
From this panel, you can also manually unsubscribe someone from any of the lists they are subscribed to by clicking REMOVE.
Profile Notes
For each profile, you have the ability to add private, internal notes so just to be super clear your customers cannot see your notes!! Like I said above, you also have the ability to add notes in the Orders panel so, in order to keep things organized, you’ll want to determine for your business when notes should be added to specific orders and when they should be added to the whole profile.
For example, if a customer emailed and asked for a certain order to be left with their neighbor because they weren’t going to be home for delivery -- order note. If the same customer included some specific delivery info such as gate instructions or to always leave packages in a certain location -- profile note. Make sense?
Notes are helpful especially if you’re working with a team and want to log interactions or other info that might be helpful to document for reference later on. The thing about notes though is that they are not searchable and you can only see them by intentionally clicking into the specific profile or order info. For this reason, some things that you may want to include as notes would actually be better off as tags!
Tags
Think of tags as quick notes that many different customers, subscribers, or members have in common. These are attributes that can help you organize profiles, analyze trends, and drill into specific niches in your audience. Tags are also searchable (more on that below)!
You’ll want to use tags instead of notes any time you’re thinking about putting someone into a group along with others. So, say you have a subset of your customers that are social media influencers. You could definitely add a note to their profile indicating as such but this would be lost data. You would have no way of pulling together everyone onto one list that contained a similar note. But you could do this by adding a simple “influencer” tag!
Other ideas for tags are things like:
VIP tag - for people who are your best customers, spend the most, have placed the most orders, or have been around the longest, etc.
Tags based on preferences - for example, you could create a tag for each of your product lines or for specific brands and tag based on what customers like
Tags based on customer info - you could create a tag for each month of the year and tag customers based on their birthday month
Tags based on dates - for example, a tag for all members who signed up for a specific membership before or after a certain date
Remember that just like notes, tags aren’t visible to customers in any way!
Creating Filtered Searches
Here’s where the magic really happens and where all of the above starts to come together! With filtered searches, you’ll really start to see the power of Squarespace to help you have more insight into your audience and also better communicate with them. Filtering narrows down your list so that only see people who fit certain parameters.
Filter By Tag
One of the most obvious ways to filter your list is by tag because tags are already a way that you’ve set up as important to your business.
Filter By Other Criteria
Squarespace has provided a super robust range of built-in filters that you can use for segmentation. Here’s an overview of all the things you can filter your list by drilling down to just very specific profiles:
Whether someone has an account or not
Subscriber details:
Whether they’ve agreed to accept marketing or not
By specific mailing list
By subscriber date (users who subscribed either before or after a selected date)
Customer details:
Customers who’ve spent a specific minimum or maximum amount over their customer lifetime
Number of orders (max or min)
By last order date (customers who ordered either before or after a selected date)
By how long they’ve been a customer (either before or after a selected date)
Member details:
By specific member areas
By how long they’ve been a member (either before or after a selected date)
Combine Factors for Super Specific Searches!
Getting fancy here but you can combine any number of the factors above to create super specific segments. For example, if you want to just see people who are tagged that they love XYZ brand and haven’t ordered in a while you can do that. If you want a list of only your biggest spenders who have also opted in to receive marketing messages AND who have a May birthday? Go wild.
Creating Saved Segments from Searches
Being able to filter your list down by all sorts of criteria for your casual browsing pleasure is fun and all but before you can do anything with the info, you’ll need to save the search as a segment. When you’re satisfied with the list you’ve created by applying all the filters you want, just click on Save Segment and give it a name. Now you can refer back to it quickly any time you want and use it as the basis for email campaigns or other marketing or reporting activities.
Hint: Something to keep in mind is that if you choose a profile type (i.e. just Subscribers or Customers) in the left panel before applying search filters, the resulting segment will only include users of that type. For example, if you click on subscribers and then filter down and click Save Segment, the segment will only ever show Subscribers. This may be your intention but if not, be sure to always start your searches from the “All” list.
How to Put This Info to Work
Up until this point, sifting through all this user data has just been for you. But when you’re ready to start thinking about how to put this info to work, here’s how!
In one of my hypothetical examples above, I mentioned the idea of creating a tag for each month of the year and tagging customers based on birthday month (you could use a simple form to gather this info). As each month approaches, you could create a Saved Segment for that month, create a special coupon code and then send them a special birthday offer!
You have two options for how to do this:
Squarespace has made it super easy to jump right into drafting an email campaign where recipients will just be people that are in that segment by clicking the Create Campaign button.
If you don’t use Squarespace Email Campaigns, you can also export your profile info as a CSV and then use Google Sheets to manipulate your list and import it into your own email marketing platform.
I’m hoping that this crash course has you thinking of how you can grow your email list, cultivate your relationships with customers and build your brand by creating super-specialized content that’s catered to each of your saved segments!
Squarespace Profile FAQs
-
Nope - they are there as a record of the activity of each unique email address on your site.
-
Not unless they have more than one email address. It’s a user’s email address that is used to link everything together: account info, order info, subscriber info, etc. That being said if a customer placed an order with a different email address than they used to previously sign up for your email newsletter that would result in two different profiles.
-
250 (that’s a lot!) - I would recommend not having more than you could reasonably scan through. Maybe a dozen or so max?
-
Split answer: Right now you are not yet able to auto-tag customers :( I’m hoping this will be a feature that is added soon! However, you can add or update other profile information automatically using the Squarespace Commerce API. More on that here!
-
Users that create accounts and purchase a membership are automatically tagged by Squarespace as “accepts marketing.” Members of free member areas will be sent an automated opt-in confirmation after signing up that they will need to click on to confirm that they want to receive emails from you.
-
People who are customers through Squarespace Scheduling are not pulled into the Profiles panel. However, you can manage customers, set up automated emails, and do similar CRM-like activities for scheduling customers from within the Scheduling area. For more info on this, check out this post: How to Use Squarespace Scheduling as an eCommerce Tool
-
In addition to being able to view and manage customers from the Profiles panel you can also see some customer info in the Squarespace Commerce mobile app. Check out this post for 5 Squarespace Commerce App Tips & Tricks!

Fun With Zapier for eCommerce
If you’re not already using Zapier to make running your eCommerce business easier, don’t be intimidated by it! I’m breaking down the best apps for shipping, email marketing and eCommerce - plus some fun zap ideas to get you started!
Of all the business stats I track, there’s one that I really look forward to seeing more than all the others: the number of tasks my Zapier account runs each month. Seeing how many mundane tasks I’ve automated that used to eat up my precious time just makes me so happy!
The surprising thing to me is always learning just how many business owners aren’t already using the power of Zapier to simplify their lives. Zapier is like having a very well-behaved personal assistant that never asks for a day off - plus, it’s fun! You don’t have to be really technical at all and I promise that you can’t help but get a little giddy when work gets done magically in the background for you.
Not sure what to automate? The rule of thumb is that anything you have to do over and over could and should probably be automated. This is going to look different for every business depending on the exact tools you use but to get your wheels turning, below are some ideas specifically for eCommerce businesses!
Zapier 101
If you’re a Zapier neophyte, here’s the gist. You have triggers and you have actions. This is basically saying when this one thing happens (the trigger), do this other thing (the action). Each “zap” needs to have at least one trigger + one action. (Some advanced setups can string lots of different actions together or get really complex with different things like filters and conditional rules but that’s for another day.)
When you are setting up a Zap, Zapier will ask you which apps you want to connect but I think if you remember that you’re not just connecting them but rather asking them to talk to one another, that's the key. Each app that is connected to Zapier comes with its own playbook; a certain set of actions and triggers that that particular app’s developers built into it.
The reason why this is important is, as you’ll see below, knowing which actions can trigger other actions is the start of building yourself a future where you make technology work for you instead of the other way around. Now, while all my apps are busy talking to one another, I can be hanging out doing nothing. No more babysitting my apps. That’s it. Easy!
Ok, on to what I think are the best apps for shipping, email marketing, and eCommerce, along with some zap ideas to get your creative juices flowing.
Shipping Extensions
Shipping is kind of the linchpin of eCommerce, right? A lot of businesses are already using a shipping extension to make shipping faster, easier, or more affordable so why not take things a step further and include your shipping activity in some fun automations?
Winner: Easyship
Easyship just released their Zapier integration and it has some of the best triggers available when it comes to shipping extensions.

Fun Zaps to try:
(Bonus: these both can go hand-in-hand with the email marketing recommendations from the next section.)
Shipment Delivered (Trigger) - How awesome would you look to your customers if you sent them a nice little note right after their shipment was delivered saying thanks, letting them know what to expect or what to do if something isn’t right? You can use the Shipment Delivered trigger to do this or even to tag a customer in your CRM so you know to follow up X number of days later.
Shipment in Transit (Trigger) - Build some hype and excitement for what’s en route by letting customers know not just that their order has shipped but that it’s getting close. Depending on what your product is, this could also be useful if you are shipping anything timely or perishable that you want to make sure people know to keep an eye out for.
Runners Up: ShipStation and Shippo
ShipStation and Shippo don't have all the same cool triggers that Easyship does but they are both still plenty powerful. ShipStation has an “Order Shipped” trigger and Shippo has a “New Shipping Label” trigger that could both be used to keep customers in the loop on their order status.
Email Marketing
You know I preach the power of an email list time and again. Your email list is clutch and, when connected to all the other apps you use in business, worth its weight in gold.
Winner: FloDesk
This was a close one because Klaviyo (below) is super powerful when it comes to eCommerce email marketing and nice integrations with both Shopify & Squarespace, but when it comes to Zapier, Flodesk (use my code K4I8S1 to get 50% off for life!) has more triggers and actions to play with and that’s what makes it the front runner to me. This should show you that with Zapier it doesn’t matter if the apps you love have native integrations or not - you just make them on your own!
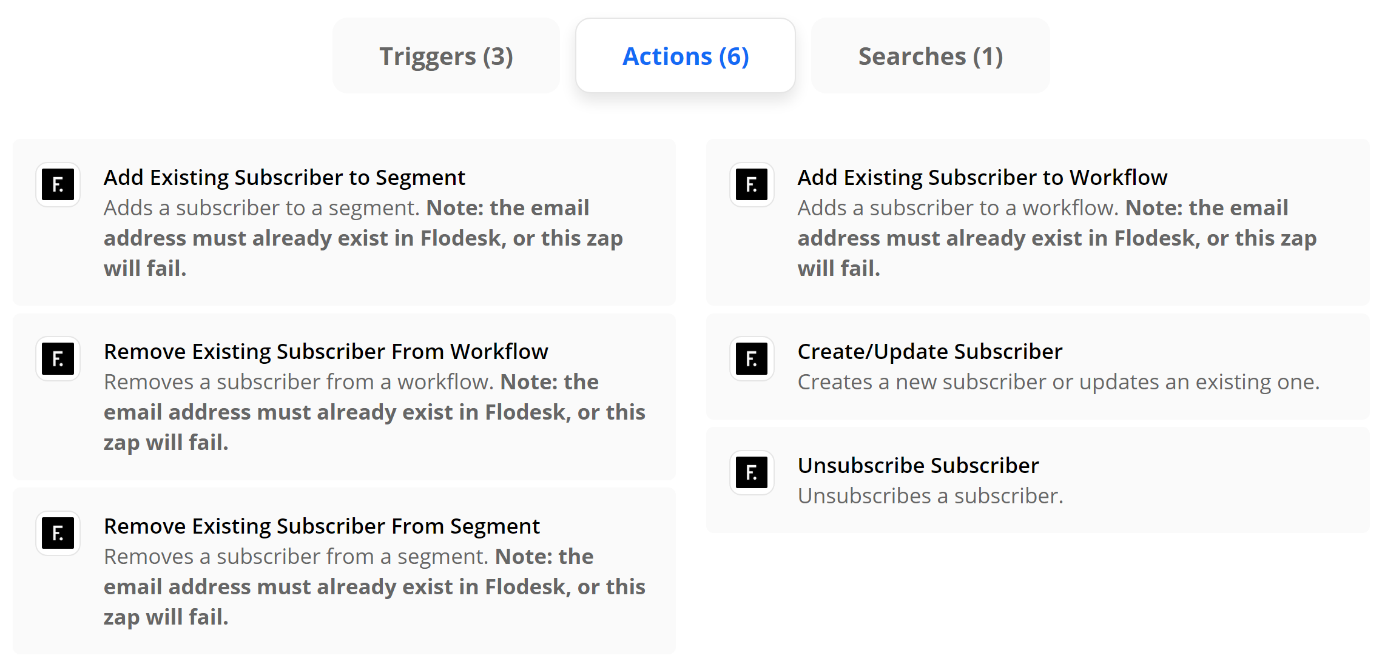
Fun Zaps to try:
Add or Remove Subscribers to/from Segments (Action) - Fun triggers to pair with this action would be things like when someone buys X, add them to X segment; when someone buys Y, remove them from Y segment, etc. This is especially useful when paired with the internal automations within Flodesk so that certain workflows are triggered based on getting added to certain segments.
Subscriber Added to Segment (Trigger) - This is different from above in that you can also think of what you might want to happen after someone gets added to a segment. Using the subscriber added to segment trigger, you could set up an email to automatically get sent out to someone on your sales team so they can follow up with leads personally or you could also add the subscriber’s name to your CRM so you don’t have to worry about double entry.
Remove from Workflow (Action) - Think of this as the escape hatch out of your email funnel! There’s nothing more annoying than companies that still send you sales emails after you’ve already become a customer. It really underscores how automated things are instead of using automation to make things feel personalized. Use a trigger that says when someone finally buys [the thing you’re selling], to remove them from the sales workflow so they no longer receive any of the sales emails.
Runner Up: Klaviyo
In much the same way as above, you can connect Klaviyo to a number of apps to help you send highly targeted messages. Some ideas are to create an event in Klaviyo anytime someone fills out the contact form on your website or to update a subscriber based on their activity so they only receive the messages that are most pertinent to them.
eCommerce
Help make sure your website isn’t lonely by connecting it to other apps! Keep in mind that I definitely wouldn’t choose a platform based on Zapier alone but it is definitely nice to know what the capabilities are for each of these if you’re starting to explore making a move to one of them from another.
Winner: Shopify
Shopify is the leader when it comes to Zapier with a whopping 10 Triggers, 9 Actions, and 6 Search functions available. The best thing to me is that even the lowest-paid Zapier plan (Starter, $19.95) could replace a ton of third-party apps that most Shopify store owners find themselves needing to add in order to get the functionality they’re looking for. All these apps add bloat - and cost! A little Zapier savviness could help on both those fronts.

Fun Zaps to try:
New Abandoned Cart (Trigger) - give people a reason to come back to your site with a custom abandoned cart email. Use this trigger to connect to an email marketing action (see above) and you can send abandoned cart emails that are 1000x better looking - and higher converting - than something generic.
Update Product (Action) - want to keep all your inventory in a nice little Google sheet and then have any updates automatically show up on Shopify? Totally possible and a total game-changer if you find logging in to your website every time you want to put something on sale super tedious and unnecessary.
Runner Up: Squarespace
Squarespace is woefully lacking in the primary triggers and actions department, but their Commerce API and some creative advanced Zapier tricks can make almost anything possible! For more on this, check out this post: How to Connect Squarespace to Anything!

How to Increase Customer Lifetime Value Through Email Marketing
Discover five email marketing automations (plus a bonus!) you should be using to increase customer lifetime value with guest blogger Madeleine Murrey of Madeleine Murrey Media!
Any savvy business owner will tell you that it’s never smart to put all your eggs in one basket and yet so many still rely almost solely on social media in an attempt to build relationships with customers. But, as guest blogger Madeleine Murrey explains in this awesome post, email marketing is really where it’s at! If you’ve never done much work in email marketing, it can feel overwhelming at first since it definitely takes a bit of upfront work — but the payoff is so worth it! And lucky for us, Madeleine has put together some great tips and super actionable advice on how some simple email automations and strategies can seriously help build legions of loyal fans. I think you’ll find this post super helpful even if you’ve been dabbling in upping your email game for a while and are looking for ways to continue to optimize. I’m happy to share it with you! - Kristine
When it comes to starting an email list - most business owners know the basics - welcome emails, abandon cart emails, and post-purchase thank you emails… but then put the others on the backburner.
You’ve got the basics down, which are great low hanging fruit to monetize your audience - however, there is so much more room for growth with your email marketing!
Email marketing is an essential part of your business and creating those VIP customers who will be fans for life.
Yeah, social media and advertising can appear flashier, fancier and more appealing, but the best part about email marketing is you OWN your list - you are not tied to Facebook, or Instagram, or even Google. Even if something happens with your email provider, you are in full ownership of your list and have the ability to pivot quickly with email marketing. Kristine has a great post on why you shouldn’t bank on social media and why you need to build an email list here.
But that’s not the only thing - email marketing to this day still brings in more ROI than SEO, display, advertising and other forms of digital marketing. Even DMA says “For every $1 you spend on email marketing, you can expect an average return of $42.”
Now that we’ve covered how much of an impact email marketing can have on the bottom line, you might be thinking “well, how do I even get started?!”
Let’s cover the best type of email marketing - automated emails. The reason why I say this is the “best” is because this is the kind of emails that you can set up, and it automatically triggers based on users behaviors.
Someone signs up for emails through your website? They get a welcome email series!
Someone purchases through email? Once they’ve received the item, let’s offer them another product that pairs well with the first item?
Someone makes a reservation at your restaurant? Offer them a special promotion 30 days after their purchase to get them back in.
The opportunities are endless… and once you get this set up, it is running essentially on autopilot.
Let’s talk about the types of automated emails you can get in place to hit that $1 spent on email marketing to $42 in return.
Welcome Emails
I break this down into a 3 series email that way you give your audience little pieces at a time.
Welcome email #1
This email is literally welcoming your audience to your brand. You can cover who you are, how you started, what types of emails you will be sending (tips, tricks, promotions, discounts, new product announcements, sales, etc.). I also always like to add a 10-15% off coupon to people who haven’t purchased before - this way you get them at the first touchpoint in email and while they are still very engaged.
Welcome email #2
This email is what I like to call the “social sharing” email. Get them to like your page! If you are on Instagram, Facebook, YouTube, Pinterest, Twitter, or any other social channels - get them to follow you! This will make sure you are able to communicate with them through multiple different touch points which will help keep you connected to your audience.
Welcome email #3
In the third email, I like to promote “favorites”, which is basically any item or service that you offer that’s a favorite of your frequent purchasers, promote this here and get them to see what others like about your offerings!
Cart Abandonment Emails
This one is pretty straightforward. If a user adds an item to their cart, enters their email address, but doesn’t complete the transaction (put in their CC details) then this email will get triggered. This email can be as simple as “you forgot xxx in your cart, grab yours today before we run out of stock”. Creating that urgency, or offering a discount, can certainly increase the likelihood of the end user purchasing!
Upsell/Cross Sell Emails
Upsell/Cross Sell Emails have typically been one of the top performing emails I’ve set up for clients. These emails promote products/services that are like the other products/services that customer has bought before. Maybe your customer didn’t know the other products existed on your site, and this can help showcase all of your offerings that are specifically tailored to that customer.
Birthday Emails
Who doesn’t like a happy birthday message? It shows you care, it shows you notice them, and creates a sense of relationship with your subscribers. Note, this one will only work if you capture your subscribers birthday in the sign up form on your website, or if you have it stored and can import that data into your email marketing software.
VIP Emails
Everyone likes knowing if they're a VIP of a certain brand, right?! We like what we like and it’s nice knowing you might be a special customer because you love their products/services (so much so, their purchase history proves it!)
Depending on your product or service, you can define who your VIP customers are. If you sell mattresses, your VIP customers might look a little different than if you’re selling moisturizer since you only get a mattress every 10 years, or so. So take into consideration how frequently your customer needs to purchase to be the top 5-10% of your customers, and create an audience around that to acknowledge and incentivize them for being so loyal to you and your brand. This email works really well if you offer a 10-15% discount to encourage them to keep coming back for more and show your appreciation!
And, one other type of automated email as a bonus!
Bonus: Review Request Emails
While this email might not generate revenue, I wanted to include this one in if you have the ability to leave reviews for certain products/services on your website. This can really help future customers navigate through to find out what others think of what they are about to purchase. Asking for a review is a simple way to get more feedback, too!
I could go on and on with other email marketing tactics that are great for generating revenue for your business.… browse abandonment (not to be confused with cart abandonment), 1st purchase anniversary emails, winback emails, sunsetting subscribers, optimizing emails, email deliverability, and more!
However, these types of automated emails have been the staple to taking a subscriber and turning them into a first time purchaser or even celebrating a huge milestone with a valued customer through VIP automated emails.
Summary
Get your automated emails in place as these are low-hanging fruits to increase your overall revenue!
Welcome Emails
Cart Abandonment Emails
Upsell/Cross Sell Emails
Birthday Emails
VIP Emails
Bonus: Review Request Emails
Overall, you want your customers to stick with you as long as possible, that is why the CLV metric is one of the most important metrics for your business. Strengthen your relationship with your customers through email marketing and you will soon turn many more customers to those VIP’ers.

Simple eCommerce Marketing Ideas
Launching an online store? Don't forget marketing details like email lists, upsells, post-purchase emails, live chat, and branding. Build customer loyalty and repeat sales with these simple yet effective ecommerce marketing tactics.
With everything that goes into launching an online store, it's easy to forget about some of the little details that will help you with marketing. There are lots of great ways to get people shopping and help you stay connected with past customers. Here are a few to get you started:
Ask Shoppers to Sign Up For Your List at Checkout
An easy way to build your email list while also increasing repeat purchases and building customer loyalty is by asking shoppers to join your mailing list at checkout. This is an easy, low-pressure way to ask people if they’d like to hear from you in the future and chances are if they are buying from you once that they love your products or services and might be interested in shopping again when you launch new products or have sales or promotions. Whether you use MailChimp, Squarespace Campaigns (my favorite), or any other email marketing platform - ask shoppers if they’d like to be added to your list at checkout.
Related Post: How to Create a Seamless Checkout Experience
Add Upsells & Cross-Sells
One of the easiest ways you can get people to buy more is by simply asking them. (Ha! This isn’t really a mind-blowing strategy, is it?) But really, adding upsell and cross-sell opportunities for your products and services are a great way to let site visitors discover more of what you offer. Even if they don’t go for it this time, it’s a good marketing opportunity to just remind them of other things you sell or do. It may be something they decide to purchase next time or something they tell their friends about now that they know you offer it. (Hint: Before you can do this, you really need to make sure have all your product categories figured out!)
Related Post: How to Upsell & Cross-Sell on Your Online Store
Send an Automated Email to Follow Up
Go beyond the standard order confirmation email and send a customized message automatically to your customers or clients. Automated commerce emails that are linked to your products or services can be a great way to follow up with additional information, check to see if customers enjoyed their purchase, or ask them to share about their experience on social media. So many options!
Related Post: How to Set Up Product-Specific Email Automations with Squarespace Campaigns
Add Live Chat
Live chat is proven to be one of the most impactful ways to connect with potential customers and clients before, during, and after they purchase from you. How do you use this as part of your marketing strategy? Easy! Every interaction with a real person (you or a member of your team) is an opportunity for you to help, engage and provide support and build strong brand affinity.
Related Post: 3 Live Chat Tips for Your eCommerce Website
Inject Your Branding Wherever Possible
The standard order fulfilled, order confirmed, and order refunded emails are functional enough that if you don’t want to write anything custom you’d certainly be just fine. However, these are all great opportunities to show off some of your unique brand personality and voice! Make the writing sound like you and match the rest of your site, make sure your logo or branding is incorporated, and invite customers to have a conversation with you if you’d like. If you ship physical products, make sure things arrive in a branded box or with some other brand material. A little personalization goes a long way in building loyal customers!
Related Post: A Minimalist’s Guide to Branding

Kristine Neil
Fractional Web Partner
I'm Kristine Neil - a communications strategist who has spent 20+ years designing websites, first running a full-scale design and marketing agency, and now leading my own studio. I've been the creative director managing the work, the coder quietly fixing what others couldn't, and the strategist in the room asking why before how. Somewhere between the MBA and the other degrees, I decided web design was just one tool in a much bigger toolbox - the real work is figuring out what you're trying to say, who needs to hear it, and what's getting in the way. A website is just where all of that comes to life.
I build on Squarespace, and after years deep in the platform I know how far it can go and when to push past its limits. These days, I'm especially drawn to working as a fractional partner - getting to know an organization over time and helping with whatever moves them forward, whether that's a full redesign, an ongoing hand with content and strategy, or just being the person who knows their site best. I write here about eCommerce, web strategy, and making the complex feel a little more human.