

Notes on building smarter websites for actual humans.

Take the Extra Step: Customizing Your Store’s Email Notifications
Let your customers know that they matter to you beyond the sale by bringing your brand into their inbox. Customizing the default emails your site sends is a quick way to create a personalized experience and Squarespace offers lots of options to quickly and easily edit all the stock emails in one place.
Updated Dec 2023
Customer email notifications are one of those things that often get overlooked or skipped by eCommerce novices. They assume the defaults will work just fine and don’t do much beyond maybe adding a logo. This is a giant missed opportunity! Taking just a small amount of time to customize your store’s email notifications lets your customers know that you care about their experience beyond the sale and goes a long way in helping build brand credibility.
Customers get email notifications for a whole bunch of different activities they may take on your site including when they buy something, create an account, join a membership area, or even make a donation! Squarespace recently updated the entire email editor to provide more design and personalization options so it’s a great time to revisit this even if your site’s been live for years.
WATCH THE VIDEO
GET THE DETAILS
How to Personalize Your Emails
Something that’s a great time-saver is the ability to set some global styles that will apply to ALL the emails that your site sends. (Also points for keeping branding consistent!) To get to the settings, just click on COMMERCE > CUSTOMER NOTIFICATIONS. To change the style options, just click the EDIT EMAIL button in the Global Email Styles preview pane. Business settings are under the… Business Settings link. Here’s a summary of all the possibilities and some important things to note:
Global & Business Settings
Global Email Styles
In terms of style, you have lots of control. You can edit colors, fonts, buttons, and the header & footer appearance.
Colors - I would recommend keeping a white/light background so that your emails are always easy to read. Then, just add in your signature brand color as buttons, below. Choose colors that match the ones in your Site Styles exactly.
Fonts - You’re only allowed to select from certain custom-paired font packs and cannot use custom fonts in emails (more on this at the end of the email if you need an explanation on why). You can change things like font sizes and text & link colors to suit your brand but you’ll need to pick a font pack that feels like your brand even if the fonts aren’t exactly the same. A good tip if you used one of the font packs in your Site Styles for your website, just pick a similar themed one for your emails; i.e. serif, sans, or mixed.
Buttons - You can change the style, alignment, colors & font of the buttons that appear in your emails. Don’t think too hard on this and just make them match your site’s settings!
Header & Footer- You have lots of options to be able to set your email headers & footers up so they don’t look so “default-y” 🙃 Play around with some great preset layout options but then choose colors and fonts that match the other choices you’ve made, above. I always think it’s a good idea to choose to display your logo in emails - it makes things look really official and personalized vs just having your site title. Or, you could choose to show your site title in the header and your logo in the footer! Another great footer option that you should enable if you are active on social media is including social links!
Don’t worry if this seems like a lot of options. The best part about taking the time to just edit the global email settings is that you only have to do it once and it automatically applies to everything!
Business Settings
You’ll want to make sure that you’ve added your business info by clicking on SETTINGS > BUSINESS INFORMATION from the home screen. This will feed that info into the email notifications section. Don’t omit this information because not only is it helpful to your customers, in some places it’s actually legally required to include in the footer. Here are a few tips when it comes to the business settings in this section:
The “From” email address should absolutely be a custom, branded email address. Do NOT use a Gmail, Yahoo, or other free email address! Not only does this look unprofessional but it can also affect email deliverability issues. You don’t want to end up in everyone’s spam box!
The “Reply-To” email should be whatever inbox you or your team check the most often. You want to be able to read and reply to customer emails quickly. If you’re setting up an email alias for all your shop emails (ex: shop@yourdomain.com) that’s not your main inbox, I would suggest also setting up forwarding on that email. This could be simple (all shop emails go to X person/dept) or more complex using a tool like Zapier.
💁♀️ Note: if you send test emails to yourself to check out how things look, they are all going to come from “no-reply@squarespace-mail.com” but that’s just for testing! Your actual reply-to email will be used for real emails sent from your site!
Customize With Merge Tags
Before we get into all the different types of emails you can customize, a quick review of merge tags! Honestly, these are the key to making sure your customers feel loved and appreciated. It’s like getting a piece of snail mail that isn’t junk! Here are the different elements you can insert into your emails:
Customer first name - abandoned cart, product restock, customer account welcome, password reset & password updated emails
Linked site title - all emails
Order number - order confirmed, order refunded, order fulfilled, and digital download emails
Subscriber first name - subscription canceled and subscription authorization required emails
Subscription name - subscription canceled, subscription authorization required and subscription payment declined emails
Donor first name - donation confirmation emails
To add a merge tag, just highlight the text you want to customize and click the arrow icon in the formatting bar. Then just select the tag from the options. Here’s what it looks like:

💡 Merge Tag Tip! You can also work merge tags into subject lines or the email preview text to make emails really feel personalized and stand out in your customer’s inbox!
Descriptions of All The Email Types
Ok, now for the fun part! I promise that this may seem like a TON of emails to have to work on but for the most part, you’re going to let the default language and global style settings do most of the work and then just pepper in some personalization and merge tags here and there so that your emails stand out from the rest. I’ve listed out all the emails below and then added some ideas for how to customize them where I feel like it would be most impactful.
🤓 Remember in general I wouldn’t mess around at all with styling individual emails; do that at the global level! This is just focusing on the content or the actual wording of the emails.
💡 Tip! Squarespace is going to automatically fill in things like order numbers, order details, transaction info, tracking info, etc. into the various emails so you don’t need to add any of that info on your own. Along those lines, keep the personalized copy you add as general as can be as the same email(s) will be sent for all of your products/orders even if you sell lots of different things.
🚩 I’ve bolded the emails below that I think are most important so if you’re short on time, customize these ones first and come back to the others. I’ve also noted some emails as self-explanatory which is… self-explanatory.
General Orders
Order confirmed - this is arguably the most important email your site will send to a customer. It has the potential to go way beyond just providing a record of their order. A great confirmation email reassures the customer that they made a great choice, expresses gratitude for their business, and opens up the 1:1 conversation between them and your brand. It allows you to use your brand voice beyond your website and welcome customers into the fold. You can do things like asking them to follow you on social media or provide additional value by directing them to additional content on your site that relates to what they ordered. If you customize nothing else, do this one.
Customizing Product Emails by Product Type
Update! Since this post was first published, Squarespace released the option to create custom order confirmation emails based on the product purchased. This means that if you sell a mix of physical, digital & service products your order confirmation emails can have a custom copy for each one. This is super helpful because it means that if you want to include special information about shipping or lead times that would make sense for an order for a physical product but not for a digital good or service you can do that. It may make sense to include a link to your scheduler in a service email order confirmation or download instructions for a digital good order. Lots of possibilities! To customize these from the Customer Notifications panel go to General Orders > Order Confirmed > Edit > Add an optional custom message based on product type.
Order fulfilled - this is the email that’s going to include the tracking information that you’ve added (or your Squarespace shipping extension has added) to the order. Get people excited for what’s on the way by including an opening sentence or two thanking them for their order and getting them hyped for the delivery.
Ready for Pickup - if you offer a local pickup option, this email is sent instead of the “order fulfilled” email, above. Use this email to provide locals with precise pickup information. Some suggestions are to repeat the hours you’re available for pickup orders, your address, and what’s required to pick up their order. For example, you might require a photo ID or just for them to show you their order confirmation on their phone. If your location has any special parking instructions or a special area for curbside pickups be sure to note that as well.
Order refunded - self-explanatory
Digital downloads - if you sell digital products, apply everything I said for the order confirmation email, above, to this email instead.
Donation confirmed - if you’re a nonprofit or an organization that accepts donations, apply everything I said for the order confirmation email, above, to this email instead.
Payment declined - haha never a fun email to get but you could lessen the sting by injecting some humor into the situation!
Product not available - this email only gets sent if the product inventory drops to zero while an order is processing. If you’re releasing product drops that often sell out or have lots of traffic competing for a small amount of product, this one can be worth customizing. Otherwise, default is probably ok because for most sellers this will not ever end up ever being sent out.
Point of Sale
Order receipt - think of this as the in-person version of the order confirmation email so if you sell via Squarespace POS you could add some pizazz here. I think it’s less important than strictly eCommerce order confirmations because the customer presumably had some sort of in-person interaction with your brand but it’s still an opportunity to continue the conversation or make a good impression.
Refund receipt - self-explanatory
Customer Engagement
Abandoned Cart - according to this recent study, roughly 3 out of every 4 shoppers will leave a site without completing check out. Enabling - and customizing! - your abandoned cart email can help you recover 10% or more of that otherwise lost revenue. I think a strategic abandoned cart email cuts straight to the point so I wouldn’t add too much in the way of copy but your subject line and an opening header or sentence could really make things stand out in a crowded inbox. Don’t forget that you can use merge tags in email subject lines and preview lines!
Waitlists - if you’ve enabled waitlists for sold out, back-ordered or not-yet-launched products, this email is what will let people know when a product they were interested in is available for purchase. Note: these emails aren’t automatically sent by the system; you’ll need to indicate that you’re ready to send them by going to COMMERCE > WAITLISTS.
Customer Accounts
Account created - if you’ve enabled customer accounts, I think this is a good email to give a little love to. Add some personality and let people know what to expect and what they can do to manage their own accounts.
Reset password - self-explanatory
Password updated - self-explanatory but keep in mind that the reset password link expires after 24 hours.
Gift Cards
Gift card issued - this is admittedly not the best-looking feature on Squarespace BUT you can make the best of the situation by at least adding some exclamation points!? Yay! A gift!!
Gift card voided - self-explanatory
Subscription Orders
Subscription canceled - self-explanatory, but make sure they know if there is any fine print just to cover your bases
Subscription verification needed - self-explanatory
Payment failed - self-explanatory but see the payment declined email, above. (TL;DR when in doubt, make a joke.)
Member Areas
Membership Welcome - if you’re using the awesome new Squarespace Member Areas feature, this email is the equivalent of an order confirmation email (minus the transaction info, that’s sent separately). This email is your opportunity to offer valuable “getting started” type info, suggest the best next steps, and let people know how to contact you or manage their membership. Don’t make it too long but know that a lot of people will save or bookmark emails and refer back to them later!
Membership Canceled - express some sadness if you must but please don’t do that thing where you guilt/shame people for canceling. Just confirm what happened and move on.
What You Can’t Do
Just a reminder of a few requests that come up occasionally that are not possible:
You can’t turn off any of the emails to stop them from sending. If you are wanting to do this, I would suggest working through WHY. There may be something about the way you have the product or service set up or your own internal process that needs to change if you’re thinking about needing to do this.
You can’t change the default portions that automatically populate i.e. order details, transaction info, tracking info, etc. This is for a good reason - it saves you time! Just like above, if you’re thinking about trying to edit these types of things I would look instead at your fulfillment process or internal business systems first.
Change styles on an email-by-email basis. Another time-saver. Set these things at the global level and be done with it.
Use custom fonts. The reason for this is that the fonts need to be universal so that they display nicely in all different email providers. Custom fonts can be tricky and you’re better off picking something similar but standard even if it’s not a perfect match. Some brand designers will even provide recommended system fonts to use for situations like this since it’s pretty common.
Other Site Emails
While all of the emails above may seem like a lot, there are actually even more emails that your site can send depending on what other features you’re using. These features are:
Squarespace Scheduling
Squarespace Email Campaigns
Afterpay payment plan emails
Email notifications to the store owner & contributors about orders and low inventory
The thing to remember on these emails is that you’ll need to set them up and style them in addition to any of the customer notification emails described in the main part of this post. Most of them have similar options for things like adding a logo to the email header or customizing button colors, etc. but they may not look 100% the same. Just do your best to make them look as cohesive as possible and don’t sweat the small stuff on this. It’s ok if these emails look like sisters instead of twins.

How to Use Product Categories & Tags in Squarespace
In this post, we’ll discover the difference between a category & a tag (hint: they aren’t the same!), how to incorporate them into your site’s navigation and how to create shop subcategories on Squarespace. Plus, I’ll share 4 of my favorite ways to use categories and tags that you may not have thought of yet!
Updated November 2023
Product categories and tags sometimes get relegated to the “I’ll take care of that later” pile for busy eCommerce sellers. But I say put this off at your own peril because categories and tags are AWESOME. Not only can they help people quickly and easily find things, they also have SEO-boosting secret powers! It’s definitely worth it to think strategically about how you can use product categories and tags on Squarespace to help your customers or clients find what you’re selling, discover new things and understand what you’re all about at a quick glance. In this post, we’ll discover the difference between a category & a tag (hint: they aren’t the same!), how to incorporate them into your site’s navigation and how to create shop subcategories on Squarespace. Plus, I’ll share 4 of my favorite ways to use categories and tags that you may not have thought of yet! Let’s get started!
What’s the difference between a category & a tag?
Great question. At first glance, there doesn’t seem to be any difference between these two different classifications. However, these should not be used interchangeably and you definitely want to plan out how you’ll use them before you just go willy nilly tagging products with all sorts of crazy things.
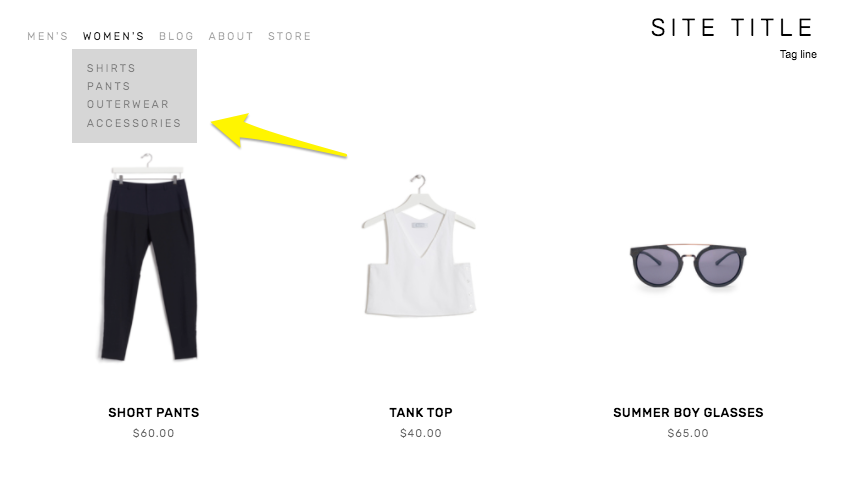
I always use the example of a t-shirt shop because it’s pretty easy to understand but you don’t have to sell physical products to use categories or tags! So, pretend we have a t-shirt shop and we want people to be able to find what they are looking for quickly. Think of categories as the “departments” of a department store. They are what organizes what you offer by subject or category. Smart categories might be :
Men’s
Women's
Kids
Tags, on the other hand, are descriptions of products in each of those categories. So, in the example of our t-shirt shop, some helpful tags might be:
Colors (red, blue, yellow, etc.)
Brand (Hanes, Bella/Canvas, Under Armour, etc.)
Material (Cotton, Polyester, Triblend, etc.)
Another way to think about the difference between categories & tags is that most products/services will fall into only one category but may have several different tags. So a blue, cotton, Hanes youth tee is going to be in just the “Kids” category but then be tagged blue + cotton + Hanes.
Categories are great for SEO
I wasn’t lying when I said that categories have SEO-boosting secret powers! Why? Because categories and tags are considered “metadata” and it’s little language snippets like these that search engines like Google can pick up on to help decipher what you’re all about. Turns out it doesn’t take a ton of artificial intelligence to figure out that if my store’s categories are:
Haircuts
Color
Blowouts
Styling
… that I’m probably operating a salon.
Video: More on categories & tags, when to use them, and why they matter
During a live November 2023 webinar with Squarespace called Five eCommerce Tips, a viewer asked a great question about categories & tags! Check out my answer for more about how to use categories & tags on Squarespace:

Incorporating Categories Into Your Site’s Navigation
Here’s the other awesome thing about product categories on Squarespace: every category is automatically added to the navigation area of your shop. Magic. But, also: dangerous. This is why it’s so, so, so important to make sure that you have a plan in place for your categories. You don’t want your navigation to be too long or cluttered.
It’s also important to note that categories and tags are case sensitive so if you create categories named: Womens, womens and WOMENS you’ll end up with THREE navigation links in your shop with all essentially the same name but none of the same products. Messy!
Another way to use category or tag landing pages in your site’s navigation is to use them to create drop-down navigation menus. This allows you to create another layer of organization.
Creating Nested Categories
Creating multiple levels of shop navigation is like making sure your department store is organized logically into different departments, each with its own little “sub-departments” within them. This makes it easy for people to find what they are looking for quickly, which can reduce frustration and lead to higher conversion rates.
Let’s consider an expanded example from our simple t-shirt shop and pretend we have a full-fledged department store. It would make sense that the navigation would need to visually allow us to “nest” categories within each other. So instead of just lumping everything together in one category called “Women’s” you can instead make subcategories like this:
Women’s
Tops
Tees
Hoodies
Bottoms
Denim
Joggers
Accessories
Sunglasses
Bags
* Note that if you want to create nested subcategories like above that you can add up to three levels max. This means you can have Main Category > Subcategory > Subcategory like in the example above. You would not be able to break the Denim category into more subcategories. If you wanted to do something like that, I would recommend just moving the category up the food chain. If you have enough products that you need more than two subcategories beneath it, that probably means it’s important enough to be the main category all by itself.

Look how fast we can find exactly what we’re looking for!
Other Ways To Use Categories & Tags on Squarespace
Link to filtered collections - Another benefit of creating categories and subcategories is that doing so creates individual page path URLs for each category, optimized for SEO and allowing categories to act as standalone pages. This means that if you are running an ad or a promo for all blue shoes, you can link people right to the filtered subcategory: Shoes > Blue. 🤯 For more on this, check out this Squarespace help article.
Make summary blocks smarter - This is one of my absolute favorite things about Squarespace summary blocks! I almost always add one to a home page design as a way to feature selected categories of products… or to feature “featured” products! Doing this is simple by just clicking on the content tab of your summary block settings and then choosing “Filter Items” to have that block only show what you want it to.
Influence what related products are displayed - I recommend everyone turn on the Related Products feature in their commerce settings because why not?? This is such an amazing built-in Squarespace selling tool that I think gets underutilized by most new sellers. Not only does it help keep people on your site longer by showing them more to look at it, but it can also actually show them more of what they WANT to look at. By default, products that share the same first category are shown in the related products section. If your product happens to not have a category, then matches using the first tag will be shown. If you’re into related products, you might also like this post: How to Upsell & Cross-Sell on Your Online Store.
Display more accurate search results - Adding search blocks or using your store’s built-in search page are other ways to help customers find what they are looking for. And, you guessed it, adding categories to your products helps here too! This is because both categories and tags are indexed for search results in addition to being indexed by major search engines such as Google.
Who should be using categories & tags?
I think everyone could benefit from using categories and tags, if only for their aforementioned SEO benefits! From a size standpoint, you probably don’t need to worry about people not finding what they’re looking for if you only sell one signature service or only a handful of products. But even if you have a small shop with just a dozen or so products or services, why not add that layer of categorization to help people be able to decide what is best for them? For example, if you’re an interior designer and offer multiple virtual design sessions you could categorize them by investment level:
$
$$
$$$
This would help people self-sort and see just the services that they can afford. When you start to think about tags & categories as strategic tools to help visitors find what they need on their own, all sorts of doors start to open up! Done right, taking advantage of this simple feature can boost your SEO, help reduce visitor frustration and increase sales. Thinking about what you sell in terms of categories (and tags, to a lesser extent) can help you create ways for customers to easily discover more and help you create a more dynamic eCommerce website.

How to Set Up Product Add-Ons on Squarespace
Learn how to set up add-on products in your Squarespace shop to offer complementary items and increase your average cart value. Follow a step-by-step guide to enable the add-on feature and link add-on products to your main shop. Boost your sales and enhance your customers' shopping experience!
UPDATED 11/29/23
Watch The Videos
Read The Steps
I have a cool update from Squarespace to share with you that can make your Squarespace shop even better. In this blog post, I'll show you step-by-step how to set up add-on products in your Squarespace shop. It's a great way to offer complementary items to your customers and increase your average cart value. So let's dive in!
First things first, log in to your Squarespace account and go to your shop dashboard. Once you're there, follow these simple steps:
Choose the product you want to add an add-on to: Let's say you're selling a delicious marinara sauce. To set up an add-on product, go to the product page and click on "Edit Product".
Scroll down to the "Selling Tools" section: You'll find it by scrolling down the page or clicking on "Settings" and then "Selling Tools".
Enable the add-on feature: Squarespace has made it super easy for you to include a product add-on on your product page. Look for the option that says "Product Add-On" and click on it.
Add the add-on product: You can add up to two four products as add-ons. Keep in mind that the add-on products need to be physical, service, or digital products. They can't be subscription-based, and they can have up to one product variation. In our example, let's add some fresh ravioli as an add-on to the marinara sauce.
Save and publish: Once you've added the add-on product, click on "Save" and let Squarespace do its magic. Now, when your customers visit the marinara sauce product page, they'll have the option to add the fresh ravioli as well.
Repeat the process for other products: If you have another product, like pesto sauce, that you want to offer add-ons for, simply go to the product page, click on "Edit Product", and follow the same steps to set up the add-on.
Remember, if a product has multiple variations such as both size and flavor, like our marinara sauce, that product can’t be set up as an add-on to any other product. However, if a product such as the parmesan which only has one product variation (size) or no product variations (ravioli) that can be set up as an add-on to another product.
But what if you want to offer an add-on that is not available in your main shop? No worries! Squarespace has a solution for that too. Here's what you can do:
Create a new store: In your shop dashboard, click on the plus icon and select "Store". Instead of adding a new category in your existing shop, create a new store.
Add the add-on product: Let's say you want to offer handmade spaghetti as an add-on. Fill in the necessary details like title, description, image, and price. Don't worry, this new store won't be visible to your customers.
Link the add-on to your main shop: Go back to your main shop, choose the product you want to add the add-on to, and follow the same steps as before. This time, you'll find your handmade spaghetti available as an add-on.
And that's it! With Squarespace's new add-on feature, you can easily set up add-on products in your Squarespace shop. It's a fantastic way to offer complementary items and enhance your customers' shopping experience.
I hope this step-by-step guide has been helpful to you as a small business owner running your eCommerce business on Squarespace. Give it a try and see how it can boost your sales. Happy selling!

Squarespace and ConvertKit: The Dynamic Duo for Your Online Business
Unleash the power of Squarespace and ConvertKit! They're the ultimate tech combo that turbocharges your online business. Discover how this dynamic duo takes your eCommerce email marketing to new heights.
There's a dynamic duo in the tech world that's been flying under the radar for too long: Squarespace and ConvertKit. They're like the perfect pair, just as inseparable as peanut butter and jelly or Batman and Robin. Squarespace is the master of providing a seamless selling experience, while ConvertKit swoops in with its superpowers in email marketing. Together, they create an unstoppable force that can turbocharge your online business and take it to new heights. Forget about ordinary, these two are extraordinary when combined.
Seamlessly Sell with Squarespace Commerce
Squarespace Commerce is renowned for its user-friendly interface and stunning templates that make setting up an online store a breeze. But when you combine Squarespace Commerce with ConvertKit, you unlock a world of possibilities. With Squarespace Commerce, you can showcase your products, securely handle transactions, and effortlessly manage your inventory. And with ConvertKit, you can automate post-purchase emails, recommend related products, and keep your customers engaged long after they've made a purchase.
One of the standout features of Squarespace Commerce is its integration with popular payment gateways, such as Stripe and PayPal. This ensures a seamless checkout experience for your customers, increasing trust and reducing cart abandonment. By connecting ConvertKit to Squarespace Commerce, you can leverage these selling capabilities and send targeted emails to customers based on their purchase history, interests, or other criteria. This level of personalization and segmentation can significantly improve the effectiveness of your email campaigns and drive repeat business. With an email list, you’re no longer reliant on social media!
Unleash the Power of ConvertKit's Email Marketing
While Squarespace does offer its own email campaigns feature, there's no denying that ConvertKit takes email marketing to a whole new level. With ConvertKit, you'll have the ability to create highly targeted and personalized email sequences that are triggered by specific customer actions. This means you can send product-specific emails to your customers, nurturing them throughout their buying journey and increasing the chances of repeat purchases.
ConvertKit's automation feature allows you to set up workflows that automatically send emails based on customer behavior, such as purchases or website interactions. This helps you deliver timely and relevant content to your subscribers, boosting engagement and driving sales. With ConvertKit, you can say goodbye to generic email blasts and hello to personalized, conversion-focused communication. (Not sold on ConvertKit yet? Check out this post where I break down my top 3 email marketing platform picks.)
How to Connect Squarespace and ConvertKit: Simple Step-by-Step Guides
Now that you're ready to harness the power of this tech combo, let's walk through how to connect Squarespace and ConvertKit.
Two Options for Collecting Subscriber Info
Option 1: Embedding a ConvertKit Form onto Squarespace
This option is perfect if you'd like to use ConvertKit's forms for collecting subscriber information. The best part is even though you can customize and tweak each form within ConvertKit, you also have freedom to customize these forms with your very own custom CSS on Squarespace.
In your ConvertKit account, create a captivating form that captures the information you need from your website visitors. You can customize the fields and design to align with your brand.
Copy the provided embed code from ConvertKit. Don’t worry, it’s just one line of code - you can’t mess this up!
Head over to your Squarespace website and navigate to the page where you want to add the form.
Edit the page, then add a Code Block.
Paste the ConvertKit embed code into the Code Block.
Save your changes, and like magic 🔮 your ConvertKit form seamlessly integrates into your Squarespace website.
Option 2: Adding Squarespace Subscribers to ConvertKit
If you'd like to use Squarespace's own forms for collecting email addresses instead of embedding a ConvertKit form, don't worry! You can still easily send the subscriber data to ConvertKit. All you have to do is create a Zapier account, which you can sign up for absolutely free. Just remember that to access the API and use this integration, a paid ConvertKit plan is required. With Zapier, you can automate the process of transferring subscriber data from Squarespace to ConvertKit, ensuring a seamless and efficient workflow for your email marketing efforts.
Connect your Squarespace form to Zapier:
Click on your Squarespace form and go to the Storage tab.
Click on the Connect button next to "Zapier".
Save your work and go back to your Home Menu.
Navigate to Settings > Advanced > Developer API Keys.
Click on Generate Key and name your key. Check the "Forms" box.
Click on "Generate Key" and Copy Key to copy the API key.
Set up the Zapier trigger step (Squarespace):
Go to zapier.com and create a new automation workflow or "Zap".
Choose Squarespace as the Trigger App and New Form Submission as the Trigger Event.
Connect your Squarespace account with Zapier using the API key.
Select the Squarespace form you want to send subscriber data to ConvertKit for.
Test the trigger to ensure everything is set up correctly.
Configure the Zapier action step (ConvertKit):
Choose ConvertKit as the Action App.
Select the desired Action Event (e.g., Add Subscriber to Form, Add Tag to Subscriber). For example, you may have a form called "Freebie XYZ." When someone signs up through that form, ConvertKit can tag them as "Freebie XYZ". This tag allows you to trigger various automations and sequences. This allows you to serve your subscribers a customized experience, tailored just for them!
Connect your ConvertKit account to Zapier.
Map the Squarespace subscriber data to ConvertKit's subscriber fields.
Test the Action to confirm it's working as expected.
Name your Zap and turn it on to activate the integration.
This integration eliminates the need for manual importing or exporting of subscriber lists, saving you time and ensuring accurate data.
How to Capture Squarespace Customer Info in ConvertKit
The ConvertKit + Squarespace Commerce integration allows you to send product-specific, post-purchase emails to your customers, nurturing them and encouraging repeat purchases. By setting up automations in ConvertKit, you can create a personalized customer journey that keeps your audience engaged and increases their lifetime value. With ConvertKit's analytics and reporting tools, you can also track the performance of your email campaigns and optimize your marketing efforts for maximum results.
Using The ConvertKit + Squarespace Commerce Integration
Generate an API Key in Squarespace:
Go to Settings > Advanced > Developer API Keys in Squarespace.
Click the 'Generate Key' button.
Give your key a name and select 'Orders' > 'Read and Write' under Permissions.
Click 'Generate Key' and then 'Copy Key' to save the API key.
Connect the Integration in ConvertKit:
In ConvertKit, go to Automations > Integrations.
Click on Squarespace.
Paste the API Key from Squarespace into the API Key field in ConvertKit.
Click Next and then click the 'Sync Squarespace orders to ConvertKit' button.
Click Next again, and now you can track your Squarespace Commerce purchases from within ConvertKi
Now, here's the icing on the cake: this integration doesn't require any coding or complex workarounds. It's designed with small business owners and startups in mind, making it accessible to everyone. Give Squarespace and ConvertKit a try today and see how they can transform your eCommerce email marketing. With this dynamic duo by your side, you'll have the tools to grow your online business and engage your customers like never before.

Squarespace eCommerce Life Hack: CSV Import Tutorial
Check out my latest YouTube video all about how I use CSV files to make uploading and managing inventory on Squarespace eCommerce websites fast and easy!
Updated May 2025
If you’re tired of manually adding products one by one to your Squarespace shop, this is the video you’ve been waiting for. I’m walking you through the process of using CSV imports to bulk upload products and save yourself a ton of time (and headaches).
In this step-by-step tutorial, I show you how to customize Squarespace’s CSV template, add all your product details in one place, and import them into your store with just a few clicks. Whether you’re setting up a brand new shop or doing a seasonal update with a bunch of new products, CSV imports can seriously streamline your workflow.
This tip came straight from audience questions after my presentation at Squarespace Circle Day in August 2023. So many of you wanted to know: “How do I efficiently manage larger inventories on Squarespace?” This is how.
It might seem a little intimidating if you’re not a “spreadsheet person,” but I promise it’s doable — and honestly kind of satisfying once you get the hang of it. Plus, this method helps reduce errors compared to adding items manually (been there, made that typo).
If you’re a fellow Squarespace web designer, this is also a great trick to have in your toolbox when working with client shops. It’s faster, more scalable, and gives you a solid process for handling larger product catalogs.
👉 Ready to learn? Watch the full tutorial below and follow along.
Got questions about using CSV files in Squarespace? Or maybe you’ve got your own tips for managing eCommerce shops more efficiently? I’d love to hear your thoughts — drop a comment on the YouTube video and let’s chat.

More Squarespace Plugins to Level Up Your eCommerce Site
Ready to take your site to the next level? Give one of these plugins or apps a try to take your basic site up a notch. From shipping to marketing there’s a little something here for you!
Here are some of plugins and apps I’ve been turning to again and again lately! These will take your already awesome Squarespace site and turn it into a super powerful eCommerce powerhouse. As a reminder, my take on plugins or apps is to use them judiciously; add in one or two to tweak or customize your site - you don’t need them all!
However, unlike some of my previous posts about plugins (check the bottom of this post for links!) these ones really hone in on specific pain points you may be facing on your Squarespace site. From making sure your shop pages look super unique to adding video to your product details pages, all of these plugins or apps come in super handy for eCommerce on Squarespace!

Variant Pricing Extension
Paid ($30)
If you’re selling customizable products on Squarespace or want to offer upsells or add-ons, this plugin is for you! It ingeniously creates an intuitive customer experience where they can select from some options/variants to increase the cost but can also bypass options if they’re fine with the base product.
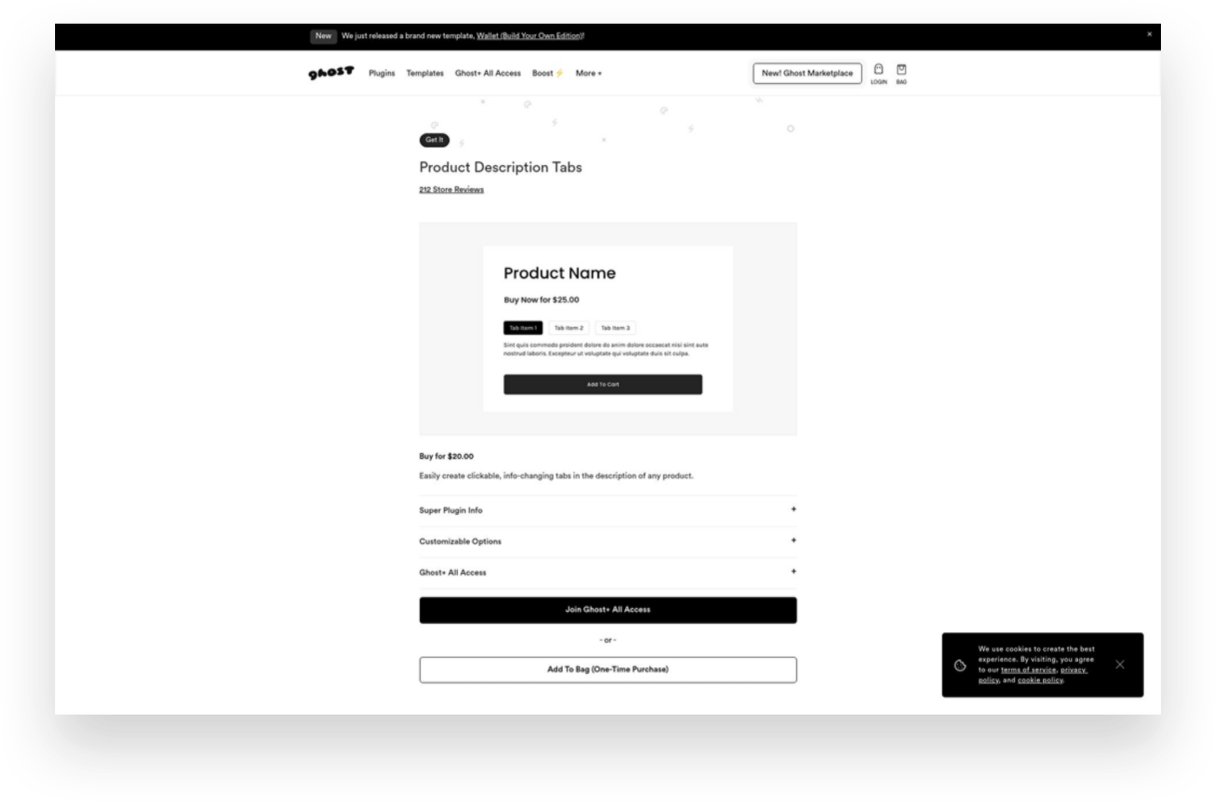
Product Description Tabs
Paid ($20)
Want to give your product details pages a little facelift? Ditch the long, boring descriptions and consolidate info into these cool-looking product tabs. I especially like this type of layout for products that have details like care instructions or other specs that might be helpful to some shoppers but that everyone doesn’t necessarily need to see right up front.

Featured Product Layout for Product Pages
Free
I showed my pal Will Myers if he could come up with a solution for shop pages that would allow you to feature a product versus just having everything the same size in the grid. You know, just to give things a little more flavor. Boy did he deliver! This simple code does just the trick and will help your shop pages look way more interesting.

Offerwhere App
Paid ($40/mo+)
I often have clients ask about how to set up a loyalty program on Squarespace and this the app I refer to them to. This app allows your customers to collect points for shopping with you and then allows them to use them in exchange for rewards or deals you set up. This is a fun way to reward your most loyal customers!

Squarespace Product Gallery Video Plugin
Paid ($29)
Product videos - especially ones that can show your product from all angles or those with 360 degree views - are super highly converting. Oddly, Squarespace doesn’t allow you to add video alongside product thumbnails on your product details pages. Luckily, this plugin does just that and videos look just like the native Squarespace thumbnails so no one would ever know this is an add-on!
Looking for more great eCommerce plugins for Squarespace?
Check out these other plugin posts:

Squarespace Holiday Selling Guide: Boost Your eCommerce Success
Are you ready for the 2023 holiday selling season? Discover 10 essential tips and strategies to maximize your eCommerce success on Squarespace. From chat widgets to free shipping and personalized checkout forms, my comprehensive guide will help you navigate the holiday rush and boost your sales.
Are you ready for the 2023 holiday selling season? The holiday shopping season provides a huge opportunity to bring in business from new and returning customers, and it's the most wonderful time of the year to spread some holiday cheer while boosting your sales. There’s a reason it’s called Black Friday, after all!
We all know that Black Friday and Cyber Monday are known for incredible deals and major discounts, setting the stage for a frenzy of shopping both in real life and online. The weeks between Thanksgiving and New Year's Day are the most hectic time of the year for brick-and-mortar retailers in the U.S., but eCommerce sellers tend to have a much longer crazy period. (In 2022, Black Friday generated a record-breaking $10.8 billion in online sales, making it the largest online spending day in U.S. history. Not to be outdone, Cyber Monday recorded a staggering $11.0 billion in online sales, surpassing Black Friday as the top online spending day ever.) What’s important to note is that the holiday season has expanded way beyond the traditional Thanksgiving weekend, encompassing the entire period from late November to early January. Shoppers now spread their purchases across several weeks and months, making it crucial for businesses to maintain consistent marketing efforts and be at the top of their games throughout the entire season.
To get ahead of this months-long holiday rush, here are my top 10 tips to get your brand ready for the season:
1. Have a Clear Return Policy (& Offer Free Returns)
One of the best eCommerce tips I can offer is to have a clear return policy and offer free returns. This will increase online sales, build trust with customers, and reduce abandonment rates. Customers may feel hesitant to make a purchase if they think they won't be able to return it if it's not what they expected. In fact, I've personally decided not to shop with companies that don't offer returns or exchanges. This time of year is a great opportunity to make sure your return policy is clear and easy to use. You don't want to be the scrooge that ruins a great experience with your stingy policies! For more information on setting up a self-serve returns portal, check out this post!
2. Offer Free Shipping
It's no secret that customers love free shipping, especially during the holiday season. This is why it’s a cornerstone of my most recommended shipping strategy! Even if you don’t do it the rest of the year (even though you should) offering free shipping as a way to incentivize shoppers to make a purchase is a great idea during the holidays. You can choose to provide free shipping on orders over a specific amount or for a limited time. This strategy not only encourages customers to buy but also eliminates any hesitation they may have due to additional shipping costs. Spread the holiday cheer by offering free shipping!
3. Turn on Afterpay
Many people prefer to spread out their purchases over time without relying on credit cards. It's similar to how your grandma might have put something on layaway at Kmart in the summer and paid it off over several months just in time for Christmas. However, with Afterpay, customers receive their order right away and pay Afterpay back over time. (Don't worry, you still receive 100% payment up front!) To learn more about how Afterpay works and how to enable it on your shop, check out this post.
4. Add Gift Cards
Gift cards are a fantastic option for shoppers who may be unsure of what to buy or prefer to let the recipient choose their own present. Some people think that gift cards are impersonal but I say that’s only true if the gift card is from a big box retailer. People LOVE shopping with small brands so consider adding gift cards to your product offerings. You can allow customers to purchase gift cards directly from your website by simply adding a new product and choosing the gift card option. This not only expands your sales opportunities but also caters to a wider range of customer preferences. Spread the joy of giving with the flexibility of gift cards.
5. Use Your Announcement Bar
The announcement bar on your website is valuable real estate for sharing important information with your customers. During the holiday season, make the most of this space by displaying enticing offers, shipping cut-off dates, or any other promotions you want to highlight. Captivate your visitors' attention and drive them towards making a purchase by leveraging the power of your announcement bar. 💡Bonus tip: if you’re looking to jazz up your announcement bar, I love this code from my pal Becca!
6. Reward Loyal Shoppers
Last Christmas, my family and I did a “favorite things” party instead of traditional Christmas gifts. The point was to share a little something that you used and loved throughout the year. The gifts weren’t necessarily huge or fancy - a really great pair of socks, a jar of someone’s favorite local-made hot sauce, another person’s must have scented candle. The point is that this is the time of year people are looking to the brands they already know and trust for gifts. Rewards could be simple (a special coupon code sent out to your VIP customer list) or more complex (I’m loving Offerwhere for a loyalty program that integrates amazingly with Squarespace) - whatever works best for you!
7. Add a Chat Widget
The holiday season can get pretty hectic, and this is when providing exceptional customer service is mission crucial. A chat widget (my favorite is LiveChat - all about that here!) can be a game-changer. By implementing a chatbot on your website, you can quickly address frequently asked questions, guide customers through the checkout process, provide product recommendations, and offer support in real-time. This efficient tool will help your customers feel heard and attended to, even during the busiest shopping days.
8. Offer Local Pickup
Even in the world of eCommerce, supporting local customers is important. By offering a local pickup option, you provide convenience to those who prefer to avoid shipping costs and long delivery times. Local pickup also gives you the opportunity to connect with your community and foster a sense of local pride. Don't forget to highlight this option on your website and let your customers know they can shop local even in the digital realm. For more on this, check out this post on how to set up local pickup or curbside delivery on Squarespace.
9. Add a Custom Checkout Form
Personalize the gift-giving experience by adding a custom checkout form to your website. This is such a simple way to allow customers to include a heartfelt gift note with their orders or offer them the option to add gift wrapping, if you offer it. Don’t forget, for those who want their purchases shipped directly to recipients, at checkout customers can enter the recipient's address in the shipping section instead of their own. You could use a custom form to allow people to indicate that the order is a gift and to not include any billing info along with the shipment. This small touch goes a long way in adding a personal and thoughtful element to each order that goes out this holiday season.
10. Create Gift Guides
Holiday shopping can sometimes feel overwhelming, with countless options to choose from. (And people are notoriously bad at making decisions when given too many options.) Help your customers navigate the gifting process by creating thoughtful gift guides. Curate collections for different categories of recipients, such as "gifts for him," "gifts for kids," or "gifts for the home." Include a mix of your own products and/or complementary offerings from other brands. By providing curated options, you make it easier for shoppers to find the perfect gifts and increase the likelihood of making a purchase. 💡Bonus tip! - an easy way to create shoppable gift categories is by using tags or categories to help shoppers filter their search!
As the holiday season approaches, it's essential to prepare your eCommerce business for the bustling days ahead. By following these tips, you can optimize your online presence, engage with customers effectively, and boost your sales during this festive time of year. Embrace the spirit of the season, spread holiday cheer, and get ready for a successful sales season!

Creating a Custom Print on Demand Store with Squarespace
Discover how to create a custom print-on-demand (POD) store with Squarespace and stand out in the competitive eCommerce market. This step-by-step guide will help you set up your Squarespace store, choose a POD provider, optimize your website for SEO, and launch your store to start selling customized products worldwide.
The eCommerce market provides a huge opportunity for entrepreneurs to start their own successful businesses. However, given the huge number of opportunities, the industry swells with competition too.
Customers today are more likely to buy from online retailers who have well-designed websites. After all, things might get a bit boring if everyone follows the same format and offers the same things in the online stores that all look the same. Therefore, one of the keys to eCommerce success is finding ways to differentiate yourself from the competition.
It's always beneficial to have an advantage over the opposition with a well-designed online store that will attract more customers and result in more purchases. The good news is that those who have joined the most recent waves of online businesses can rely on Squarespace for being their hidden weapon.
Wondering how to get started? In this article, I’ll help you create your very own custom print-on-demand (POD) store with Squarespace.
Benefits of Having a Print-on-Demand Store With Squarespace
With a POD business, you partner with a third-party vendor that prints out individual orders as they come in from your customers. So, for example, if you’re selling custom tumblers, they will only manufacture it when someone places an order for it on your website.
One major perk is that you and others like you may launch a business without having to worry about the hassle of investing in an inventory or managing it. You can focus on running your company while your POD partner handles production, packaging, and shipping.
There are several options for setting up a POD storefront, including eCommerce platforms, such as Shopify, WooCommerce, BigCommerce, etc. Out of these, Squarespace makes a compelling case for why it should be your ideal website builder. They offer superior graphic power, ease of use, and overall value for your money. A personal domain name and unlimited storage space are both included.
Steps to Create a Custom Print-on-Demand Store With Squarespace
Now that you understand why creating a POD website with Squarespace is your best bet let’s help you set up a store and start earning.
1. Set Up Your Squarespace Store
To set up your Squarespace store, you’ll need to first create an account. Squarespace provides a 14-day free trial that allows you access to all its tools. (p.s. When you’re ready to subscribe, you can use my code KRISTINE10 to save 10% on your annual subscription!)
After you’ve created an account, choose a template or design your own! You will have lots of options to choose from but this post will help you know what to look for.
Simply enter your email address or use your Google account to sign in to Squarespace. The next page will prompt you to enter a title for your website before providing some general editing tips. Depending on your vision for your website, you can:
Add pages
Organize the structure for easy navigation
Add content
Choose color scheme
Add branding elements like logos, fonts, store policies, etc.
Once your store is all set up, you’re ready to move to the next step.
2. Pick Print-on-Demand Provider
You may connect to a number of print-on-demand services with Squarespace Extensions. The success of your print-on-demand venture hinges on picking the right POD partner to work with your eCommerce platform. But how do you choose the best POD service when there are so many? Here's a rundown of some things to think about:

Your budget
The catalog size
Quality of products
Customization options
Delivery timeline
Quality of support
Ease of integration
I like Printify because it provides an extensive catalog of more than 800 high-quality white-label products. You can sell anything and everything from custom jackets to custom phone cases, stickers to shoes - whatever you can think of! They also have a free mockup generator that helps you create beautiful designs easily and create 3D mockups. Lastly, they guarantee a production time of 10 days. If they don’t meet the timeline, they’ll process a refund! And if you ever get stuck, they’re available around the clock to help you with any issues.
Once you’ve selected your POD provider, it’s time to understand what it’ll take to survive and thrive in the market. For that, we move on to the next step!
3. Do a Competitive Analysis
Competitive analysis is a technique for gauging the business's market standing in relation to that of its competitors. It is a technique for gathering information and making it useful.
Conducting a comprehensive competitive analysis positions you to outperform the competition and win over loyal customers. Competitor analysis is an integral part of developing a successful company plan. A thorough competitor analysis will help you in the following ways:
Learn more about the current corporate climate, which may assist you in better positioning your brand;
Find your niche and stand out from the competition;
Take note of the areas in which your rivals excel;
Use opportunities to benefit you and take advantage of your rivals' shortcomings.
Learn from the marketing moves made by your competitors and use those lessons in your own approach.
4. Choose Your Products and Upload them to the Store
After the competitor analysis, you should be clear about what you want to offer. Now, link your POD provider with Squarespace and display your products on your website.
With Squarespace and Printify working together with its integration, this is a breeze. Browse the comprehensive collection and pick the items that you believe will appeal best to your intended audience.
Using Printify's straightforward interface, you can add your company's logo or other custom artwork to any of your selected products. You may easily customize the appearance of your products by uploading and positioning your own custom artwork. You can personalize your products with art, typography, and more with Printify's mockup generator and state-of-the-art design tools.
Once your designs are ready, simply upload them to your store with a descriptive title, compelling description, and the selling price.
5. Create a Marketing Strategy
Online retailers need to work harder to attract customers than traditional stores since they can't just rely on foot traffic. You can't expect clients to appear out of thin air if you launch an online store.
While the products offered in each online store may be unique, their marketing approaches are consistent. To help you replicate this strategy on your own, you’ll have to do the following:
Define your unique selling point, meaning what makes you stand out from your competitors.
Create a marketing funnel from discovery to purchase to understand the customer journey.
Set marketing objectives for each stage of the funnel and how you’ll achieve them.
Define your budget and determine what methods you can afford.
Define your marketing channels and key performance indicators (KPI) to measure progress.
Determine a timeline to implement the strategies and stick to them.
Track your progress, see what you can do better, and implement changes.
Related Post: Crash Course: The Squarespace Commerce Analytics Panel
6. Launch Your Store
Once your marketing strategy is in place, it’s time for action! Find out what kind of fulfillment alternatives and shipping costs the POD provider offers before you start selling online. Some POD services may have the ability to fulfill and ship orders mechanically.
Make sure your shipping policies are in line with the requirements of the POD supplier you plan to use before you announce them to the public.
That’s it launch your store and publish it on all marketing channels to start making sales!
More Tips While Creating a Custom Print-on-Demand Store With Squarespace
Squarespace websites are built keeping search engine indexing in mind, but how well people find your new store still depends heavily on the material you provide as well as how you exhibit it. I strongly suggest you take advantage of the SEO tools that Squarespace provides or use a tool like SEOSpace to help your site get noticed. You can also optimize your Squarespace website by:
Targeting keywords
Optimizing product pages, their images, title, and description
Creating regular content in the form of blogs
Creating inbound and outbound links
and following other SEO practices found on their official checklist.
Another strategy you can implement is setting up an affiliate or referral program for your shop. Adding an affiliate strategy will boost your marketing returns multi folds and visibly show results with increased brand awareness, customer loyalty, generation of leads, and conversion rates. For more on my favorite affiliate and referral marketing tool check out this post!
Conclusion
The eCommerce industry is booming with opportunities, and Squarespace provides a great solution for entrepreneurs to create visually stunning websites with little to no coding knowledge. You have a lot of freedom with Squarespace when it comes to designing your eCommerce platform and handling client orders, including the option to use POD services. With this article, you’re equipped to start your own print-on-demand store and sell customized items to the world. Get started with your very own POD store on a Squarespace website today!

The Best Alternative Checkout Methods
Squarespace offers a way to sell almost everything almost everywhere, but sometimes you just need another option. Whether it’s because you sell something super custom or because you’re just wanting to create a specific user experience for your customers - here are the best alternative checkout methods that can all be embedded or linked to from your current website.
Updated April 2023
Squarespace offers the ability to sell so many different types of things but sometimes you might need to look to an alternate checkout method. This could be because you’re selling something super unique that doesn’t fit well within Squarespace’s existing checkout options or because you use other business tools that integrate better with other options. Whatever the case may be, there are a number of alternate checkout methods that you can integrate into your current Squarespace website and still offer a streamlined way to get paid. Check out some of my favorite options below but be sure not to miss my final notes at the very bottom of this post with some tips on how to pull this off seamlessly!
Stripe
There’s a reason this is at the top of the list, and that’s because if you’re going to circumvent the built-in checkout system on your website, you might as well go straight to who was going to be processing the payments anyways, which in 99% of cases is Stripe. Stripe has been rolling out some awesome no-code and low-code solutions that offer some powerful ways to get paid while still keeping that sleek, minimalist design that makes my heart sing.
What I would use this for:
Pricing tables
Subscriptions
Client Portals
Payment Links
Quoting
What it costs: 2.9% + 30¢ which is the same rate as you’d be charged for accepting credit card payments through your site. (There are some additional features that come with additional fees, but most elements are included at no extra charge. See Stripe’s pricing page here.)
Flodesk Checkout
Most people know Flodesk for their great-looking email templates and easy-to-use email marketing platform, but they recently released Flodesk Checkout, which allows you to sell services, digital products, access to a course, or membership - whatever it is you sell! The process is smooth and, in true Flodesk fashion, pretty stylish too! This is an especially attractive solution because Flodesk automatically segments customers based on purchase activity, so you can seamlessly send targeted follow-up emails.
What I would use this for:
Digital goods or services
One-click upsells
Mini sales pages
Targeted email campaigns as a result of a purchase
What it costs: $35/mo as a standalone product; $59/mo to access all of the Email features in addition to Checkout. There are no other platform fees or limits, just the standard Stripe processing fee of 2.9% + 30¢ per transaction.
ConvertKit Commerce
ConvertKit is another popular email marketing platform (and the one I love most), and it has its own built-in way to get paid for things like ebooks, music, presets, or coaching. The biggest difference between Flodesk Checkout, above, and CovertKit Commerce is that you can set up subscription options. This means that in addition to all the regular digital or service products, you could also use ConvertKit to set up a subscription-only email newsletter or other services with recurring billing.
What I would use this for:
Digital goods, services, or subscriptions
Embeddable “buy now” buttons
Multiple pricing options: standard, subscription, donation, or payment plans
Targeted email campaigns as a result of a purchase
What it costs: ConvertKit has a free plan, but most people will want to be on the Creator plan, which starts at $9/mo. Commerce purchases are charged a 3.5% + 30¢ transaction fee.
Gumroad
Gumroad is a great option if you’re interested in spending less time tinkering around with the platform you’re selling on and more time creating whatever it is you sell! You can really get up and running in no time at all on Gumroad because it’s just so simple and well-designed. Another thing that sets Gumroad apart is that you can create a little community of people, not just customers. People can follow your page, and you can even embed a “follow” button on your website. They also recently launched the ability to offer upsells (an upgrade to whatever they intended to purchase) and cross-sells (new products that might pair well with what they’re purchasing. You can offer discounts on these and completely customize the experience for users.
What I would use this for:
One-click upsells & cross-sells
Digital services, memberships, subscriptions
Selling software or other licensed products
Selling multiple versions of products
Accepting payments in multiple currencies
What it costs: 10% flat (plus the standard i.e. 2.9% + 30¢ per transaction for Stripe).
Buy Me a Coffee
If you’re looking for a simple alternative checkout method that allows you to accept donations, sell memberships or offer commissions, you should definitely consider Buy Me a Coffee! You can even use it as a digital tip jar (like I do here 😉) or build wishlists for your fans to buy from. I really like the public-facing landing page that Buy Me a Coffee creates for you, and there are also options to embed your BMAC link on your site or even create a QR code for people to scan and pay you. It’s overall just so easy to use for all!
What I would use this for:
Memberships, services, donations
Commissions and physical products
Embeddable widgets
One Tap Payments
What it costs: There is no fee to create a Buy Me a Coffee account, and you can use all features like email and publishing for free. There is a 5% transaction fee charged for things aside from donations, in which case you’re just charged Stripe’s transaction fee (2.9% + 30¢ per transaction), which you can opt to cover for your customers or choose to have them pay for.
Paperform
I’ve written before about how Paperform can be used to create a custom order form for Squarespace, but the commerce capabilities really need more of a shout out! On Paperform you can create products, set up subscriptions, book paid appointments or other services on a calendar, and collect as much or as little extra information as you need from your customers in the process. I love how customizable Paperform is and how simple it is to create a really nice-looking checkout process that you can either embed on your own site or link out to, depending on the flow you’re going for.
What I would use this for:
Services or bookings
Subscriptions
Complex or highly customizable products that require advanced calculations or conditional formatting
Any instance where you also need to collect extra info at the time of checkout
What it costs: There are no transaction fees charged by Paperform - just the standard processing fees by Stripe or Paypal. Paperform subscriptions start at $24/month but I would suggest an annual Pro subscription ($40/mo) for most.
Proceed With Caution: Drawbacks to Keep in Mind
If you decide to implement one of the options above, you’ll need to keep in mind that doing so bypasses Squarespace Commerce entirely, which means that you’ll need to take care of things like order confirmation emails and reporting on your own somehow. Most of the options listed have some of their own options for things like this, but some don’t.
Just know that any products, services, classes, subscriptions, or downloads you sell through an alternate checkout method will NOT show up on Squarespace, and you may need to take some extra steps to do things like generate shipping labels (for physical products) or make sure your customers receive adequate communication from you about their purchases.
This isn’t to say that one of the above options isn’t a perfectly good solution for your unique business needs, just a reminder to think about the whole experience from start to finish for both you and your customer!

My Favorite Squarespace Plugins & Extensions for eCommerce
Squarespace has (almost) everything you need built right in for eCommerce but when you’re ready to take things to the next level or want to boost your customer’s experience in your online shop, check out these favorites I turn to time and again.
One of my favorite things about Squarespace is that almost everything you need to run your eCommerce business is built right in. Believe it or not, there are some website platforms where adding simple things like an Instagram feed or a contact form require (paid) third party apps (lookin’ at you, Shopify 😬). Luckily, Squarespace does both of those things - and much more - for us! However, there are a few areas where you may still need to look to a few strategic add-ons to enhance the eCommerce experience for your customers, or make life easier on you as the store owner. Here are the Squarespace plugins and third party apps I look to time and again for almost every eCommerce project I do on Squarespace.
Plugins
Squarespace plugins are little code snippets that allow you to extend or customize the way Squarespace looks or functions. Most plugins come with a one-time upfront cost and once you add the code to your site you’re done.

Custom Order Confirmation Page
FREE
This plugin from Ghost is quick and easy to install - the perfect way to add a little personality to your site and replace the boring order confirmation page with something that matches your brand and personality.

Custom Cart Slide Out Plugin
$40
This plugin makes it so your customer don’t have to scroll back up to hunt for their cart. It’s easy to install and offers a lot of customizable options.

Breadcrumbs Plugin
$37
Breadcrumbs are the little bits of navigation that help shoppers remember where they’ve been or how they got to the page they’re on. As a default, Squarespace shows only the first page and current page - and no steps in between! This plugin is probably one of my most often used and adds true breadcrumbs to your shop’s navigation.

Product Color Image Swatch Plugin
Change up those boring text dropdowns to color icons! You can even upload your own images to show different patterns or textures - whatever you’d like! This plugin is a must for any sort of apparel or fashion site.

Sync Product Variant Images Plugin
$49
This plugin works great on it’s own or in conjunction with the swatch plugin above. This plugin extends the way product variant images are displayed. By default, Squarespace will show a variant image (assuming you’ve assigned one) but it only works in one direction and doesn’t allow you to group images based on the variant selected.

Upsell Plugin
FREE
It’s easy to add an upsell page to Squarespace using this plugin! The way this works is that your customers are redirected to a landing page after they add something to their cart. This plugin is great because you can design the landing page however you like.

Universal Filter Plugin
$70
This plugin is probably the most intensive as far as coding goes but also one of the most powerful! I would say it is a necessity if you have a lot of categories or tags you’d like shoppers to be able to search and filter by. This functionality here blows Squarespace’s built-in search out of the water!
Extensions
Unlike plugins, Squarespace extensions typically come with a monthly subscription cost. They aren’t just code snippet you copy and paste into your site, they are third party apps that you can sync up to your Squarespace shop to extend the functionality of your site.
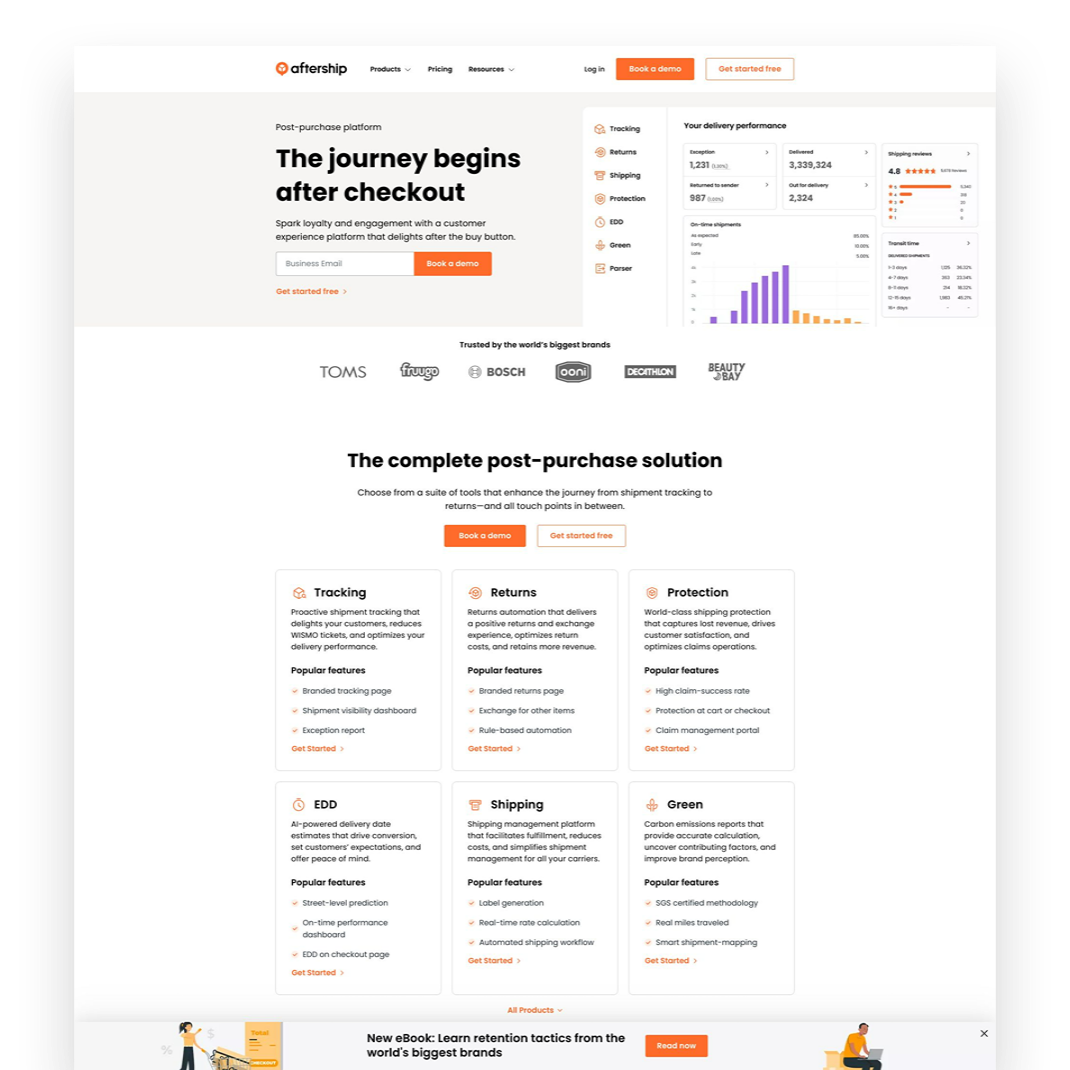
Aftership Tracking
PLANS START AT $11/MO
This extension allows you to provide customers with a branded tracking page and even send updates about deliveries - which I love! You can even use the tracking page to add links to other offers or specials to attract people back to your shop.
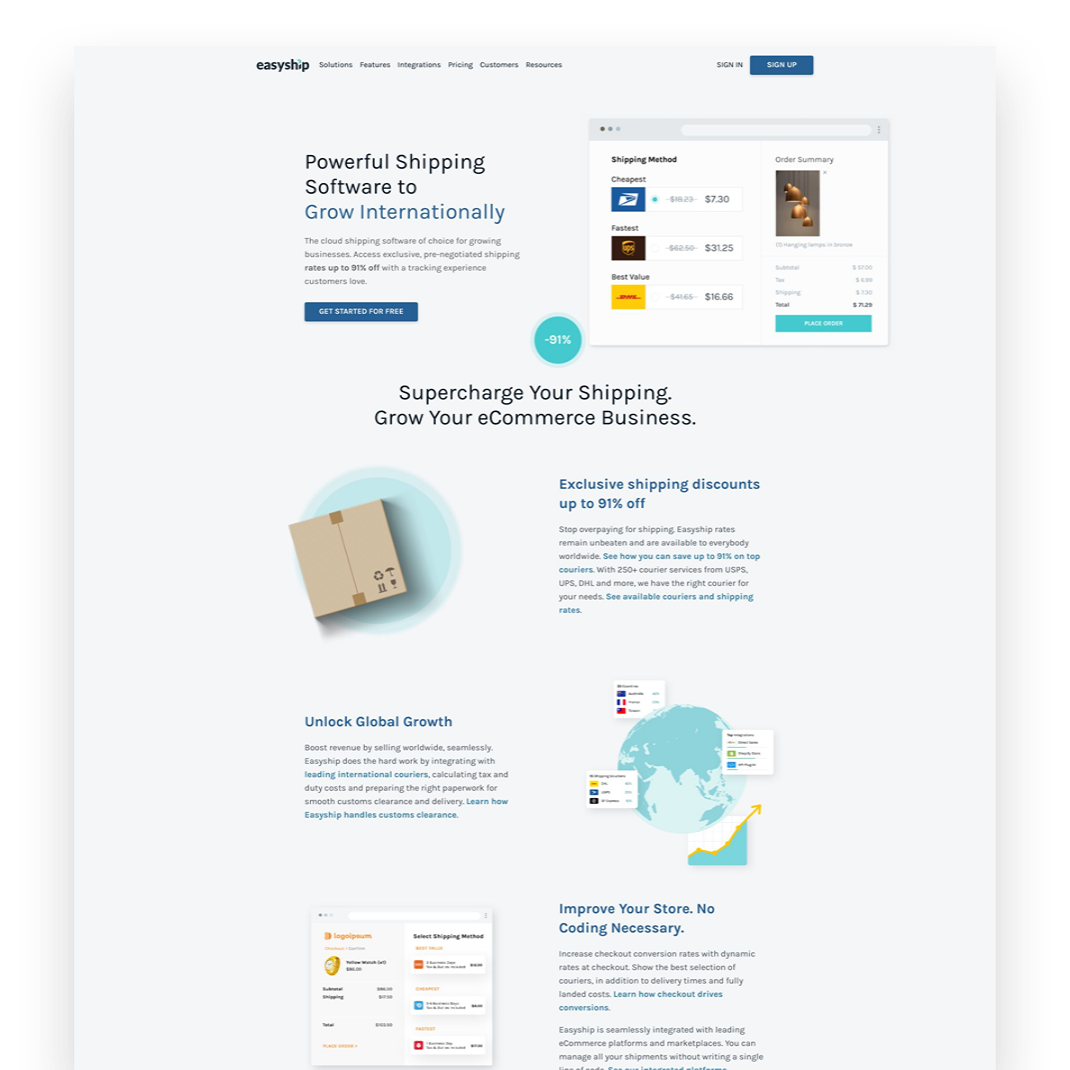
Easyship
PLANS START AT $29/MO
My hands down favorite shipping extension that I think everyone should be using. Easyship makes it… easy to fulfill orders with the added benefit of discounted shipping rates versus paying retail or printing labels directly through Squarespace.

Aftership Returns
PLANS START AT $11/MO
Even if you never process a single return, this extension is worth the minimum plan since customers LOVE being able to see that they could return if they wanted to. This extension creates a self-service returns portal just like all the major eCommerce brands have.

Candid Wholesale
PLANS START AT $39/MO
If you’re selling wholesale another way now - or looking to add a wholesale channel in the future - save yourself the headaches, skip all other options, and go with Candid. Everything you need to manage those relationships and sell in a secure way to your wholesale partners.

Trunk
PLANS START AT $35/MO
If you’re selling on multiple channels (think Etsy, Amazon, Shopify) OR you sell bundles or kits on Squarespace, this nifty little app will help you keep your inventory in check. Update in one place and -magic!- all your various sales channels follow suit.
LiveChat
PLANS START AT $20/MO
Personal story time: since adding LiveChat to my site people rarely fill out my contact form. Why? People trust a live chat widget more than they do a form and it’s everyone’s favorite way to communicate! LiveChat is simple to install and you can get started really fast!
Bottom Line
With a few simple, strategic add-ons you can take your basic Squarespace site and turn it into a stellar eCommerce powerhouse. With the right plugins and extensions you can customize the customer experience, improve your metrics and even see more sales! Thankfully, most of what we need to sell on Squarespace is already built right in but these tools come in handy when you just want to go the extra mile.

SEO Best Practices for Product Pages
How do you help the right people discover your products? Follow these tips and best practices for your product pages to appeal to customers and search engines alike.
When it comes to Squarespace SEO, I usually defer to the experts and always recommend starting from Squarespace’s own SEO checklist. This is a great resource to start dabbling in improving your site’s search performance and touches on all the site-wide best practices. There are some specific things you can do on your product pages to give things a boost as well though and that’s what we’re going to be talking about here!
First, A Big Fat Disclaimer
SEO is crazy complex and a niche unto itself. When we talk about improving things for SEO purposes, we’re talking about the super long game. Changes you make today will have virtually no impact on how things perform tomorrow but may have measurable ripple effects over time. So, if you’re here thinking that making these changes are going to magically change how your site performs in search overnight, you will be disappointed.
BUT this does not mean that they aren’t worth doing – just want to set some realistic expectations here! Ok, onward!
Squarespace eCommerce SEO
One of the most important things you can do before you jump into your product pages specifically is make sure your site is connected to Google Search Console. (Step-by-step instructions on that in this Squarespace support article.) Doing this will help serve up some pretty helpful info to your Squarespace analytics dashboard. You’ll want to use this info to help you compile a list of relevant keywords that you can incorporate into your product pages.
Related Post: Crash Course: The Squarespace Commerce Analytics Panel
Once you have that done, it’s time to head to your shop and take a look at your products.
How to Optimize Your Product Pages for SEO
Here’s a checklist of 6 specific things each of your product pages should have in place.

Product Names
Remember that keyword list I told you to make using the info from your analytics panel, above? Whenever possible, using one or more of those relevant keywords right in your product names can help connect your product to a customer's search query.
Don’t work too hard to force anything (human readers matter more than robot ones!) – and know that for the most part your product names are naturally going to be relevant without needing to try too hard. (If they aren’t, ask yourself whether they truly have a place in your shop.)
It can also be helpful to use descriptive words that might match up to your shop’s tags or categories right in the product name. Example: instead of “sweatshirt” try “Women’s 100% Cotton Vintage Sweatshirt”

Product Descriptions
For each product, you’ll want to be sure to write descriptions that include more of those keywords from your list. Describe what sets your item apart from the competition, highlight relevant features or explain what makes your product worth buying.
If you’re struggling with what to say, I always think that tapping into one of the 5 senses helps; for example - describing the way a fabric feels in detail or how a candle smells using descriptive words.
The one thing you don’t want to do is drone on for too long in your main product description. Keep things relatively short (roughly 3 sentences at most) is a good guide. Add other information, including technical details, product specs, longer descriptions and more to the Additional Information section. This makes it so people don’t have to scroll too far from the top of your page to get to the “Add to Cart” button!

Product Images
I promise not to tell you that a picture is worth a thousand words. But I can’t lie to you: your product photography can really make or break your entire eCommerce experience. There’s nothing that will make a potential customer click away faster than bad product photos (think: poorly shot, poorly lit, inconsistent in style). So don’t be stingy on product photos! For each product, include shots of the front, back and sides if you can. Depending on what you’re selling you may also want to include close-up shots of details (so people can see things like fabric texture or how a product is assembled) or other angles. Bonus points for 360 videos or gifs!
Related Post: 6 Simple Tips for eCommerce Photography that Converts

Product Prices
I’m kind of hoping that you already did this before deciding to launch your business 😬 but please take the time to research products similar to what you’re selling to make sure your prices are competitive. This is another situation where not only will your actual human shoppers notice when things feel off but so will Google and other search engines.
If there’s a reason why your products are significantly higher (or lower) than the competition, you’ll want to make sure that your copy (including relevant keywords) backs that up. Example: if your line of soda is priced significantly higher than average make sure that you’re describing why using keywords like: organic, hand-crafted, small batch, locally sourced ingredients, etc. This information can help explain that we’re not comparing apples to apples.

Product URLs
I’ve hinted at this a bit above but one of the most important things about SEO is to remember that you need to appeal to both humans and search engines alike. Sellers used to try to “trick” search engines by stuffing keywords into every nook and cranny, including product URLs. But remember that Google is very smart and you cannot get by with any dirty little tricks like this.
So, the secret to a great product URL is to keep things short and sweet. URLs with too many keywords are red flags as are keywords that contain much more than the simple product name.
If you followed the advice above on how to name your products using relevant keywords where appropriate, making your product URLs your simple product name is all you’ll need to do.
(Bonus tip: clean up any odd bits that get added automatically to URLs if you’re duplicating products. For example, change “womens-wool-socks-h3lm23” to just “womens-wool-socks.”

Product SEO Title & Description
For each of your products on Squarespace, you also get a chance to write specific information that you’d like search engines to pick up. In the absence of this info, Google will use the other info on the page to try to fill in the blanks so it’s best to just serve it up exactly how you’d like it.
SEO titles for products should be about 100 characters or between 5 and 10 words to make sure it appears correctly in search results. Longer titles may get cut off. If your product names are about this length, I would say to just make your SEO title = your product name but if you have any extra room you could add the name of your collection or another product attribute.
SEO product descriptions are what displays right below the title above in search results. You want to cap this at about 400 characters and first and foremost make it human-readable. Use product keywords naturally incorporated into a shortened product description and you’ll make it easy for customers to find your products as a result of their search queries!
Bottom Line
SEO can be a little overwhelming but most of the best practices help improve your site as much for your real life customers as they do search engines. Thinking about how your customers experience your site, what information they need and how you can best communicate to them digitally will ultimately also help your site perform better in search. When it comes to your product pages, incorporate the tips in the 7 areas above for each and every item you sell and over time you should find that more of the right people are finding you.

Should You Offer Free Shipping?
Free shipping is popular but may not be the best solution for everyone. Learn when it works, when it doesn’t, and 6 strategies to explore if you’re thinking of offering it as a shipping option for your online store.
If there’s an area where every single online seller seems to struggle, it’s trying to figure out what to charge for shipping and delivery. It’s such a challenge because there’s a very fine line between a solution that eats into your profits as little as possible and one that doesn’t completely turn customers off at checkout.
I tell nearly every client I work with that they absolutely should be offering some form of free shipping. It can be a hard pill to swallow but if you consider that more than 80% of U.S. shoppers say that shipping cost (combined with shipping speed) is one of the biggest factors that influence whether they’re going to buy at all.
That’s right. Your products could be amazing and the fact that you’re charging too much for delivery that takes too long is what’s tanking your sales.
So, what is it about things like free shipping that make us all feel like we just got away with sticking it to the man? Why don’t we like transparency when it comes to shipping costs? As an online seller, what are the pros and cons of offering free shipping? How do you offer free shipping without seeing red?
As a store owner, should you even consider offering free shipping?!
Keep reading for answers to all these questions + 6 strategies to explore if you’re thinking of offering free shipping in your online store.
First, Why We All Love Free Shipping
There’s probably no better way to explain it than via meme:
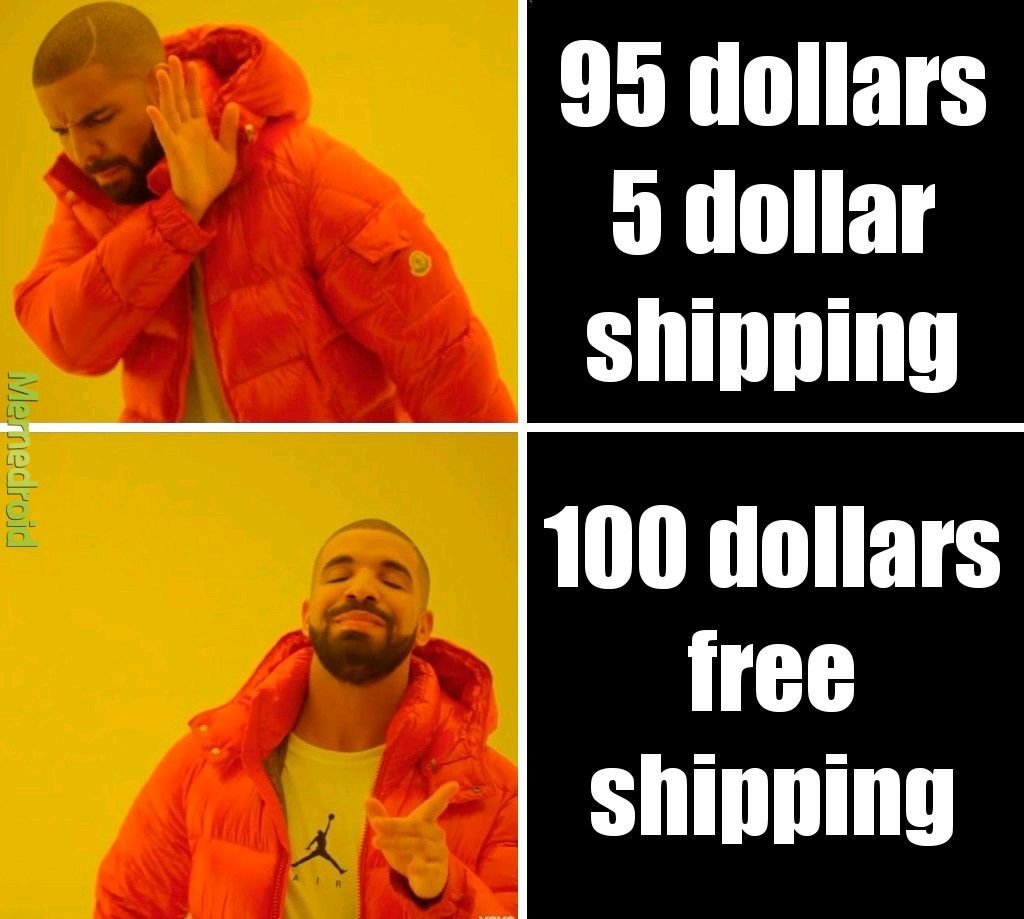
So true, right? To the average shopper, there’s just something magical about free shipping. This is probably because for most shoppers, we assigned a higher value to the cost of shipping than it actual is. (Or, transversely, perhaps we’ve undervalued the cost of whatever it is we’re buying.) Whatever it is, we like the word free. Seeing a free shipping offer is like an aphrodisiac to any online shopper - enticing us to buy things we honestly may not have otherwise.
When viewed from this standpoint, offering free shipping is really no different than running any other sale or promotion. It's a marketing tactic deployed based on the assumption that people wouldn’t buy without it. The shipping cost is just the amount of money we’re willing to spend to get the sale. (Hold this thought. We’re going to circle back to it in a minute.)
Why We Love Transparency (Except for When It Comes to Shipping Costs)
It’s funny when you look at trends in one area of business and how they compare/contrast to trends in other areas. Case in point: brands that have publicly embraced “transparency” as one of their core values are seemingly everywhere these days. There’s something raw and authentic-seeming about a company that will just lay it all out there and tell you everything: how much their CEO makes, where they source materials, how things work behind the scenes.
Instagram and social media has helped as all feel like we know the people and happenings behind the brands we shop from - and this can be a major marketing tactic.
There’s just one area it seems no one wants to see the real truth of: shipping.
I’m sure there is some psychological pricing word for this but it seems to boil down to the fact that most of us just don’t want to know how the sausage is made. We kind of just want to know the total cost and be offered some sort of guaranteed delivery date and we don’t really care how the places we buy from make that happen.
It used to be that “shipping & handling” was seen as just a necessary evil of shopping online. If you wanted something that was sold somewhere not local to you, it made sense that you’d have to pay to ship it. But we’re all too savvy & spoiled for that now. Basically, we want free 2-day shipping to apply to everything we buy ever. So the total cost matters more to us than the breakdown. We’d rather pay $30 for something and get it shipped for “free” than buy a $25 product with a $5 shipping cost.
Free Shipping Pros
Free shipping is super simple for buyers to understand
Free shipping has become an expectation for many shoppers
Free shipping can reduce cart abandonment rates
Free shipping can increase conversion rates
Free shipping can reduce customer service costs for returns (if things ship for free there’s no reimbursement of shipping costs)
Free Shipping Cons
Free shipping isn’t actually “free”
More orders don’t necessarily mean more profits
It can be hard to forecast and budget for the unknown
There may be cheaper ways to “advertise” depending on your product(s) or target demographic
Bottom Line
So, what’s the bottom line? Should you or shouldn’t you offer free shipping?
I say that if you’re a high volume shipper with products that are relatively small, lightweight, and/or similarly sized (i.e. not a lot of variation in product dims and weight) it would probably work well for you. On the other hand, if you sell products with a lot of variability in size, weight, or destination or have too low of volume to be able to average out the highs and lows, there may be better solutions (see some ideas below such as only offering free shipping on specific products, or only if a certain order minimum is met, etc.).
The last thing to consider (and I hinted at this above) is that this really boils down to a difference in mindset (and accounting). If you would like to do a promotion for free shipping or you think that offering it might help you increase the number of sales in the short term, the cost of shipping is essentially a marketing expense.
If offering free shipping is a long-term strategy or something that you just consider “the cost of doing business” then it would be considered a direct cost and classified as a Cost of Goods Sold. (BTW, just because you include it as part of your COGS doesn’t mean you can’t market it as a perk you offer on your website.)
The reason I mention this is because all too often I talk with merchants who only think of shipping costs as an expense. They then turn around and spend thousands on things like Google ads or promoted social posts. If they thought of free shipping as a marketing tool and invested in it the same way, I can almost guarantee they’d see a better ROI than any of that ad spend.
How to Offer Free Shipping And Not Lose Your Shirt
If you decide to offer free shipping, or just want to try it out for a while to see how it affects your conversion rates and the bottom line here are some tips to keep in mind:
If your product isn’t a highly commoditized one, just bake shipping costs into your product prices and just raise prices. (This is my #1 piece of advice for a reason!)
Make limitations on the shipping method that will be “free” i.e. only ground shipping is free but overnight or 2-day is an upcharge. Interestingly, people are willing to pay for express shipping so long as it is their choice to do so and they know that they had an opportunity for free (slower) shipping. In this way, any express shipping orders are a bonus since you’ve already included the cost of “free” shipping in their prices.
Offer free shipping only to certain geographic locations (sorry Alaska, Hawaii, Canada and others!)
Set a “minimum order” requirement to qualify for free shipping. This is a great way to boost average cart values as people are very often willing to spend a little more on product so long as shipping is free.
Offer free shipping only as a short term promotion for a limited period of time. This can be a good way to try it out and see how your customers respond to it.
Add free shipping as a membership perk or to reward your most loyal/repeat customers. This can give you some recurring/passive income in the form of membership payments that can then be used to offset shipping costs.
Bonus! If you decide you don’t want to offer free shipping, try these other “free” alternatives which can be just as enticing: free in-store pickup or local delivery, or free returns/exchanges.
My last piece of advice is to pick a strategy and stick with it - at least for a while. Customers will appreciate that they know what to expect when shopping with you and you’ll have enough time to gather data to determine whether your initiative was successful. You can always tweak down the road as needed. That being said, I do think that offering free shipping in some form is useful for nearly every online seller so I hope you give it a try!

11 Lead Magnet, Offer & Freebie Ideas to Grow Your Email List
Smart, strategic ideas for lead magnets, offers and freebies that go beyond the typical to help you build your email list.
One of your best business assets may be something you don’t suspect. It’s not your website or your super-secret trademarked process or even your brand recognition or goodwill. It’s your email list! And if you’re not using your website to actively build a list, you are leaving money on the table.
Like I’ve mentioned before, you can’t count on social media to connect with your audience, and done right people are not annoyed or bothered by getting emails. Here are some quick email marketing stats (all stats from here.):
72% of consumers say that email is their favorite method of communication with companies they do business with. '
81% of US online shoppers are more likely to make additional purchases, either online or in a store, as a result of emails based on previous shopping behaviors and preferences.
66% of consumers have made a purchase online as a direct result of an email marketing message
Why Email Works
If you’re running an online business or have something to sell (your products, your services, even your time!) - the chances are good that it’s going to take more than one contact with a potential customer to get them to fork over some cash. Do you know what odds aren’t good? Hoping that the client comes back to your site on their own to check you out multiple times. So, email gets you in front of people who have already expressed at least some moderate amount of interest in what you have to offer on a timeline you can control.
Here’s the secret: you’ve got to sweeten the deal
Sorry but no one is signing up to your list just because they’re hoping to get an email from you at some point. Email isn’t that magical. But people want to feel connected to brands they are interested in so let potential subscribers know that discounts and the VIP treatment awaits and they’ll be more than happy to sign up! And, of course, while this post is all about how to grow your email list don’t forget that email marketing success is really about sending consistent content that’s of high value to your subscribers. Just think of all the ways you can be a resource to your customers or how you can help them get the most out of their purchases from you. (Related post: 4 Post-Sale Emails Every eCommerce Site Needs)
Lead Magnet, Offer & Freebie Ideas
We’ve all seen the sign up boxes offering a discount off our first order and those are good but I want you to think about how you can set up a sign up box with a message that 1) aligns with your brand and 2) isn’t just about dishing out discounts left and right. I do think that a welcome discount code can be good so I’ll share with you exactly how to set that up below but remember the goal is to think of ways that you can give something of value to subscribers and start to build a relationship with them. We’re not just looking for one-time signups who will unsubscribe as soon as they get their coupon code here!
Offer a Free Gift with Purchase. I especially like this over a pure discount because it doesn’t de-value your products.
Offer a free gift with purchase by creating a coupon code for one of your smaller “add-on” type items. To prevent people from taking advantage of things, just set a dollar limit. (i.e. Free XYZ with any purchase of $$$ or more.)
Offer free shipping - but only for first-time customers who spend $X
Offer a discount code that only applies to certain shop categories like your best sellers to encourage people to try you for the first time
Offer a “digital gift card” instead of a coupon code - it feels more special!
Offer a companion guide to your products. For example, if you sell genuine Italian leather goods, offer a free guide on how to take care of leather accessories.
Send free samples. For example, if you sell candles pop a free wax melt in the mail so people can try out your scents!
If you sell services or digital goods:
Use a free Canva template to create a workbook, cheatsheet, checklist, or printable that aligns with your larger services.
Offer a teaser of what to expect from your larger offering i.e. just the first chapter of your ebook (with a link to buy the full one at the end, obviously)
Giveaway access to a “resource library” of files (ex: Grab my 10 favorite business checklists!)
Create an email “mini-course” that triggers upon signing up
Offer a free trial or way to engage with you at low/no risk for a limited period of time
Whatever you decide upon, you’re sure to start seeing new list signups start flowing in!
How to Set Up an Automated Welcome Offer
Create/set up your freebie. It doesn’t have to be fancy! (See below for ideas if you’re struggling to think of what to offer.)
Add a newsletter block or popup to your site. Most people throw their newsletter signups in the footer but, hey, go crazy and put them wherever! Don’t feel like you can’t pop a signup mid-page if it makes sense. Or, if you’ve got something cool you don’t want people to miss, use the popup feature!
Don’t ask for more info than you need to. Email address only or email + name, max. That’s it.
In your email marketing system, create an automatic “welcome” email that goes out to anyone who has just signed up for your list and includes the offer within the body of the email, or use a link/button to attach a download.
Not sure which email marketing software to go with? Check out Email Marketing Platform Showdown (ConvertKit vs. Flodesk vs. Squarespace Email Campaigns) for my recommendations!

Ecommerce Pricing Strategies That Will Help You Increase Your Bottom Line
Pricing strategies are some of my favorite things to explore because it's just so fascinating how our consumer brains work. These aren't tricks, just proven ways to help you sell more on your eCommerce site.
Updated July 2022
Something everyone in business struggles with is pricing. If things sell quickly, we worry that maybe we could have priced higher and made more money. If things aren’t selling at all we are quick to cut prices, rationalizing that “any sale is better than no sale” and eat away at our profits in the process.
The thing about pricing is that getting it right isn’t just dumb luck. There are strategies (with actual science and psychology to back them up) that can help you figure out how to position your products and services to optimize profit.
1. Cheaper Isn’t Always Better
This is an example of how what you say about your pricing matters almost as much as what the actual price is. (Copywriters worldwide are applauding me right now!) Imagine someone selling fake designer sunglasses on a street corner. Their only sales pitch is that they are cheaper than their competition (either other fakes or the real thing). They don’t tell you why (inferior materials, cheap labor, potentially stolen goods, whatever), they are just telling you that you’re not going to find a cheaper pair of sunglasses anywhere. Do you buy it? Of course, you don’t! Because your mind immediately thought it was a scam or a trick. Why would they be pointing out their competitor’s pricing if there wasn’t something great about their own product that they could promote instead? Leaning on price alone as a differentiator is a race to the bottom.
Takeaway: Don’t mention your competitors or their prices unless you can also provide damn good reasons why you’re a more affordable alternative. Explain that you have better purchasing power or a more refined process or more high-tech manufacturing facilities or whatever it is. Let that be the differentiator and the pricing won’t matter.
2. Give Them a Price Anchor
Price anchoring is a nifty little pricing psychology hack that I often compare to the jewelry case at Costco. Have you ever lingered a while at the Costco jewelry case? It’s a price anchoring master class. Why? Because there is always that one singular engagement ring that is glittering and giant and comes with a price tag of something like $99,193.74. This makes you laugh in horror because who in their right mind would buy this? No one. But you know what suddenly looks super awesome? That very reasonably priced and almost as sparkly stunner right next to it. Why does Costco put this anchor ring in the case? To make the prices of all other rings seem like a bargain. Once your mind has been shocked by the first price, all other prices will seem reasonable by comparison.
Takeaway: When giving people options, make sure there are perceivable differences in cost and value. On the off chance someone goes for your super-premium option you’re in the money but in the everyday scenario, the item you really want to sell will seem like the best deal by comparison.
3. Play With The Digits
There are tons of different articles, strategies, and theories out there about how the way we present the price of what we’re selling affects the bottom line and they can all agree on this: when in doubt, shift the digits up or down.
Down Shift (Charm Pricing)
Charm pricing is so ubiquitous that it’s everywhere and even though we’re all super aware of it, none of us seems to be immune to it. It is wildly effective! It’s basically reducing the price by one cent to a number that ends in 9 (or 5, but 9 is more popular).
So: making something that is $10.00 ➞ $9.99
Why this works: scientists aren’t 100% in agreement on why but one theory is that because the price is specific that we feel like its value is calculated very precisely. Others say that because we calculate the value of a product or service based on the perceived loss that we read $9.99 as cheaper than $10.00 or that we feel like we’ve saved money by buying something for $9 rather than $10.
Up Shift (Prestige Pricing)
On the flip side, shifting prices up by a cent or rounding them to even numbers and removing the decimals can have equally powerful effects.
For example: making something that was $197.82 ➞ $200
Prestige pricing works well in situations where you’re selling based on emotions and feelings and less on rationale. For example, if you’ve positioned your product as the premium option in the market shifting the price up to a round number can help validate the copy and drive up sales. Where $197.82 would be perceived as a “sale” price or markdown, $200 feels like the right type of price for something premium.
Takeaway: Depending on your positioning, shifting your prices up or down a digit can have a big impact. The most important thing is that the pricing layout (how the numbers themselves are actually presented) aligns with the copy and positioning of your product. Buyers are quick to suss out any sort of dissonance between what they’re being told and what they’re being sold so if your copy says premium but your price says discount, they’re going to click away.
4. Use Price Tiers to Your Advantage
This principle seems to almost contradict #1 above but there’s a method to the madness, I promise! This one comes from Priceless: The Myth of Fair Value which is a great book if you’re into this topic like I am. If this book doesn’t exactly sound like your idea of a fun weekend read, no worries, here’s the breakdown of one of the studies which may blow your mind a little at first but will definitely help you structure your price tiers better!
The study looked at beer purchasing patterns (as all good studies should).
Round 1: Two beer options
Out of 100 Beers Sold:
Outcome: People preferred the fancy beer 4 out of 5 times.
Round 2: Two original beer options + with a new option priced lower
Out of 100 Beers Sold:
Outcome: Now the premium beer seems too expensive and since the cheap beer is priced so closely to the mid-range beer, the midrange beer seems like the best option.
Round 3: Two original beer options + with a new option priced higher
Out of 100 Beers Sold:
Outcome: Surprise! People like nice things and some people will always buy the most expensive option but now the mid-range (formally premium) choice seems like the smartest way to go.
Takeaway: If you’re going to bracket your prices into tiers, always anchor up as opposed to down. Cheers!
5. Limit Their Choices
It has been proven time and again that among our many great skills as humans, making decisions amongst too many options is not one of them. Shoppers given too many things to choose from will often opt to do nothing or defer a purchase because 1) we know we suck at making decisions and fear making the wrong one and 2) we tend to over-analyze things that are presented as very complex sending us into “analysis paralysis.”
In the example of using pricing tiers (above), a safe max is three. And if you’re thinking right now that if three options are good then 10 must be better let me tell you NO. Wrong. Stop this.
Takeaway: If there isn’t much difference between similar products or services you offer, consider eliminating or consolidating to present fewer options to your customers or clients. Offering a curated selection of products or services will almost always beat offering an endless array of options shoppers feel bewildered trying to sift through.
The Bottom Line (Pun Intended)
When working on pricing for your online shop or eCommerce store, it’s important to think about all of the different factors that can impact whether that “Add to Cart” button gets clicked. It’s certainly not simple but it doesn’t have to be a guessing game either. Taking some time to familiarize yourself with various eCommerce pricing strategies can help you feel more confident in setting your prices while also improving your bottom line.

Squarespace Feature You Should Be Using: Product Reviews
One of the best eCommerce tools you can use is built right into Squarespace and I bet you're not even using it yet. What is it? Product reviews! Find out how to get started sending review requests and displaying them on your site.
Anyone else here scroll right on past product descriptions half the time and head straight for the reviews/comments? 🙋♀️ There’s just something about getting an outsider’s take on things that feels so much more trustworthy. I mean, sure YOU love your products but what do the real people think?
Good news: collecting reviews for the physical, digital or service products that you sell on Squarespace could not be easier! But this is a feature that I see people sometimes skip setting up. It’s definitely worth the few minutes to be able to start collecting that valuable feedback from satisfied customers to share with the world. (p.s. Showing reviews on your product pages is a great way to boost sales!) Here’s how to do it.
How to Turn on the Product Reviews Feature on Squarespace
I told you this was going to be simple! To start sending out review request emails and displaying reviews on your site, from the home menu in Squarespace click COMMERCE > PRODUCT REVIEWS. From there:
Toggle REQUEST REVIEWS on to send an email request for a review 14 days after every purchase of physical, digital or service products in your shop.
Toggle EMAIL NOTIFICATIONS on if you’d like to receive an email notification every time someone leaves a review.
That’s the basics! There are a few more settings and options that you’ll want to set up or customize to your liking which I’ll get to in a second but first, what happens when someone leaves a review on your Squarespace site?

What leaving a review on Squarespace looks like for your customers.
How Squarespace Product Reviews Work
Once you’ve turned reviews on, here’s how things work:
14 days after you fulfill each order, customers will receive an automated email asking them to leave a review. (You can - and should! - customize this email - more on that below!)
In addition to (or in lieu of) a written review, people can also rate products between 1 and 5 stars.
How to Customize the Squarespace Product Review Request Email
The stock email that Squarespace is going to send out once you toggle reviews on is pretty boring and generic looking. You’re going to definitely want to jazz it up with your own branding and maybe even customize the copy so it has some of your company’s personality.
To edit the Product Reviews email specifically, from your home menu click COMMERCE > CUSTOMER NOTIFICATIONS > CUSTOMER ENGAGEMENT > PRODUCT REVIEW REQUEST. From here you can change the text from the default to something more personalized.
To change the way emails look in general you’ll head to COMMERCE > CUSTOMER NOTIFICATIONS > GLOBAL EMAIL STYLES. In this section you can change things like fonts and colors in the email, add your logo or social media icons, and other things that will change the way ALL emails sent from your site look. (For more on customizing all of your shop’s email notifications, check out this related post: How to Customize Your Store’s Email Notifications.)
How to Change The Way Reviews Are Shown
Product reviews are shown on product details pages below all other content. You have a few options on how to display reviews on your site:
Show Product Reviews Only - This option will show only reviews related to each specific product on that product’s details page. So reviews for Product A will only show on Product A’s page, reviews for Product B only on that page, etc. The star rating shown is an average of the rating for just the product in question. I would recommend this option once you have a lot of reviews for each product.
Show Store Reviews Only - This option will display ALL the reviews you’ve received regardless of which product page you are on. This means that on any given product page you’ll see a mix of reviews for Product A, Product B, etc. The star rating shown is an average of the ratings for all products in your shop. I would recommend this option if you’re just getting started and don’t want it to look like your products don’t have any reviews.
Show Both Product & Store Reviews - This option will allow people to toggle between a tab that shows just reviews related to the product they are looking at and a second tab that shows all reviews received from your shop. This is a good option if you’re wanting to show that customers also really like other products you sell since the product thumbnails shown with each store review are clickable to those specific product pages.
To select the display option that works best for where you’re at right now, from your home menu click COMMERCE > PRODUCT REVIEWS and in the “Display” section click on the dropdown menu to select from one of the options above. You can change this at any time so select what works for now and update later as you’d like!
What to Do When You Get a Bad Review
Eek! Ok, I know it seems like the end of the world but bad reviews happen to all of us and you should definitely not live in fear of a bad review. You should also not let the chance of a bad review prevent you from asking for feedback in the first place!
If you’re confident in your products, customer service and the overall experience of shopping with you then you know the occasional bad review probably says more about the reviewer than you. Perhaps they just had a bad day or something happened that was outside of your control like a shipping delay. Assuming you’ve done all you can to make things right, just chalk the occasional bad review up to that person not being your ideal customer and move on with your life.
How to Manage Reviews
All of the above being said, you’ll probably want to still go in and hide any less than stellar reviews. I would only do this for things that are truly nasty or untrue; objective reviews that are less than 5 stars may have feedback or comments that future customers find helpful such as how to pick the right size or what they could do differently to expect a better outcome. Sometimes the 3 and 4 star reviews are the best ones because they seem real and honest!
For anything else, from the Product Reviews panel click on VISIBILITY next to the review you’d like to hide and change from PUBLIC > HIDDEN. Click on HIDE to Confirm.
Squarespace Product Reviews FAQs
-
Yes - long winded reviewers get cut off at 1500 words.
-
Yes. Customers can only review a purchase within 120 days of receiving the review request email.
-
No - and it’s not recommended to do so, especially if it’s a negative review. You don’t want to seem argumentative. Instead, I would just go in and hide the review and send the customer a personal email to try to resolve the issue. To hide a review, follow the steps in the “How to Manage Reviews” section, above.
-
If someone places an order for multiple products from your store, they will only receive one review request email but they can review and rate each item individually.
-
Not at this time. Review request emails will only go out for purchases made from your online shop.
-
Yes… but only within the last 14 days. For any customers who purchased before that, you could always reach out with a personalized email asking for feedback. One off testimonials can then be incorporated elsewhere on your site which is still a good thing.
-
No. Only reviews received directly from customers via the email review request form can be managed and displayed via Squarespace. This helps the credibility of the reviews on your site since they are all verified purchases.
-
Nope but you can hide them using the steps in the “How to Manage Reviews” section, above.
-
You cannot resend review request emails and this is probably for the better. I would say that the best reviews come from people who are willing and eager to respond quickly when asked the first time. Resending requests could seem spammy and might actually impact the feedback you receive. If someone doesn’t respond, just let it go and focus on your other, more engaged customers.
-
Not at this time. Keep in mind that review request emails are sent out 14 days after you mark an order as fulfilled. If you sell physical products, this gives enough time for shipping and allows the customer to use the product a bit before reviewing. For digital or service products, 14 days is a good window where the experience is still fresh in their minds but it’s not too soon as to be annoying.
-
Yes! I detail everything you need to know about moving from Etsy to Squarespace including how to import reviews in this post.
-
You can embed reviews widgets from third-parties onto your Squarespace site but honestly? I think it looks kind of janky and that it's ok if all your reviews aren’t aggregated in one place. Let Facebook reviews live on Facebook and website reviews on your website. You could always do like I recommended above and add some static text to your site quoting a few select really awesome third-party reviews if you really wanted to include that copy on your site. Otherwise, I would focus on building well-rounded reviews across a variety of platforms as this could be good for SEO.

The Best Technology Combos for Your eCommerce Business
Looking to keep your monthly costs in check or just not pay for subscriptions you don’t need? This post breaks down my best technology recommendations for different types of eCommerce business models. Discover which software and apps work well together to do exactly what you need.
Updated: September 2022
It seems like all business tools these days come with some sort of SaaS subscription-based pricing model. And at first, all the accounts seem to make sense. You sign up for one service that does this thing, and another service that does that thing… but before you know it your bank account is getting hit several times a month for all sorts of things! And it isn’t just a financial drain. Running multiple services side-by-side means you’ve got to keep track of multiple logins, track which programs are in charge of which tasks, and (my favorite) try to get them to all play nice together.
Using tools like Zapier can help ease the pain of connecting various apps and software together but at some point I think we’ve all wondered if there was a way we could pare things down - if only for our own sanity. In the tech industry, the buzzy word for all the software and tools that you use to build your product is a “technology stack.” When I look at my client’s businesses I see all the software, services, subscriptions, apps and extensions as their personal technology stack and the goal is always to keep it as efficient as possible.
An optimized technology stack:
Reduces potential for errors or bugs,
Is easy to manage for individuals and small teams,
Ensures you’re not underutilizing and resources and getting the most for what you’re paying for,
Helps create a consistent UX for your customers or team as they move between platforms,
Allows you to see the big picture, and
Keeps costs low.
With these things in mind, there’s one platform I find to be the perfect starting point for any small to medium business or startup: Squarespace.
Building a Strong Foundation
Start With Squarespace
I love Squarespace not just because it allows you to access nearly everything you need for your business with one login but it does so at a super affordable price point. Using Squarespace as your foundation allows you to skip extra payments for things that often require additional subscriptions and costs with other website platforms. In addition to the actual website builder you can eliminate the need for these extra services because they’re all included with your Squarespace subscription:
Domain including WHOIS privacy & protection
Hosting with Unlimited Bandwidth & Storage
SSL Certificates
Site Security
SEO Features
eCommerce Functionality (yes, some web platforms charge you to add this!)
Squarespace is a minimalist’s dream because you can access nearly all of the things you’ll need to run your online business with one password and one subscription. It’s infinitely customizable to suit your unique product/service mix and business goals and easy to build on to as needed. It’s the perfect foundation to build your eCommerce business on.
(Related post: Why I Love Squarespace for eCommerce)
Now for as robust as the Squarespace is, the cheese doesn’t stand alone. Most businesses are going to need to pair it up with some additional software/services to really make things hum. Keep reading for the software combos I turn to time and time again for running smart eCommerce businesses!
Best Email Marketing Combos

Best combo if you’re just getting started
There’s a lot to love about Squarespace’s built-in email marketing solution and if you’re just getting started it should definitely be on your radar as a great all-in-one tool.

Best combo if you want to build your list but don’t need commerce-based automations
Flodesk is a good option if you’re looking for something that has a great user interface and if image-based emails are important to you. It integrates well with Squarespace but more so for traditional email marketing & list building than for eCommerce-specific automations.

Best combo if you want to get serious about email marketing AND eCommerce
If you’re as serious about email marketing as you are about selling online, ConvertKit should be at the top of your list of tools! It’s powerful where it needs to be and simple where it matters; it’s clear that everything about it is geared to convert.
General eCommerce Technology Must Haves

Best way to build a great eCommerce experience
One of the best ways to make an impact with new customers (and continue to excite loyal shoppers!) is through a great on-brand unboxing experience. If you’re selling anything that requires packaging noissue makes it easy with low order minimums and help making sure you always look good.

Best way to keep your shop protected
Termageddon is my gold standard when it comes to making sure the sites I work on have the best iron clad privacy policies, terms of service and even cookie policies. The best part? Once you’re set up the first time, your policies will auto update whenever laws change meaning you’ll never be left hanging.

Best if you want to start an affiliate or referral marketing program for your shop
If you’ve been thinking of adding affiliates or referrals to your marketing arsenal, you’re so smart! Adding these types of programs help you keep control of your marketing spending, expand your reach and boost awareness. Peach’s is the best partner to Squarespace on this front and the only one I recommend!

Best way to add a custom order form to Squarespace
For complex order forms, quote request forms or forms that require conditional logic or other advanced features, I recommend Paperform. You can integrate forms seamlessly onto your Squarespace site or even use them to add on features and functionalities to your store.

Best way to sell wholesale on Squarespace
Whether you’re just getting started selling wholesale or have been doing it for a while and looking for a way to do it better, Candid Wholesale is the way to go. This platform syncs up your Squarespace inventory and allows you to create custom wholesale order forms, custom pricing and a whole platform of other features to build your wholesale business.
Best Options if You’re Selling & Shipping Physical Products

Best for low to medium volume shippers
Easyship makes it easy to fulfill and ship orders and in addition to never having to stand in line at the post office ever again, you’ll also score a sweet shipping discount over paying retail - win-win-win!
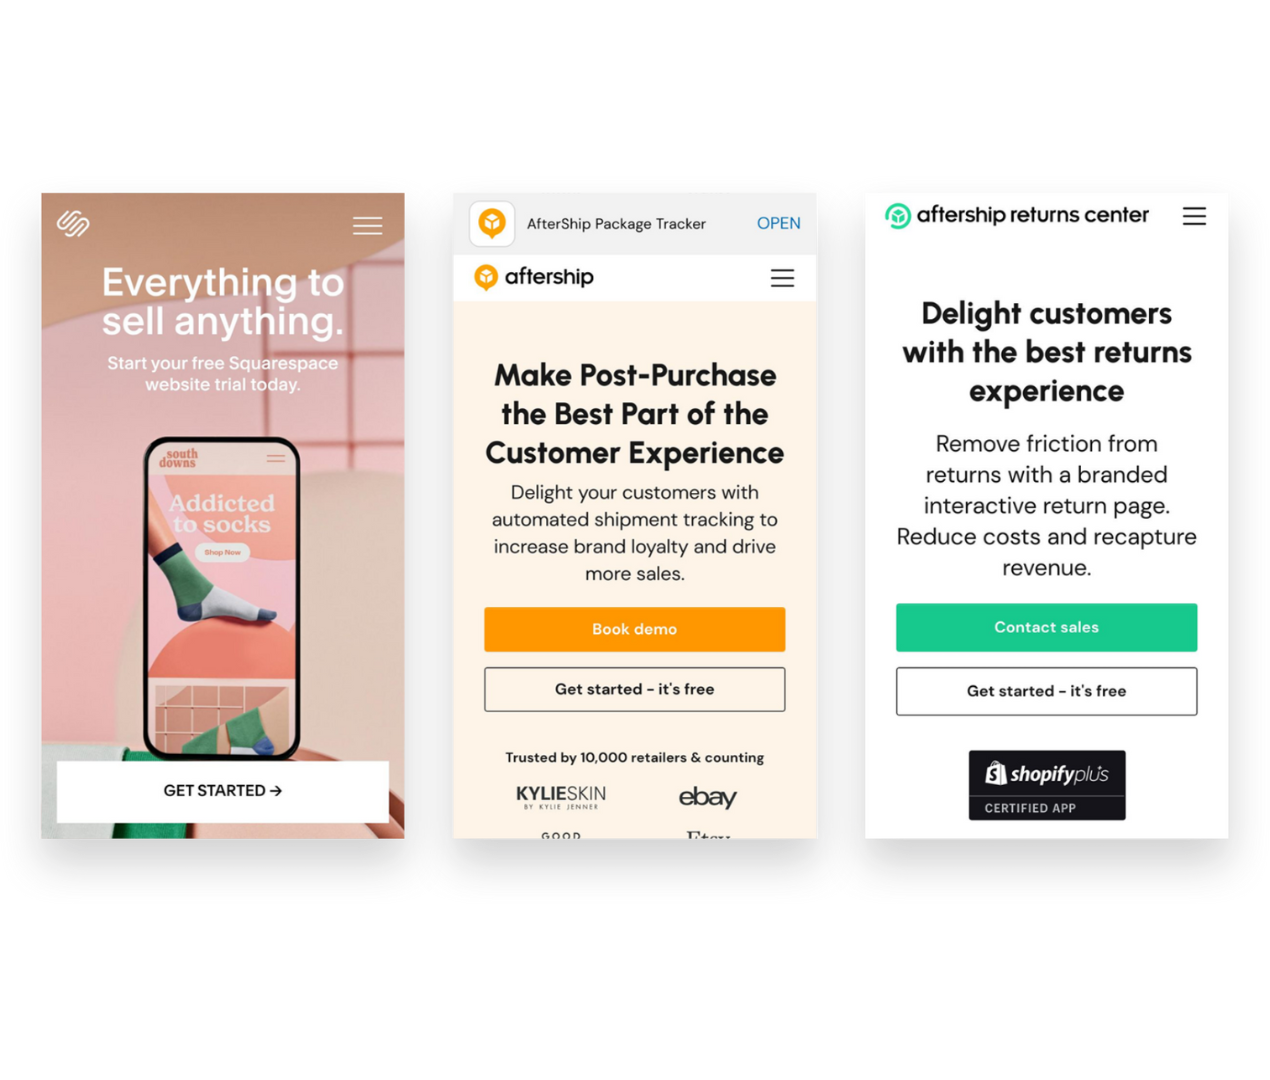
Best for medium to high volume shippers
Help customers help themselves by providing a great experience that extends beyond the order confirmation page. With Aftership Tracking + Aftership Returns you can create branding tracking pages and even allow customers to do self-service returns.

Best if you sell on multiple platforms
If you’re selling on Squarespace + other platforms like Etsy, Faire, Amazon, Shopify or Squares - you NEED Trunk! Trunk makes inventory management super simple and makes sure that your inventory counts are accurate across the board. Bonus - it also makes selling bundles and kits on Squarespace a dream!

Best if you use a third-party logistics company for fulfillment
ShipStation integrates with literally every 3PL provider I’ve ever encountered and it makes fulfillment by a third-party really seamless for Squarespace shop owners.
Best if you’re selling online AND in person
The free Squarespace app allows you to basically run your business from anywhere and have full visibility into things like orders and inventory. You can accept mobile payments, scan shipping labels, fulfill orders, update stock levels and more - all from your phone or tablet.
Best Options if You’re Selling Digital Products, Courses, Memberships, Events & Classes

Best for in-person or virtual meetings, events or workshops that require payment and/or registration
Squarespace’s add-on Scheduling works really well and the thing I like most about it is that all of the language can be modified to suit whatever it is you do. You can even create packages of courses and sell gift certificates or subscriptions for any of your events, webinars or classes.
Best for online courses, coaching, memberships or communities
Podia is great at the items above but it’s also not too shabby if you’re selling digital products making it a great all-inclusive add-on to Squarespace. Podia is rare in that it is very feature-rich but still super simple for you (and your customers!) to use. It’s easy to create bundles of your products or services and market them using the built-in tools.
The Bottom Line
Thinking strategically about what features you really need to move your business forward is smart whether you’re trying to keep your budget in check or just wanting to streamline the website tools you use. When in doubt, I always say that there’s no shame in starting small. You can always upgrade plans to add features later on or incorporate new platforms if need be.
Having too many services and software subscriptions for your eCommerce business can be a headache, though - especially if you’re just getting started with eCommerce. You’ll likely end up overpaying for features you don’t use, leaving yourself in a bad spot when it comes to budgeting for the tools you really need.
Hopefully, my strategic pairings and combos above will help you create the perfect technology combos for your eCommerce business!

How To Set Up an Affiliate Program for Your Squarespace Shop
Word of mouth marketing should definitely be part of your eCommerce toolkit so I’m sharing all the benefits, the differences in types of programs and my #1 tool to make it all happen on Squarespace like a dream.
Affiliate marketing is a “trend” that has turned into an industry mainstay. It really is such a great way to market your eCommerce business! Don’t worry if you don’t already have a referral or affiliate marketing program set up or aren’t sure where to start. In this post, I’m going to first remind you why you should definitely give this a go, then make sure you know which type of program to set up (affiliate or referral), and finally give you my #1 recommended tool to make the whole thing super easy breezy on Squarespace! Let’s go!
Why try affiliate or referral marketing?
So you don’t have all your marketing eggs in one basket! If I had a dollar for every eCommerce store owner who described their marketing plan as something along the lines of “I’m just going to post on Facebook” 🙈… well, let’s just say that I’d have a lot of dollars. But what happens when the algorithm doesn’t go your way, when Instagram crashes for the day again, or when Google ads stop working? Well, nothing will ever beat how effective it is to hear a friend say that you absolutely MUST try something. Rewarding your loyal fans and customers for every time they do what they do, well - that’s algorithm-proof.
So you can expand your reach on a limited budget. The other thing about paying for ads or boosting posts is that you’re fronting the costs on the mere hope that they will turn into sales. But with affiliate or referral marketing, you don’t pay unless you make a sale. It’s a win-win! Affiliate marketing also allows you to control your costs since it’s easy to know exactly what you’ll be spending on marketing for every dollar you make and can just build it into your budget accordingly. If you don’t have a lot of money to spend on marketing, I’d put it towards building an affiliate or referral program and email marketing first before I ever spent a dime on social media.
To boost brand awareness amongst your key demographic. Because all the web traffic in the world doesn’t mean a thing if the people visiting aren’t actually potential customers. And you know who may know people who could be your potential customers? That’s right, your current customers. Instead of trying to figure out how to build a fake buyer persona and replicate it in Google AdWords (mind numbing, if you ask me) - why not just… have your current customers do it for you? They know your people better than anyone!
Referral Programs vs. Affiliate Programs
Ok, before we get into which affiliate program is best for Squarespace let’s sort out the differences between referral programs and affiliate programs. Because they’re both kind of the same but very different and it’s just nice to know what’s what. Also, don’t worry, because my favorite tool can do both!
Referral Programs
A way to reward your current loyal customers who share about your brand.
Examples:
Refer a friend and save 5%!
Give $20, Get $20.
Get $10 off for every friend you refer.
Get a free sticker for referring a new client.
Affiliate Programs
A way to incentivize influencers (and micro-influencers!) to promote your brand.
Examples:
Receive 10% recurring commission on every new subscription.
Get $10 for every referral to our store.
Share your affiliate link and receive $5 for every sign up.
Use your affiliate code and receive 20% commission from every sale.
As you can see, both referral marketing and affiliate marketing are very similar. Both reward people for sharing about your business. The difference is that referral marketing is geared towards working with people who are also your customers and affiliate marketing would be more appropriate if you have fellow industry leaders or influencers that you’re hoping to partner with to build your brand. Both have their place and you may, in fact, someday use both strategies! To get started you may decide that one fits more with your current goals than the other.
Which affiliate program is best for Squarespace?
There are lots of affiliate marketing platforms out there that you could certainly try out but you know what? I’m not even going to bother linking all of them here. I’m going to help you cut to the chase and just go with the best: Peach’s (<— affiliate link). Here’s why:
You can set up either a referral program OR an affiliate program (or both!)
It’s made FOR Squarespace and integrates like a dream.
It’s super easy to use and their customer support is A+
It helps you keep everything organized and on (almost) 100% auto-pilot
There are lots of ways to customize to set up the perfect program for your business needs.
No commission fees!

You can try Peach’s free for 14 days. After that, their referral software is $49-149/mo and the affiliates one is $59-$199. Well worth the price for either one or both for how powerful these tools are!

8 Ways to Make Your Small Business Look Big Online
Just because you're small doesn't mean you have to look it! Here are 8 ways your small business can turn up, compete with the big guys, and use your size as a competitive advantage!
Updated April 2022
Most of the businesses I work with are startups or small-medium businesses so if anyone has a soft spot for SMBs, it’s me. And there are tons of reasons why you should actually really lean into the fact that you’re on the smaller side because it is definitely not a weakness. In fact, it can be a real competitive advantage! Small businesses can offer more personalized service than larger businesses and are often much more capable of pivoting to adapt quickly to new trends or changing marketing conditions. All this being said, there are still some things you can do to make sure your SMB looks big - in a good way.
1. Understand that your brand matters more than your logo.
Big companies get this right. To them, the brand ethos - everything the brand stands for, the brand voice, the mission and goals, and all the visual collateral is the grounding force. Many small businesses make the mistake of overthinking their logo and not thinking enough about how they’re going to fulfill the promises they want their brand to make to their customers. Branding is important but when it comes to logo design, think minimal to look big and remember that consistency matters more than anything.
2. Think global.
The beauty of the internet is that it makes almost anyone the world over a potential customer. Unless you also have a brick-and-mortar location you need to promote, being too hyperlocal can really limit your growth potential and alienate potential shoppers from outside your area. This applies to everything from your actual business name to your choice of photos.
3. Add a live chat widget.
Live chat isn’t just a trend, customers have come to expect it as a key way to interact with brands they love. The biggest concern I’ve heard from SMBs is that enabling live chat on their site will somehow chain them to their desk like a customer service agent but so many of them can allow you to set up automations and link to FAQs or help articles based on what people are asking. This leads us to...
4. Use automation to look like a superhero.
By now I think you may know about how much I love Zapier - and one of the biggest reasons why is that I can automate a ton of mundane tasks that make me look like I’m super on it, even if I’m not even at my desk. There are lots of other tools and apps that have automations that you can (and should) be taking advantage of. From email marketing workflows, the automated emails your eCommerce store sends out or your CRM, there are lots of ways to “set it and forget it” in the name of better customer service. (Looking for some new tech tools? Check out this post all about refining your tech stack or my resources page here for links to my recommendations.)
5. Branded email is your friend.
Email addresses are cheap. You have no excuse for using a Gmail email address for your business. Get GSuite for your brand and make sure everyone in your company has an email, plus general addresses for things like returns, shipping, orders, etc. If need be, you can even just use aliases to route those all to your inbox. No one needs to know that you’re the CEO, creative director, returns specialist, customer service agent, and shipping department! 🤣
6. Keep your inventory up to date.
Managing your inventory and keeping everything up to date is super important. If you’re feeling overwhelmed by this, you can always outsource it but it’s actually probably easier than you think to manage inventory or even fulfill orders yourself right from your phone. All of the eCommerce platforms have mobile apps that you can download on your phone or iPad that make it super easy to scan in new inventory as you receive it. Some of them even help you with shipping so that’s a bonus, too!
7. Add a “Buy Now, Pay Later” option to your site.
Not only are "Buy Now, Pay Later" services super popular, but they also make your store look big! Adding one of these payment gateways puts you amongst big name brands which instantly shows everyone that you may be small but you mean business! All of the big providers in this realm (Afterpay, Affirm, Klarna) include merchants who use their services in their own special shopping portals, and having your name on their list is a definite perk!
8. Do what you can to stand out.
Many startups and SMBs fall into the trap of doing exactly what their competitors are doing, not just in terms of how they look and feel but even in their websites, products, and service offerings. Just because everyone else offers a certain package or has a specific feature on their website, does not mean you need to follow suit. Big brands aren’t afraid to be different and know that they will benefit from the courage to stand out. If things are feeling a little stale or too much like everyone else, sometimes something as simple as a website template switch can really give things new life!

How to Sell Bundles & Kits on Squarespace
Use my favorite simple tool to help you sell simple bundles or keep track of all the pieces that go into more advanced kits. Offering "build your own" options on Squarespace is easy when you organize things and know exactly what you have on hand to sell.
In this recent post, I sang the praises of bundles. They’re a great way to simplify the buying process, add value, reduce friction and boost sales - all total wins! But how do you actually sell bundles and not feel like you’re constantly having to babysit your inventory and stock levels? I mean, think about it:
Say you sell both Product A and Product B by themselves. But since you know that bundles are a great sales tool, you also sell a bundle that contains both Products A & B together. As is, every time you sold one of your bundles you would have to go in and manually adjust the available stock levels for the individual products so that you don’t run the risk of overselling them. The same would work in reverse if there was a run on Product A because it became super popular. Without manually adjusting the stock level of your bundle someone may purchase it without you actually having enough inventory on hand to fulfill it. No good.
The solution is a super simple tool called Trunk. I love Trunk and wrote about it in this blog post as a great way to sync inventory levels between programs such as Squarespace and Shopify, or Squarespace and Square, or any other number of platforms that Trunk integrates with such as Amazon, eBay, Etsy, Faire, and Quickbooks Online.
But the secret is that it does more than just sync things up between platforms - it can also be used to sync things up on the same platform. Which makes it perfect for keeping your inventory in tip-top shape even if you’re only selling on Squarespace.
Advanced Bundling & Kitting
I explained above a simple bundle that contains two items that are also sold individually but you may have a scenario that’s a bit more advanced such as:

This kit could contain the box, the string, the liner, AND all the individual chocolate pieces.
If you sell the same items in multiple quantity packs. An example of this might be if you sell candy bars and provide the option to buy a single bar, a pack of 5 bars, or a pack of 10 bars. In this case, once your inventory drops to 9 you would need to make the 10-pack unavailable but still offer the 5-pack and individual options. Trunk can do this for you. Bonus - even if you decided to no longer offer the single bars (who only wants one candy bar anyways?!) you could set that up as a hidden product so that the availability of your other options still depends on how many individual bars you have in stock. This brings us to:
If you sell gift boxes or bundles and need to keep track of all the pieces, materials & supplies. Gift boxes and subscription boxes are really popular with customers but they can be a lot to manage as a merchant! How many boxes or bundles you can sell ultimately depends on the component in your bundle with the lowest available quantity. And components don’t need to be publicly available goods, either! Just like in our candy bar example above, you can add all the parts you need to fulfill an order as a component: the box, the fill, the pack-ins, and all the actual items included in your gift box! Think of how much easier it would be to sell gift boxes that contain similar but not exactly duplicate items; no more last-minute inventory crunches or overbuying just to be on the safe side.
Q: What about “build your own” bundles or boxes?
This is a popular topic and one reason why some people look to Shopify over Squarespace, where the functionality exists but only if you’re willing to pay for no less than 3 third-party apps to the tune of $$$$ per month. Needless to say, I’m not a fan. Don’t worry - emulating a custom “build your own” bundle experience on Squarespace is easy if you just set your products up as variants instead of main products. This is made so much easier because on Squarespace each product can have up to 6 options and up to 250 variant combinations whereas on Shopify you’re limited to 3 options and 100 variant combinations.
So, for example, if you want to sell a gift box that contains six items you would just set up each set of items as variants of your main gift box product. Customers would choose your gift box product, then select the items they’d like to add to the box using the drop-down menus for each option set. Using Trunk, you could easily sell the same options in multiple different gift boxes without losing your mind trying to keep up with everything!
Related Post: To sell even more advanced customizable products with more complex pricing, you could also always build a custom order form for Squarespace.
Try Trunk
If you’d like to see what it’s like to streamline your inventory tracking when selling bundles & kits, you can try Trunk out free for 14-days. The trial includes all the features you need to make this happen but after that, you will need to be on the Pro Plan which starts at just $39/month and scales up based on the number of orders you have each month. Simple.

How to Price Your eCommerce Shipping Options
Should you offer free shipping or flat rate shipping? Is there a way to get people to spend more on your site, abandon their carts less often and make them happier? How do you calculate the perfect free shipping threshold? Check out this post for answers to all these questions & more!
Your shipping strategy is arguably one of the most integral parts of your whole eCommerce setup. It’s how you can easily lose money if you’re not paying attention to the details… but also how you can gain tons of loyal fans if you dial things in right. Customers expect orders to arrive fast and cheap - even when shopping for higher-end, luxury items. Most eCommerce shoppers expect some sort of deal for free or reduced shipping and want to see packages at their door in no more than a week. Long story short: it’s a lot to ask of the average small business owner to deliver on!
In this post, I’ll walk you through the most common eCommerce shipping options. We’ll uncover which one (or ones!) I recommend most to help you keep your customers happy AND keep some money in your pocket.
FIRST THINGS FIRST
Figure Out What Shipping Actually Costs You
Look, I know this seems obvious but you’d be surprised how many merchants I talk to who haven’t thoroughly worked through how much it actually costs them to ship each and every product in their inventory. 😲 Now, you don’t have to be a spreadsheet person but you are going to have to break out the calculator here. Also, I’ll admit that in a former life I managed shipping & logistics for a large company so things like shipping zones and carrier contract negotiations, and packaging pricing come naturally to me. Don’t worry if they don’t for you - all the details you need to get started are below!
Make note of each product’s specific weight and dimensions. When you’re running sample rates through carriers, you’ll need this info. If products normally ship on their own in one box, the weight should be the total of the item PLUS the packaging itself and the dimensions are of the box. If customers normally order multiple items, you probably have one or two boxes that are most popular. Use those package dimensions as your baseline and then calculate what it costs to ship it at various weights.
Factor in where shipments are going & how they’re getting there. Other factors that play into your actual shipping costs are the destination and the shipping method. For US domestic shipments, shipping is figured based on zip code; international orders will depend on the country + postal code. Since i’s not really reasonable to have five zillion different shipping rates based on all the possible destinations & methods available to you, I recommend just lumping things into buckets. For merchants in the US, you might have groupings such as contiguous US, Alaska & HI, Canada, and everywhere else. You may also decide that you’d like to offer two service options: priority/express delivery and ground/economy delivery. In which case, make note of the costs for both of those for all your buckets.
Don’t forget to include packaging & pack-in costs. You can sometimes score free boxes from carriers like USPS or FedEx depending on your volume but once you start seriously selling, you’re probably going to want to upgrade to branded packaging. It just looks so much better and goes a long way in building your brand. When tallying up your costs, you’ll want to include not only the cost of the boxes themselves but also any fill you use or other materials such as tissue paper, packing peanuts, etc. Lastly, if you include anything special like a postcard, flyer, brochure, or stickers in each box don’t forget to include that in the cost as well! While these are usually just a few cents each, you have to account for it somewhere otherwise it’s just a loss. (p.s. If those pack-ins weigh more than a few ounces be sure to include them in the total weight of each package as well!)
If you want to establish a solid eCommerce brand, it’s best to invest in custom box packaging for your business. Seeing your brand logo in the packaging improves brand recall, which is a great marketing strategy. This helps boost brand awareness and enhance the customer experience. Above all, it gives your customers the impression that your brand is legit and serious about doing business.
Optional: Run a Shipping Audit
If you’re already busy shipping orders, a shipping audit can really help you check in on how things are going. I used to do this quarterly when I was a shipping & logistics manager as a way to keep a pulse on how our expected costs were stacking up against actuals. This doesn’t have to be super complicated but it can definitely expose places where your assumptions based on the factors above need adjusting.
How to run a shipping audit:
Determine a period that you’ll track details that will include a good sampling of your average shipments. This will vary on your order volume and frequency so for some this might be a day or two… others might want to track for a whole week or more.
Keep track of each shipment’s details such as size, weight, destination, etc plus what you charged each customer for the shipment.
At the end of your tracking period, go back to your shipping extension (or your carrier statement) and note what each shipment cost you.
In doing this, you can see if there are destinations or order types that routinely cost more or less than you’re currently charging.
Important tip: don’t worry about one-off outliers! There are always going to be weird shipments that go to crazy destinations that unexpectedly cost a small fortune. Or oddball orders that need to ship in much smaller or much larger boxes than normal. Whatever it is. Don’t worry about them. Shipping is a “sometimes you win" and “sometimes you lose” kind of thing. We’re just looking for if you win more than you lose, you know?
Shipping Strategies to Consider
Now that you have a handle on what it actually costs you to ship your products, it’s time to decide how you’ll cover those costs. Here are the most common options:
Make customers pay for the full price of shipping on top of product prices. This can either be a flat rate average of your costs OR variable, carrier-calculate rates. (Note that I am not a fan of variable rates and customers aren’t either. Check out this post for more on that!) Since this option can be a huge turn-off, I would really only recommend it if you have a very well-established business that sells lightweight items such as jewelry.
Make customers pay part of the shipping cost by increasing product prices & charging a small flat-rate shipping fee. This option works well because it allows you to recoup all of your costs in a more palpable way than the first option. Customers like flat rate shipping fees because they are easy to understand and you’ll like that you’ll see way fewer abandoned carts! If you’re worried about raising your product prices, don’t be! Unless you are selling a highly commoditized product, customers would much rather pay more for something as long as they’re getting a “deal” on shipping than feel nickel-and-dimed at checkout.
Make customers pay for all or part of shipping by increasing product prices accordingly & offering free shipping. Make no mistakes - this is my favorite shipping option by a landslide and the reason why is because customers love it! It’s easy. It feels generous. There are no hurdles or obstacles to overcome once someone is on the checkout page. Whether you account for all or just part of the shipping cost in your product prices is up to you and also depends on how complex you’d like your free shipping offer to be. More on that below but this is the option I would recommend for almost all businesses & startups. Okay, now on to the free shipping fine print!
Free Shipping Fine Print
Because you know that nothing is truly ever “free” here are the ways to make a free shipping strategy work for you:
Free Shipping on all orders - works best if you sell mostly small, lightweight items with high-profit margins or luxury goods.
Free Shipping on only orders over a certain amount - works best if you’re trying to increase your average order value (more on that below). For all orders below the minimum threshold, set up a nominal flat-rate fee.
Free Shipping on only orders for specific products or services - works best if you’re trying to promote new products or clear out seasonal inventory. (For more on how to set up automatic free shipping discounts, check out: Squarespace Discount Rules.)
Free Shipping on only orders to certain locations - works best if a lot of your customers are local/regional and you want to cater to them while not paying too much on the other shipments headed farther away.
Free Shipping on only orders by loyal customers - works best as an incentive to boost repeat purchases and build brand loyalty.
How to Calculate Average Order Value & Determine Your Free Shipping Threshold
Since offering free shipping on only orders over a set amount is my favorite option from the list above, I thought I’d make sure you know how to calculate average order value (sometimes referred to as “average cart value.”) That’s because this option is a tried-and-true method for boosting that amount! The important thing to keep in mind when setting a free shipping threshold is that you want it to be:
Low enough that shoppers feel they can reasonably add an additional product or two without spending a significant amount more than they planned.
High enough that you can cover the additional cost of shipping while still retaining profits.
To calculate your average order value, simply divide your revenue by the # of purchases. Using that number as your base, you’ll then identify a point just above it that you can set as the free shipping cutoff. For example, if your average order value is currently $57 and your average product sells for $18, I would set your free shipping threshold of $75. This would encourage the average shopper to add just one more product to their cart (a reasonable ask) while providing you additional revue to offset any additional shipping costs. Win-win!
Bonus Shipping Strategies Worth Exploring
Local Pickup - I firmly believe that every online shop that has the capacity to do so should be offering some sort of free local pickup. There are just so many good things about this:
Allows you to compete with large retailers & big box sellers
Provides an alternative for your local customers to avoid shipping costs
Offers the opportunity for in-person upsells & engagement
Better for the planet!
Click here for more on how to set up an in-store or local pickup option on Squarespace.
Go Wild & Combine Multiple Options! Okay, okay, okay - I swear to you that I’ll stop saying that options are my favorite but I swear: this one is my actual favorite 💕 Some of the most successful online sellers don’t implement just one of the strategies outlined above, they combine several of them! An example of what this might look like:
Offering low, flat-rate shipping rates for domestic & international shipments. Again, this makes it easy for customers to understand what to expect at checkout and you’ll have accounted for some of the shipping costs by pricing your products appropriately.
Offering free, flat-rate shipping on orders over a certain amount in order to boost average order value. The bonus here is that even though shipping is “free” for your customer that you’ll have already accounted for some of your shipping expenses by pricing your products appropriately.
Offering free in-store pickup for local customers. This will allow them to get orders faster and cheaper and you’ll come out ahead because (you guessed it) you’ll have accounted for some shipping cost in the cost of your products. Bam - straight to the bottom line.
Using the occasional free shipping offer for specific product categories or customer segments as a marketing tool. This allows you to move slow inventory, reward your best customers, build your email list, or promote a new product line without sacrificing the integrity of your main shipping strategy.
Bottom Line
A successful shipping strategy can be as simple or as complex as you’d like it to be but the most important thing is that you start by understanding what it actually costs you and going from there. It’s so important to keep track of this type of info about your business and check back in regularly to make sure things are on track. Shipping doesn’t have to be a headache at all — especially once you realize that it’s one of the most powerful (and easiest) tools available to be able to increase average order values, reduce abandoned cart rates and make customers happy!

Kristine Neil
Fractional Web Partner
I'm Kristine Neil - a communications strategist who has spent 20+ years designing websites, first running a full-scale design and marketing agency, and now leading my own studio. I've been the creative director managing the work, the coder quietly fixing what others couldn't, and the strategist in the room asking why before how. Somewhere between the MBA and the other degrees, I decided web design was just one tool in a much bigger toolbox - the real work is figuring out what you're trying to say, who needs to hear it, and what's getting in the way. A website is just where all of that comes to life.
I build on Squarespace, and after years deep in the platform I know how far it can go and when to push past its limits. These days, I'm especially drawn to working as a fractional partner - getting to know an organization over time and helping with whatever moves them forward, whether that's a full redesign, an ongoing hand with content and strategy, or just being the person who knows their site best. I write here about eCommerce, web strategy, and making the complex feel a little more human.