

Notes on building smarter websites for actual humans.

Mastering Product Variants in Squarespace
Harness the power of product variants to transform your Squarespace store. This comprehensive guide covers everything from basic setup to advanced strategies, helping you create a more efficient, user-friendly, and profitable online shop.
If you've ever felt like your product catalog is starting to resemble a digital version of that notorious junk drawer, you're in the right place. Today, we're exploring product variants - your secret weapon for turning chaos into order in your Squarespace store.
In this comprehensive guide, we'll cover everything from the basics of setting up variants to advanced strategies for optimization. You'll learn how to streamline your product offerings, improve your store's user experience, and make informed decisions about your product structure. By the end of this post, you'll have the knowledge to create a more efficient, user-friendly, and scalable Squarespace store that's primed for growth. Let’s dig in!
The Importance of Product Variants
Product variants allow you to offer multiple versions of a product without cluttering your store. While this feature is commonly used for products that come in different sizes, colors, or styles, its applications are far more versatile than you might think.
For example, if you're selling t-shirts in various sizes and colors, using variants lets you present all options under a single product listing, rather than creating separate entries for each combination. It's like having a really efficient personal shopper for your customers.
But let's think outside the box. Here are some creative ways to use variants that you might not have considered:
Customization options: Use variants to offer personalization choices, like engraving text on jewelry or selecting gift wrap styles.
Bundle building: Create a "build your own gift box" product where each variant represents a different item customers can include.
Service add-ons: For service-based businesses, use variants to offer different service levels or add-on features.
Product pairings: Use variants to suggest complementary products, like "Shirt Only" or "Shirt + Matching Accessory."
By thinking creatively about variants, you can streamline your product offerings while providing customers with more options and a smoother shopping experience while you see increased average cart values. Win-win!
ℹ️ FUN FACT! Did you know that Squarespace allows up to 6 options and 250 total variants per product, giving you ample flexibility for most product types. For context, Shopify caps at 3 options and 100 total variants without add-ons and Podia offers unlimited digital products. (Podia's living its best digital life, apparently.)
Variants vs. Separate Products: Making the Right Choice
Deciding when to use variants versus creating separate products can significantly impact your store's organization and user experience. Here's a simple decision guide:
Use variants when:
The item is essentially the same product with different options
You want to simplify inventory management
You're well within the 250 variant limit
Create separate products when:
The item has unique features beyond basic options like color or size
You need more detailed, separate tracking for inventory or analytics
You're approaching the 250 variant limit
Let's look at some examples across different industries:
Clothing Store:
Use variants: Different sizes and colors of a t-shirt design
Separate products: "Classic Tee" versus "V-Neck Tee" (different styles)
Electronics Shop:
Use variants: Storage capacity options for a smartphone (64GB, 128GB, 256GB)
Separate products: Different models of smartphones (e.g., iPhone 16 vs. iPhone 16 Plus)
Furniture Store:
Use variants: Fabric choices for a sofa
Separate products: Different sofa models (e.g., loveseat vs. sectional, or different designs)
Jewelry Business:
Use variants: Necklace chain lengths or gemstone choices
Separate products: Different jewelry types (necklaces, bracelets, earrings)
Digital Products:
Use variants: License types for a software product (personal, business, enterprise)
Separate products: Different software applications or courses
Food and Beverage:
Use variants: Different flavors of the same product
Separate products: Different product formulations (sugar free vs. regular)
Home Decor:
Use variants: Sizes of a picture frame
Separate products: Different frame styles or materials
Subscription Boxes:
Use variants: Subscription durations (3 months, 6 months, 1 year)
Separate products: Different types of subscription boxes (e.g., beauty box vs. snack box)
The key is to use variants when the differences are primarily in options or customizations of the same basic product. Create separate products when the items have distinct features, purposes, or when you need to manage them independently for inventory or analytics purposes.
How variants (or the lack thereof) can make better product pages:
There's another significant benefit to creating separate products: it allows you to craft more specific and tailored product descriptions and pages. When you're not trying to cover multiple variants in a single description, you can:
Focus on unique features: Highlight the specific benefits and features of each product without diluting the message to cover all variants.
Target specific customer needs: Speak directly to the customer who's looking for this particular item, addressing their unique pain points and desires.
Optimize for specific keywords: Create more focused SEO strategies for each product, potentially improving your search rankings for specific terms. (More on this below! 😉)
Provide detailed information: Include in-depth specifications, use cases, and customer testimonials that are relevant to the specific product.
Showcase product-specific imagery: Use photos and videos that highlight the unique aspects of each item without confusing customers about which variant they're viewing.
Tailor your call-to-action: Create more compelling and specific calls-to-action that resonate with the target audience for each product.
By not offering too many options on a single page, you can really cater to the needs of customers interested in each specific item. This approach allows you to communicate more effectively about the benefits and features of each product, rather than trying to cover all bases with a broader, less focused description.
Understanding Variant Calculations
Calculating the total number of variants is straightforward but crucial for planning your product structure. Here's how it works:
Total Variants = Option 1 choices × Option 2 choices × Option 3 choices (and so on)
For instance:
A t-shirt with 4 sizes and 3 colors: 4 × 3 = 12 variants
Adding just 3 additional colors and 5 design choices to the above: 4 × 6 × 5 = 120 variants
As you can see, the number of variants can increase rapidly as you add options! It's important to plan your variant structure carefully to avoid hitting Squarespace's 250 variant limit unexpectedly. Trust me, hitting that limit is no fun because it forces you to go back and rethink your product strategy when you’d probably rather just get to selling.
Optimizing Your Product Page for Variants
Now that you know a bit more about product variants, when to use them and how they work, let's talk about how to display your product options effectively on your product details pages. A well-designed product page is crucial for effectively presenting variants to your customers so it’s important to pay attention to the details. Here are some best practices:

Use visual elements: Implement color swatches or pattern images for relevant options. This helps customers quickly understand and select their preferred choice.
Utilize button options: For options like size or style, buttons keep the interface clean and options easy to navigate.
Clear impact display: Ensure that customers can easily see how their variant choices affect price and availability.
Descriptive labels: Use specific, clear labels for each option. "Size" is more helpful than "Option 1." After all, we're not playing a game of "Guess What This Dropdown Does."
Logical ordering: Present the most important variant options first, typically size for clothing or main feature for other products.
ℹ️ TIP! If you’ve set up specific images for each product variant (as you should), they will only display after ALL options are selected. This means that if you have a shirt in 5 sizes and 3 designs that the thumbnail will only change to match the selected after both size AND design have been selected. In this case, I would always recommend having size as the first option and the design as the second one so that as soon as the design is selected the corresponding thumbnail will display.
The key takeaway here is that a well-optimized product page with variants should be intuitive and easy to use. It should guide customers smoothly through their options without overwhelming them with choices.
I’m going to start to sound like I’m repeating myself, but it’s just SO important: your goal should always be to make the shopping experience as easy as possible, not over-complicate it. A clear, well-organized variant display can significantly reduce decision fatigue and increase conversion rates. On the flip side, a confusing or cluttered variant setup can lead to abandoned carts and lost sales. This means that when you’re thinking of how to set up your products, you’re really aiming for that perfect balance between offering variety and maintaining simplicity.
SEO and Inventory Considerations
When dealing with product variants, it's crucial to consider both search engine optimization (SEO) and inventory management. These elements can significantly impact your store's visibility on the front end and operational efficiency on the back end.
SEO for Variant-Rich Products
Optimizing variant-rich products for search engines requires a strategic approach. You need to balance providing detailed information for each variant while maintaining a cohesive overall product page. Here are some key tactics:
Strong main product title and description: This forms the SEO foundation for all variants. Ensure it encompasses the core product while hinting at the variety available.
Include key variants in the product title if commonly searched: "Women's T-Shirt - Sizes XS to 3XL" is more informative than just "Women's T-Shirt."
Use alt text on variant images: "Red V-neck T-shirt front view" is better for SEO (and accessibility) than "DSC12345.jpg".
Create unique content for significant variants: If certain variants are particularly popular or distinct, consider creating separate sections on the page with unique descriptions for these. (ℹ️ TIP! The Squarespace product additional info section is perfect for this!)
Google isn't psychic (yet 😬) so if you help it understand your products, it'll help customers find you. Create rich, informative pages that serve both your human visitors and search engine crawlers effectively. (For more on SEO, check out this video on my most recommended Squarespace SEO tool.)
Inventory Management
Effective inventory management is crucial for businesses with variant-rich products. Squarespace offers tools to help you stay on top of your stock levels across all variants. Here's how you can leverage these features:
Squarespace allows you to track stock for each variant separately. This means you can:
Set different inventory levels for each variant
Receive notifications when a specific variant is running low
Display "Out of Stock" messages for unavailable variants without removing the entire product
To make the most of these features:
Regularly review your inventory levels: Set aside time to regularly assess which variants are selling well and which might need to be discounted or discontinued.
Use low stock alerts: Set up notifications to alert you when variants reach a certain threshold, allowing you to reorder in time.
Analyze sales patterns: Use the data from your variant sales to inform future purchasing decisions and identify trends in customer preferences.
ℹ️ TIP! Use out-of-stock variants as an opportunity to collect email addresses for restock notifications. It's like turning lemons into lemonade, except the lemons are disappointed customers and the lemonade is future sales 🍋 This not only helps retain potential customers but also gives you valuable data on demand for specific variants!
Good inventory management isn't just about keeping products in stock—it's about optimizing your inventory to meet customer demand while minimizing holding costs. Your variant strategy plays a crucial role in striking this balance.
Money Talk: Variant Pricing Strategies
When it comes to pricing in Squarespace, it's important to understand the platform's capabilities and limitations. Here are some strategies you can implement:
Flat pricing: Set the same price for all variants of a product. This is the simplest approach and works well for products where all options have similar production costs.
Variant-specific pricing: Charge different prices for different variants. This is useful when some options (like different colors or premium materials) cost more to produce.
Product-level sales: While you can't discount specific variants, you can put entire products on sale. This can be useful for clearing out inventory or running promotions.
Limited-time offers: Use Squarespace's sale feature to create urgency around entire products or categories for a set period.
Here's how these strategies might look in practice:
Strategy: Flat Pricing
When to Use: Simple products with similar costs across variants
Example: All t-shirt sizes and colors for $25
Strategy: Variant Pricing
When to Use: When some options cost more to produce
Example: All red shirts are $25 but black shirts are $30
Strategy: Product-level Sales
When to Use: Clearing inventory, seasonal promotions
Example: 20% off a specific t-shirt product for a week
Strategy: Limited-Time Offers
When to Use: Create urgency, boost sales during slow periods
Example: lash sale: 15% off all hoodies for 48 hours
Remember, while Squarespace has some limitations, you can get creative within these constraints:
Create 'bundle' products: If you want to offer a deal on multiple items, create a new product that represents the bundle. (More on bundling & kitting on Squarespace.)
Use tiered products: Instead of variants, create separate products for "Standard," "Deluxe," and "Premium" versions if the differences are significant.
Leverage your product descriptions: Use this space to explain the value of higher-priced variants or to highlight limited-time offers.
ℹ️ TIP! While you can't automatically apply discounts to specific variants, you can manually adjust variant prices for sales. Just remember to change them back when the sale ends!
The key is to work smartly within Squarespace's framework. Your pricing should still reflect your brand positioning and target market. It's about finding the right balance between simplicity (which Squarespace enforces) and the flexibility your business needs.
User Experience: Don't Make Your Customers Play Hide and Seek
A great variant setup means nothing if your customers can't find what they're looking for. Here's how to ensure your store is more "helpful librarian" and less "labyrinth designed by M.C. Escher":
Organize categories logically: Group similar products together. "Tops" can include t-shirts, blouses, and sweaters, each with their own variants.
Use clear, descriptive category names: "Women's Tops" is better than "Upper Body Decor."
Implement robust filtering options: Let customers filter by size, color, style, etc. The easier it is to find, the easier it is to buy!
Optimize site search: Ensure your search function can handle variant-specific queries like "red XL t-shirt."
Create intuitive navigation paths: Think about your customer's journey. For instance, a path like Home > Women's > Tops > T-Shirts > Graphic Tees guides the user naturally through your store hierarchy.
Use breadcrumbs: These not only help with navigation but also with SEO.
Consider a mega menu: For stores with many categories and variants, a well-designed mega menu can provide an at-a-glance view of your product structure. (ℹ️ TIP! Looking for a mega menu? I love this plugin from Will Myers!)
Mobile optimization: Ensure your category structure and filters work well on mobile devices. Remember, a significant portion of your customers may be shopping on their phones.
Use the related products feature smartly: Many people use Squarespace’s built-in related products feature to display related products but did you know that you can specify exactly which categories you’d like to display for each product? This may be better than the default which is just going to show products at random based on either stock levels or what’s been most recently added to your store.
A/B test your navigation: What works best can vary depending on your specific audience. Don't be afraid to test different category structures or menu designs to see what resonates with your customers.
Ultimately, your site structure should feel invisible—guiding customers to their desired products without them having to think about the navigation process.
Future-Proofing Your Variant Strategy
As your business grows, so might your product offerings. Here's how to ensure your variant strategy scales with you:
Monitor your numbers & consider splitting high-variant products: Regularly check how close you're getting to that 250 variant limit. If you're approaching the limit, it’s probably time to think about creating separate product lines.
Consolidate when possible: Do you really need 15 ever so slightly different shades of blue tees? Would your sales really drop if you offered fewer options?
Plan for scalability: When adding new products or options, consider how they'll fit into your existing structure.
Stay flexible: The eCommerce world moves fast. Be ready to adapt your strategy as your business evolves.
Bottom Line
We've covered a lot of ground, from understanding the basics of product variants to strategizing for the future. Armed with this knowledge, you're now ready to transform your Squarespace store into a well-oiled, variant-powered machine.
Remember, mastering product variants is about finding the right balance - offering enough options to meet your customers' needs without overwhelming them (or yourself). It's about creating a shopping experience that's intuitive, efficient, and dare I say, even enjoyable.

3 Essential Squarespace Product Page SEO Tips to Boost Sales
Discover the power of Squarespace product page SEO with these three essential tips. Learn how to optimize your titles, descriptions, and images to attract more customers and boost your online sales.
Are you struggling to attract customers to your Squarespace shop? Implementing the right Squarespace product page SEO tips can make all the difference in driving organic traffic and boosting your sales. In this post, I'll cover three essential strategies for optimizing your product pages and getting your products in front of the right people.
Why Following These Squarespace Product Page SEO Tips Matters
Picture this: you've poured your heart and soul into creating an amazing line of artisanal candles. You've spent months perfecting your scents, designing beautiful packaging, and setting up your Squarespace shop. But when you finally launch... crickets 🦗
It's a disheartening feeling, knowing that your incredible products are just sitting there, waiting to be discovered. But here's the thing: if you haven't optimized your Squarespace product pages for SEO, you're essentially leaving money on the table 💸
Think about it - when someone searches for "lavender vanilla candle", you want YOUR product to be the first thing they see. But without the right SEO strategies in place, your candles might be buried on page 5 of the search results, gathering virtual dust.
The good news is that with a few simple tweaks, you can start attracting more organic traffic (and sales!) to your Squarespace shop. Let's dive in!
1. Optimize Titles, Meta Descriptions, and Alt Text with Target Keywords
When it comes to SEO for your Squarespace product pages, your titles, meta descriptions, and image alt text are prime real estate. These elements are not only visible to potential customers on the search engine results pages (SERPs), but they also give search engines crucial context about what your page is all about.
To make the most of these elements, be sure to incorporate your target keywords naturally. For example, if you're selling artisanal candles, your product page title could be something like "Handmade Soy Candles - Lavender & Vanilla | Your Brand Name". This title includes relevant keywords while also showcasing what makes your product special.
Your meta description should expand on this, providing a compelling and concise summary of what customers will find on your product page. Aim for around 150-160 characters and be sure to reiterate your primary keyword.
Finally, don't neglect your image alt text! This is a golden opportunity to provide context to search engines about your image content while also improving accessibility for visually impaired users. Describe your product images clearly and concisely, like "Lavender and vanilla scented soy candle in a glass jar".
2. Write Unique, Keyword-Rich Product Descriptions
Your product descriptions are your chance to really sell your items - both to potential customers and to search engines. Instead of using generic manufacturer descriptions, take the time to craft unique, compelling copy that highlights your product's key features and benefits.
As you write, weave in relevant keywords where they fit naturally. But remember - your ultimate goal is to provide value and answer any questions a potential buyer might have. Focus on creating helpful, engaging content and the SEO benefits will follow. (The simple Squarespace product page SEO tips in this post are a great place to start!)
Consider using storytelling techniques or highlighting what makes your product special. Maybe your candles are hand-poured in small batches using locally sourced ingredients, or perhaps they're inspired by your grandmother's favorite scents. These details not only make your products more enticing but also give you opportunities to include valuable long-tail Squarespace product page SEO tips.
3. Optimize Your Product Images for SEO and User Experience
Your product images play a crucial role in both SEO and user experience. High-quality, visually appealing images can help your products stand out in the search results and encourage potential customers to click through to your site.
To optimize your images for SEO, start by choosing descriptive, keyword-rich file names. Instead of using generic names like "IMG_1234.jpg", go for something more specific like "lavender-vanilla-soy-candle.jpg". This helps search engines understand what your image depicts and can even contribute to your rankings for image search.
Next, be sure to compress your images before uploading them to your Squarespace site. Large image files can slow down your page load times, which is a major red flag for SEO. Squarespace recommends using images that are no larger than 2500 pixels wide and keeping file sizes below 500KB for optimal performance.
Finally, consider adding alt text to your product images. We touched on this briefly in the first section, but it bears repeating! Alt text is a great place to include your target keywords while also making your images more accessible to visually impaired users and search engine crawlers alike.
Bonus tip: If you have multiple images per product, consider using Squarespace's built-in focal point feature to ensure that the most important part of each image is always visible, even on different device sizes. This can help keep your product pages looking polished and professional, no matter how customers are browsing.
The Bottom Line
Phew, that was a lot of information! But don't worry - SEO doesn't have to feel overwhelming. By focusing on these three key areas - keywords, product descriptions, and images - implementing my proven Squarespace product page SEO tips, you'll be well on your way to boosting your Squarespace shop's visibility and sales.
Remember our example candle shop? By implementing these Squarespace product page SEO tips, they could start ranking for relevant searches like "best soy candles" or "unique scented candles gift". And that means more potential customers discovering (and falling in love with) their products every day.

Top 5 Squarespace Shop Mistakes & How to Fix Them
Squarespace makes opening an online store smooth but scaling operations takes strategy. This post reveals the top 5 store management mistakes that may be hurting your growth and actionable ways to get back on track.
Listen, I get it. Setting up an online store via Squarespace offers a ton of out-of-the-box simplicity compared to tackling site design and a pile of code, and the beautiful templates and intuitive CMS make opening up shop online a breeze.
But don’t let that ease fool you - scaling eCommerce operations into a high-performing machine still takes savvy strategy. Without thoughtful setup and smart management choices, what seems straightforward can quickly snowball into an overwhelming headache.
Over my years building websites and consulting for scaling entrepreneurs looking to unlock growth through eCommerce, I’ve seen merchants make some common Squarespace store management mistakes that shoot future success in the foot.
Lucky for you though, these pitfalls are avoidable if you know what to watch out for! In this post, we’ll review five frequent problem areas and - more importantly - how to course correct.
Mistake #1
Improper Inventory Tracking
Without careful record keeping, items get lost in distribution centers and warehouses faster than a banana bread disappears at a farmer’s market.
Problem: Failing to thoughtfully organize inventory into Squarespace’s categories, tags or other filters makes scaling untenable. Plus not actively monitoring stock levels and reordering timeframes means unpleasant sell outs and scrambling to restock hot items.
Outcome: You can’t find product inventory when needed for an order. Items sell out and diehard customers get turned away empty handed. Massive revenue opportunity cost.
Solution: First, logically segment your catalog with categories and nested subcategories so both you and shoppers can navigate quickly at scale. For example, categorize apparel by type (shirts, pants), further broken down by style (casual, dress), gender, brand, etc.
Monitor best selling items and set minimum stock alerts tied to reorder timeframes by leveraging Squarespace’s built-in analytics and integrating an inventory management extension. Data is your friend!
Mistake #2
Complicated Shipping Options
Free shipping or no free shipping? Zones or flat rates? Tiered pricing by item cost or calculated by carrier? Decisions, decisions.
Problem: It’s easy to get excited by Squarespace’s expansive built-in shipping functionality and go overboard configuring a confusing spider web of custom rates, surcharges, and limitations. But this complexity quickly becomes a barrier preventing checkout and you’ll start to see abandoned cart rates skyrocket.
Outcome: Customers bounce from cart when they can’t clearly understand shipping fees or find an option that seems reasonably priced. Plus you sink unnecessary hours fielding customer service inquiries trying to explain variances.
Solution: I cannot stress enough - simple is best! Studies show free shipping dramatically increases conversion. So make that your hero offer as much as possible by baking modest shipping costs into base prices.
For supplementary paid shipping, configure just 2-3 flat rate tiers based on cart value brackets like under $50, $50-$100, and over $100. Publish handling times by common carriers. Be transparent upfront to set expectations. (p.s. This is all great info for an FAQ page.)
Mistake #3
Discounts Devaluing Products
Everyone loves a deal, there’s no doubt about it. But the lure of juicing short-term sales through discounts often backfires over the long haul.
Problem: Rather than special limited-time or targeted offers, you fall into the trap of keeping items perpetually “on sale” through sitewide promo codes plastered on your site.
Outcome: Customers quickly become trained to only purchase when receiving a discount and abandon carts or hold off buying items at full retail value. Your products seem meaningless without deals.
Solution: Shift promotional focus from widespread price cuts to exclusivity. Highlight specialty collaborations driving scarcity. Use segmented emails with special subscriber sales. Offer new customer discounts but fade them over time through customer lifetime value marketing.
Sparingly advertise discounts around seasonal launches or holidays using banners - then quickly revert back to regular prices. You want to seem generous at times without eroding product value. (Check out this post for more pricing psychology tips.)
Mistake #4
Gaps in Inventory & Order Visibility
With countless product details and customer orders to track daily, it's easy for gaps in visibility to emerge if you’re not proactive.
Problem: Relying on manual spreadsheets and notes rather than a centralized system leads to order processing delays, inventory blindspots, lack of customer purchase history, and more.
Outcome: You oversell out-of-stock items, mishandle customer data, respond slowly to fulfill orders without a 360-degree view. And with no analytics insights, you miss sales trends.
Solution: Eliminate blindspots by centralizing critical info and workflows into Squarespace’s stock tracking, order management, and customer profiles. Standardize order processing procedures. Export analytics reports to make smart decisions based on data.
Staying on top of the details can help you know when to cut items from your inventory, understand which customers purchase most often and help you streamline your back office procedures. Start leveraging the platform tools available to you!
Mistake #5
Transactional vs. Personalized Customer Experience
In the early days of your business, my guess is that you were on a first name basis with every shopper. And while growth is good, it’s easy to forget how important personalization was in making it all happen.
Problem: Once you scaled, customers became faceless transactions rather than unique individuals with preferences and a previous purchase history with your brand.
Outcome: Failure to make shoppers feel special can send them elsewhere to shop, which also means you miss out on referrals and community enthusiasm from loyal brand advocates.
Solution: Tap back into the CRM power built right into Squarespace like saved customer profiles and order data. Segment users by lifetime value bands so your VIP shoppers feel appreciated through special treatment and exclusive offers.
Send post-purchase surveys to identify pain points requiring attention across the buying journey. Personally respond to negative reviews. Have loyalty or affiliate programs that foster community among top fans.
Remember - personalized customer experiences drive measurable revenue gains, increased retention, valuable insights, and free word-of-mouth promotion! Don’t leave that money on the table.
Bottom Line
While it's easy to fall into these common eCommerce pitfalls, the good news is that they are all avoidable with a bit of diligent preparation and process focus upfront. Leverage the tools already available in your Squarespace platform and think proactively. Carefully organize behind-the-scenes workflows just as thoughtfully as you design the customer-facing storefront. Monitor key metrics. Continuously gather feedback. And never lose sight of the individual people who make this business possible - your customers!
By taking the time to purposefully streamline operations and experiences, you equip your brand for scalable, sustainable growth. So be confident in your path forward, learn from mistakes, and continue delighting shoppers - that's the recipe for long-term eCommerce success.

A Step-by-Step Guide to Starting an eCommerce Business in 2024
Do you have a great idea for an eCommerce site but no idea where to start? This quick step-by-step guide will help you cover the basics, launch quickly, and be able to start selling with confidence on Squarespace. We’re going lean and mean!
In my many (many) years as a web design and former design agency owner, one of the biggest traps I've seen new business owners and startups fall into is wanting everything to be absolutely perfect before launch day. And not just in a “let’s make sure to spell check the copy” kind of way. No, more in an “analysis paralysis”, perfectionist kind of way. Here are some of their trademark behaviors:
They get stuck on minute details that won’t affect their initial sales or long-term success.
They put off launching while they worked on extras that could have easily been added in Phase 2 (or 3… or 5… or 10) of the project.
They research and research and research but never actually make decisions.
They stall out because they’re afraid they missed something.
And if you’re wondering why you clicked on a blog post about how to start an eCommerce business in 2024 and landed instead on a little side story about people who’ll probably never launch, here’s why:
Because I want you to see how simple it is to just do it.
One of the things I love about Squarespace is how easy it makes it to just jump in and start selling. You can’t put off making sales while you wait for your website to be ready for you. You need to start selling ASAP. The rest can come later.
Taking a Lean-Agile Approach to Web Design & Development
Let me tell you how my little minimalist heart just sings at the sound of the words “minimally viable product.” When others hear it and think “barebones”, I hear the cha-ching of that cash register ringing.
An MVP product is one that starts lean so that you can:
Keep initial investment costs in check.
Get feedback before adding on new features.
Start seeing revenue right away to fund and finance the implementation of those features.
It makes sense in product development and app development and all sorts of other areas so why not web design?
So here we are: how to actually make it happen.
The Step-by-Step Guide to Starting an eCommerce Business in 2024
I could write a college textbook-sized document that covers all the things you could ever need or want to do on your website at some point but these are the things that you need to launch your MVP site. You know, the one that’s going to start making you money ASAP before you even crack open a book. We’ll dig into each of these things in detail in a bit but here’s our shortlist of absolute must-haves:

The Right Website Subscription
A Domain Name
3 Basic eCommerce Settings (Money, Taxes, Shipping)
Simple Content + Images
Legal Policies
With these things set, just add your products and you’ll be ready to sell!
Now let’s dig into each item in more detail:
The Right Website Subscription
There are two parts to this: the right website platform + the right subscription plan.
Now, it’s no secret that Squarespace is the MVP of MVPs. It’s my eCommerce website builder of choice and it should be yours, too. Some people will tell you (falsely) that if you’re in eCommerce you’ve “got to be on Shopify” and - sure- that’s an option you could totally look at.
However, as both a longtime Squarespace Circle Member and a Certified Shopify Partner I feel like I’m uniquely qualified to speak objectively about both platforms. I’ve built sites of all types and sizes on both and yet still choose Squarespace 9 times out of 10 for the sites I work on. Here’s why:
Ease of Use - I’m guessing you didn’t get into business to also learn how to code something as simple as a landing page or contact form. You’re most likely going to be the one managing day-to-day things on your site and I don’t want you to go mental trying to do so.
More Commerce Features - Yep, you read that right. On Squarespace, you can offer more product variations and sell more product types all without the need for paid plugins.
Limited Monthly Costs - You’ll find no one that hates feeling nickel-and-dimed more than me so the type of thing that really grinds my gears is when you pay a monthly fee to a service provider only to quickly realize that in order to do what you really want you’ll need to sign up for 8,342 additional paid apps. Welcome to the Shopify experience: where the world is at your fingertips so long as you’re willing to string together multiple third-party apps with questionable security levels in order to do the one thing the platform claims to be able to do well: sell stuff. With Squarespace, everything’s built right in with the exception of a few very specific optional add-ons making it easy to not just sell but to run your entire business without the need for multiple additional paid apps.
(For more Squarespace vs. Shopify comparison notes check out this post: Squarespace vs. Shopify: Which is Best for Small Business?)
So now that we’re all on the same page with Squarespace, it’s just a matter of picking the right plan. I break down all the options in detail here but here’s the TL;DR:
Choose Basic Commerce ($27/mo) if you’re just getting started and are in super cost-saving mode. You can switch plans at any time so you can always upgrade later. This plan is probably also sufficient for smaller sellers whose primary income isn’t generated online.
Choose Advanced Commerce ($49/mo) if your eCommerce website is the centerpiece of your business. The advanced tools really are what’s going to help you compete most effectively and they come at a pretty reasonable premium over the Basic plan.
A Domain Name
Hot tip before we jump into all things domain-related: if you pay for your Squarespace subscription (above) annually you can register a new domain name FOR FREE for the first year! This will not only save you a few bucks, you’ll never have to figure out how to log in to your “web host” ever again. Because it’s Squarespace. And it’s all just right there. 🧘♀️ZEN
Ok, now on to picking a domain name. I have two slightly contradictory pieces of advice on this front:
On one hand, your domain name is super important. Probably more important than your business name or your product names or your brand colors or anything else.
On the other hand, just pick something and keep on trucking.
In this post, I give a bunch of my been-there-done-that advice on domain names but since we’re going for simple here, my number one piece of advice on domains is this:
Go for the .com version! Vanity domains are becoming slightly more ok but if you absolutely can, find a .com domain that you can live with instead. People will get your vanity domain wrong, like, 96% of the time and that’s annoying for them and bad for you.

Beyond that, I just recommend keeping things as short and easy to spell as possible!
3 Basic eCommerce Settings (Money, Taxes, Shipping)
eCommerce doesn’t have to be scary! There are 1,001 settings and features and options but what it boils down to when you’re just getting started is:
Have a way to get paid
Make sure you’ve got your tax situation on lock
Put together a simple shipping strategy
That’s it. Everything else is secondary or can be added on and taken care of later.
Money - Create a Stripe account so that you can accept cards plus Apple Pay and Afterpay. One account, all the payments. Simple. (More here.)
Taxes - Put ‘em on autopilot.
Shipping - Don’t be stubborn. Just offer free shipping already. Here’s my #1 most recommend strategy in detail!
Simple Content + Images
This is one of my 3 Mistakes New Online Sellers Make: they say too much. Yep, that’s right. Most eCommerce newbies feel the need to write way more than they need to for their websites when the truth of the matter is that people don’t read websites, they SKIM them.
Bottom line: the best sites are simple, straightforward, and highly skimmable.
Most e-commerce sites need only a few static pages (such as an about page and an FAQ page) but I often see newbies give more real estate to the history of their company than they do to what they’re actually selling. This is a huge mistake and has the unintended side effect of reducing sales, which makes people think e-commerce isn’t worth it. The truth is, we’re often getting in our own way when it comes to sales.
A good rule of thumb for web copy is to write out what you think you need to say, then cut it in half... and then cut it in half again. Upside: less to write and faster to launch!
When it comes to the images on your site, it’s also important to keep things simple. Here are two of my best simple image tips:
Don’t worry about minute details in stock photos that may not be exactly right. For example, I once had a client say that a stock photo (that was otherwise perfect for their fitness brand) wasn’t going to work because the brand of weights shown in the image wasn’t the same as the brand they own 🙃 I guarantee no customer is going to notice a thing like that! Images are just there to set the mood and visually contribute to a bigger story. Find ones that work but don’t sweat the small stuff.
Selecting images that are consistent in style is one of the best ways to make stock images look less… stock. Select images that have the same overall colors and tones or the same photographic style, such as all black and white images.
You’d also be surprised at how few photos you’ll actually need on an eCommerce website - aside from product photos, that is! A few well-chosen images for banners and backgrounds on your static pages and you’re in business!
Legal Policies
I know, I know: if the tiny print is really as important as it is, why isn’t it at least in a larger font?! 😂 Jokes aside, you really need to make sure your arse is covered in case something goes sideways. Chances are it won’t but just think of the legal policies on your site like buying insurance; you get it on the off chance that something does go wrong.
My #1 go-to for website policies is Termageddon because it’s an affordable way to make sure that I’m always covered. The policies are auto-updated any time a data privacy law changes (which is actually pretty often these days) which really aligns with my desire to make things as simple and streamlined as possible. Set things up once and you’ll be covered forever.
You may also like: Legal Checklist for New eCommerce Businesses
Putting It All Together
Now that you’ve got the basics taken care of all you need to do is add products and you’re in business! Your MVP website will be a true MVP! The most important thing you can do is just launch. That’s it. Getting started is the hardest part but with these few basics taken care of, you can start selling right away while you turn your attention to the rest of your business. By launching quickly:
You won’t be stuck obsessing over teeny, tiny, meaningless details that won’t affect your ability to sell now OR see success in the long run.
You can feel confident in selling online and add additional features funded from those first sales.
You can build on the strong foundation you have when the time is right.
Time to launch your MVP eCommerce website!

What does it cost to start an eCommerce website in 2024?
Are you thinking about starting a website on Squarespace in 2023? In this blog post, I break down the costs of getting started on Squarespace, including domain registration, hosting fees, and premium design templates. Whether you're launching a simple shop or a robust online store, I've got you covered with all the pricing information you need to make an informed decision. Find out what it really costs to start a Squarespace website in 2023 and start building your online presence today.
Starting an eCommerce website can be an exciting way to sell products or services online and reach a wider audience. It’s no secret that my favorite platform for building an eCommerce website is Squarespace, which offers a range of templates and features to create a professional-looking website and super powerful online shop. But what does it cost to start an eCommerce website on Squarespace in 2024? In this post, I’ll break down the various costs associated with building and maintaining an eCommerce website on Squarespace, including template and plan pricing, payment processing fees, and other potential expenses.
Before we jump into the details, I have a few helpful tips to keep in mind about pricing in general:
Tip #1
Choose the right tool (or suite of tools) for the job
There are still a lot of people out there who seem to think that eCommerce is a costly undertaking, completely out of their reach. While this can definitely be the case if you’re using the wrong tools, I think it’s why it’s so important to make sure you know about all the options out there and what exactly each tool does. It’s also important to have a clear idea of exactly how each piece of software or app you plan on using specifically fits into your business ecosystem. I’ve seen too many business owners paying for redundant systems because they didn’t realize that Software A had the same features or capabilities as App B. (For some of my favorite tech combos for small businesses check out this post.)
Tip #2
Don’t be afraid of monthly subscription costs - just be smart about them
Look, I hate being nickel-and-dimed as much as the next person and I know it’s super annoying that everything these days seems to come with a monthly or annual subscription cost. However, paying monthly subscription costs for apps or software is definitely no more expensive than developing something custom. In fact, custom development is often much, more more expensive. I’ve had more than a few potential clients come to me over the years and inquire about building a custom solution for them because they either “can’t afford” or “don’t like” the monthly costs associated with various apps or tools to do the job. TL;DR things didn’t work out.
Think of it like this: if a company like Squarespace spends a lot of money on R&D to build a powerful eCommerce platform they can either charge a small number of big companies a ton for it (because those companies can afford it) -- or they can charge a large number of small businesses a little for it. Monthly subscription costs offer smaller players the opportunity to use the same tools that used to only be available to the big guys and so I say this is a huge win for small businesses! Love it or hate it, that SaaS model is what has helped put the cost of eCommerce website development into the realm of possibility for many small business owners that may not otherwise be able to afford it.
Tip #3
Don’t forget about tangential costs
It would be impossible for me to estimate all of these things because there are so many variables but there can be quite a few “non-website” costs that can impact the overall success of a website. Upfront costs are things like investing in great branding, strong product photography and compelling copywriting. You might also have ongoing expenses for things like paid ads, promoted posts, social media marketing, social media strategy and SEO. All of this is just to say that while the costs I’m going to outline below are a good place to start for the actual website part of things that you should expect to budget for these other upfront and ongoing costs to get the most out of your investment in a website.
What does it cost to start an eCommerce website in 2024?
Upfront Costs
The bulk of the expenses of an eCommerce website project come in the setup / getting started stage. There are three main factors to consider: the cost of a custom website template (if you choose to go that route), the cost of working with a web design professional to design/build/develop your site, and whether you need to add any third party plugins to customize your site.
Squarespace Template
All modern websites are built off a starting theme or template. This is just a framework that’s used as a jumping-off point so that you don’t have to reinvent the wheel with every new website.
One of my favorite things about Squarespace is that even the free templates are all modern and beautiful. Even better, sites built on the Squarespace 7.1 platform don’t even really need to choose between templates like before because all templates have the exact same features. This means that you’ll never be locked into anything by choosing the “wrong” template.
You also have the option on Squarespace from buying a template design from a third-party designer which is kind of like a compromise between using one of the free templates and going all-in with a web designer (like below). Paid templates are a really affordable way to get a “custom” look without the custom price tag and allow you to get started really quickly so IMHO they are well worth their very affordable price tags!
For more on templates, check out these posts:
Total template cost: $0-$399
Web Designer
I mean, not to be too biased or anything but this is where your investment can really make the difference 😉 especially when it comes to making your chosen template stand out from the crowd. An experienced web designer can use custom CSS, HTML, and javascript to tweak templates so they don’t look so generic and will have an excellent understanding of UX/UI best practices so that your finished site looks professional and converts visitors into customers!
The cost of a web designer is going to vary based on their years of experience but also just the going rate for the type of projects they specialize in and the clients they work for. For example, a designer that works mostly for local businesses in a small, rural town is probably going to have a lower hourly rate than someone who works for brand name companies in NY or LA. This doesn’t mean that one’s work is necessarily more valuable than the other, just that they cater to different markets and meet different needs. For an average small-to-medium business looking to either build their first eCommerce site or revamp an existing one, I have seen designers charge as little as $1000 and as much as $7000 or more.
When comparing web designers, it’s important to not just compare the bottom line cost but also the deliverables. What are you getting exactly? How many pages? How many products? Will you be getting help with SEO or copywriting in addition to the web design setup? What’s not included or is going to cost extra? Take a look at all of these things so you know exactly what you’re paying for.
Last note on this subject: if you feel like you’re somewhat technically inclined and interested in learning some of the basics you could always forgo hiring a designer and go the DIY route. As with most things of this nature, you have to understand that what you save in money doing it yourself will probably cost you in time. An expert can work a zillion times faster and knows what pitfalls and roadblocks to look out for. In most cases, I think that optimizing your time to market is a super relevant factor to consider; after all, you can’t start making money until you launch so spending too long in the development phase has a cost all its own.
Total web designer cost: $0-$7000+
Squarespace Plugins
These are code snippets that extend the functionality of your site and unlike other third party apps below, most of these you only have to pay for once when you first set them up. Check out my favorite plugins for Squarespace eCommerce in this post.
Total Squarespace plugin costs: $0-$160
Recurring Costs
Beyond the initial setup, there are some website expenses that you’re going to get billed regularly for, either monthly or annually. Paying annually almost always comes with a discount over paying monthly so save yourself some $$ and always sign up for subscriptions annually!
Squarespace Costs
Here are the main expenses for a Squarespace eCommerce website:
Website Subscription $276 - 588 / year - I break down the difference in all the plans in this post but this cost is for either the Basic or Advanced Commerce plans
Domain $9-12 / year - Unless you’re new to Squarespace and pay for an annual subscription in which case you get your first year FREE!
Email (G Suite)* $6 / user / month - Same as with the domain/hosting, above - Squarespace offers this FREE for one year for new accounts.
Third Party Tools
Alright, this is where things get VARIABLE because the apps you choose to use are going to probably different than the apps someone else uses making this super unique to each business. That being said, here are the rough costs for the things that I recommend for ALL business:
Email Marketing Subscription $60 - $420 / year - Compare my top three picks in this post
LiveChat $492 / year - more on my favorite tool for this and why I think it’s so important here
Legal Policies $99 / year - make sure you protect your business with an ironclad privacy policy and terms of service
Aftership $108 - $1188 / year - a custom order tracking page can make your small business look totally awesome
Automatic Returns Platform $0 - $1188 / year - worth every penny even if no one returns a thing. Find out why in this post.
Bottom Line
Modern eCommerce software has made it so much more affordable for small businesses to enter the market and even those pesky monthly costs should be considered manageable versus the high custom development costs of yesteryear. When it comes to total expenses, there are some ways to make sure you get the best bang for your buck by carefully selecting a platform and template that meets your business needs. Armed with the right tools and people on your team, you can keep monthly expenses in check and focus on growing your business.

Shopify vs Squarespace: Which eCommerce Platform is the Best in 2024?
The question I’m asked more than anything is whether small businesses and startups should choose Squarespace or Shopify for their eCommerce website. There are lots of variables that go into that decision but this post covers the biggest factors (ease of use, features & pricing) to determine the best option.
Are you looking for an e-commerce platform to launch your online store? Two popular options that you may have come across are Shopify and Squarespace. Both of these platforms are designed to help small and medium-sized businesses build and manage their online stores, but which one is right for you?
In this article, we'll compare Shopify vs Squarespace, looking at their features, ease of use, pricing, and more. By the end of this article, you'll have a better idea of which platform is best for your needs.
What is Shopify?
Shopify is an all-in-one e-commerce platform that lets you create and manage your online store. It's a cloud-based platform, which means that you don't need to worry about hosting or server maintenance.
You can use Shopify to build your website, manage your inventory, process payments, and more. As of 2023, 4.4 million websites use Shopify across 175 different countries. This popularity has led to Shopify being the go-to when someone thinks of building an e-commerce platform.
What is Squarespace?
Squarespace is a website builder that also offers e-commerce capabilities. It's known for its user-friendly interface and beautiful templates.
Squarespace lets you build your website using drag-and-drop tools, and you can use it to sell physical and digital products. Unlike Shopify, Squarespace is not exclusively an e-commerce platform; it's designed to help you build any type of website.
With over 3.7m subscribers on Squarespace's platform, not only is this a popular place to build a website, but the platform is also improving massively, especially compared to its competitors like Shopify.
Considerations of Each Platform
Below are some considerations you should bear in mind when deciding between Squarespace and Shopify. They are both fantastic platforms in their own right, so make sure to take the time to weigh them up for your business.
Ease of Use
Both Shopify and Squarespace are designed to be user-friendly and intuitive. Shopify has a straightforward interface that makes setting up your online store easy. The platform offers a variety of templates (some free and some paid), and you can customize your site by editing the HTML and CSS. Shopify Themes built on the newer Online Store 2.0 framework do feature better drag-and-drop functionality and more options to add sections to non-shop pages. This opens up a lot of design capabilities that Shopify previously lacked.
By comparison, Squarespace features a full drag-and-drop interface. Squarespace sites built on the latest Fluid Engine platform have almost endless possibilities for customization and design and while there are paid Squarespace template options out there (see some favorites here) all design features and functions are available even if you choose to start from a free template. Setting up a store on Squarespace is also a simple process, though some sellers with larger catalogs may find it harder to organize or manage their inventory without some extra support.
Features
Both Shopify and Squarespace offer a wide range of features to help you build and manage your online store. Here are some of the key features of each platform:
Shopify:
Inventory management
Payment processing
Order management
Shipping and fulfillment
Marketing and SEO tools
App store with over 4,000 apps and integrations
Squarespace:
eCommerce tools
Marketing and SEO tools
Customizable templates
Domain registration and hosting
Blogging tools
Exciting extensions and plugins, such as the Squarespace SEO plugin
Third-party integrations with platforms like EasyShip and TaxJar
Pricing
Pricing is an important factor to consider when choosing an e-commerce platform. Here's how Shopify and Squarespace stack up in terms of pricing:
Shopify:
Basic Shopify: $29 per month
Shopify: $79 per month
Advanced Shopify: $299 per month
Squarespace:
Business: $23 per month
Basic Commerce: $27 per month
Advanced Commerce: $49 per month
It's worth noting that both platforms offer free trials, so you can test them out before deciding which one to move forward with for your business.
Aside from monthly platform costs, you also need to factor in costs for any extra apps or plugins that you may need. Shopify features a very large app store which can be tempting to turn to but nearly every quality app requires a monthly subscription in addition to what you pay Shopify. These fees can range from a few dollars to a few hundred dollars or more per month so if you’re not careful they can really add up quickly.
There are apps, extensions, and plugins that you can add to Squarespace as well but in general, there is more built-in functionality within Squarespace that does not require any extra monthly spend. Aside from features such as Scheduling or Email Campaigns, everything else is included with your Squarespace subscription which can help you keep your budget in check.
Bonus: Check out this post to determine which Squarespace plan is right for you and use code KRISTINE10 for 10% off your Squarespace subscription.
Shopify vs. Squarespace Conclusion
After a detailed comparison between Shopify and Squarespace, it is evident that both platforms offer a lot of features and benefits to their users. However, Squarespace comes out on top due to its ease of use, affordability, and the availability of all the essential features required to run an online store. Shopify is a great solution for some businesses but Squarespace is the ideal solution for small businesses and startups who want a sleek and modern-looking website with the ability to sell products with ease. As your business grows in complexity or needs to scale, you may find yourself looking to Shopify as a solution but you’ll need to be willing to take on the additional costs and some design limitations when you do.
Shopify Vs Squarespace FAQs
-
Yes, Shopify does offer website templates that don't have an e-commerce functionality. However, these templates may not be as flexible as that Squarespace offers. If you don’t plan on selling anything right away or plan on using an alternate checkout method, go with Squarespace!
-
Squarespace does not offer a free plan.
Shopify does offer a very low cost “Starter” plan but it’s really geared towards those that do not want or need a full website of their own and is not really recommended for most users.
Both platforms offer free trials so that you can try them out before subscribing to a paid plan.
-
Yes, Squarespace allows users to sell digital products like ebooks, music files, and video downloads. Check out this post for all of the things you can sell on Squarespace without the need for any additional third-party apps.
-
Yes, Shopify does charge transaction fees of 2% on their Basic Plan, but these can be waived if users use Shopify Payments as their payment gateway.
Both of the Squarespace Commerce plans feature 0% transaction fees.
-
Yes, Squarespace allows users to use their own custom domain name or purchase one through Squarespace.
-
To improve your Squarespace SEO you can follow this Squarespace SEO checklist or list of Squarespace SEO tips.
This post was co-authored by guest contributor Henry Purchase, Founder of SEOSpace. SEOSpace offers an easy-to-use Chrome plugin created specifically for Squarespace. Their tool analyzes your Squarespace website for SEO and provides actionable steps to help you improve your search performance. It’s the “Yoast for Squarespace!”

Squarespace Holiday Selling Guide: Boost Your eCommerce Success
Are you ready for the 2023 holiday selling season? Discover 10 essential tips and strategies to maximize your eCommerce success on Squarespace. From chat widgets to free shipping and personalized checkout forms, my comprehensive guide will help you navigate the holiday rush and boost your sales.
Are you ready for the 2023 holiday selling season? The holiday shopping season provides a huge opportunity to bring in business from new and returning customers, and it's the most wonderful time of the year to spread some holiday cheer while boosting your sales. There’s a reason it’s called Black Friday, after all!
We all know that Black Friday and Cyber Monday are known for incredible deals and major discounts, setting the stage for a frenzy of shopping both in real life and online. The weeks between Thanksgiving and New Year's Day are the most hectic time of the year for brick-and-mortar retailers in the U.S., but eCommerce sellers tend to have a much longer crazy period. (In 2022, Black Friday generated a record-breaking $10.8 billion in online sales, making it the largest online spending day in U.S. history. Not to be outdone, Cyber Monday recorded a staggering $11.0 billion in online sales, surpassing Black Friday as the top online spending day ever.) What’s important to note is that the holiday season has expanded way beyond the traditional Thanksgiving weekend, encompassing the entire period from late November to early January. Shoppers now spread their purchases across several weeks and months, making it crucial for businesses to maintain consistent marketing efforts and be at the top of their games throughout the entire season.
To get ahead of this months-long holiday rush, here are my top 10 tips to get your brand ready for the season:
1. Have a Clear Return Policy (& Offer Free Returns)
One of the best eCommerce tips I can offer is to have a clear return policy and offer free returns. This will increase online sales, build trust with customers, and reduce abandonment rates. Customers may feel hesitant to make a purchase if they think they won't be able to return it if it's not what they expected. In fact, I've personally decided not to shop with companies that don't offer returns or exchanges. This time of year is a great opportunity to make sure your return policy is clear and easy to use. You don't want to be the scrooge that ruins a great experience with your stingy policies! For more information on setting up a self-serve returns portal, check out this post!
2. Offer Free Shipping
It's no secret that customers love free shipping, especially during the holiday season. This is why it’s a cornerstone of my most recommended shipping strategy! Even if you don’t do it the rest of the year (even though you should) offering free shipping as a way to incentivize shoppers to make a purchase is a great idea during the holidays. You can choose to provide free shipping on orders over a specific amount or for a limited time. This strategy not only encourages customers to buy but also eliminates any hesitation they may have due to additional shipping costs. Spread the holiday cheer by offering free shipping!
3. Turn on Afterpay
Many people prefer to spread out their purchases over time without relying on credit cards. It's similar to how your grandma might have put something on layaway at Kmart in the summer and paid it off over several months just in time for Christmas. However, with Afterpay, customers receive their order right away and pay Afterpay back over time. (Don't worry, you still receive 100% payment up front!) To learn more about how Afterpay works and how to enable it on your shop, check out this post.
4. Add Gift Cards
Gift cards are a fantastic option for shoppers who may be unsure of what to buy or prefer to let the recipient choose their own present. Some people think that gift cards are impersonal but I say that’s only true if the gift card is from a big box retailer. People LOVE shopping with small brands so consider adding gift cards to your product offerings. You can allow customers to purchase gift cards directly from your website by simply adding a new product and choosing the gift card option. This not only expands your sales opportunities but also caters to a wider range of customer preferences. Spread the joy of giving with the flexibility of gift cards.
5. Use Your Announcement Bar
The announcement bar on your website is valuable real estate for sharing important information with your customers. During the holiday season, make the most of this space by displaying enticing offers, shipping cut-off dates, or any other promotions you want to highlight. Captivate your visitors' attention and drive them towards making a purchase by leveraging the power of your announcement bar. 💡Bonus tip: if you’re looking to jazz up your announcement bar, I love this code from my pal Becca!
6. Reward Loyal Shoppers
Last Christmas, my family and I did a “favorite things” party instead of traditional Christmas gifts. The point was to share a little something that you used and loved throughout the year. The gifts weren’t necessarily huge or fancy - a really great pair of socks, a jar of someone’s favorite local-made hot sauce, another person’s must have scented candle. The point is that this is the time of year people are looking to the brands they already know and trust for gifts. Rewards could be simple (a special coupon code sent out to your VIP customer list) or more complex (I’m loving Offerwhere for a loyalty program that integrates amazingly with Squarespace) - whatever works best for you!
7. Add a Chat Widget
The holiday season can get pretty hectic, and this is when providing exceptional customer service is mission crucial. A chat widget (my favorite is LiveChat - all about that here!) can be a game-changer. By implementing a chatbot on your website, you can quickly address frequently asked questions, guide customers through the checkout process, provide product recommendations, and offer support in real-time. This efficient tool will help your customers feel heard and attended to, even during the busiest shopping days.
8. Offer Local Pickup
Even in the world of eCommerce, supporting local customers is important. By offering a local pickup option, you provide convenience to those who prefer to avoid shipping costs and long delivery times. Local pickup also gives you the opportunity to connect with your community and foster a sense of local pride. Don't forget to highlight this option on your website and let your customers know they can shop local even in the digital realm. For more on this, check out this post on how to set up local pickup or curbside delivery on Squarespace.
9. Add a Custom Checkout Form
Personalize the gift-giving experience by adding a custom checkout form to your website. This is such a simple way to allow customers to include a heartfelt gift note with their orders or offer them the option to add gift wrapping, if you offer it. Don’t forget, for those who want their purchases shipped directly to recipients, at checkout customers can enter the recipient's address in the shipping section instead of their own. You could use a custom form to allow people to indicate that the order is a gift and to not include any billing info along with the shipment. This small touch goes a long way in adding a personal and thoughtful element to each order that goes out this holiday season.
10. Create Gift Guides
Holiday shopping can sometimes feel overwhelming, with countless options to choose from. (And people are notoriously bad at making decisions when given too many options.) Help your customers navigate the gifting process by creating thoughtful gift guides. Curate collections for different categories of recipients, such as "gifts for him," "gifts for kids," or "gifts for the home." Include a mix of your own products and/or complementary offerings from other brands. By providing curated options, you make it easier for shoppers to find the perfect gifts and increase the likelihood of making a purchase. 💡Bonus tip! - an easy way to create shoppable gift categories is by using tags or categories to help shoppers filter their search!
As the holiday season approaches, it's essential to prepare your eCommerce business for the bustling days ahead. By following these tips, you can optimize your online presence, engage with customers effectively, and boost your sales during this festive time of year. Embrace the spirit of the season, spread holiday cheer, and get ready for a successful sales season!

The Best Alternative Checkout Methods
Squarespace offers a way to sell almost everything almost everywhere, but sometimes you just need another option. Whether it’s because you sell something super custom or because you’re just wanting to create a specific user experience for your customers - here are the best alternative checkout methods that can all be embedded or linked to from your current website.
Updated April 2023
Squarespace offers the ability to sell so many different types of things but sometimes you might need to look to an alternate checkout method. This could be because you’re selling something super unique that doesn’t fit well within Squarespace’s existing checkout options or because you use other business tools that integrate better with other options. Whatever the case may be, there are a number of alternate checkout methods that you can integrate into your current Squarespace website and still offer a streamlined way to get paid. Check out some of my favorite options below but be sure not to miss my final notes at the very bottom of this post with some tips on how to pull this off seamlessly!
Stripe
There’s a reason this is at the top of the list, and that’s because if you’re going to circumvent the built-in checkout system on your website, you might as well go straight to who was going to be processing the payments anyways, which in 99% of cases is Stripe. Stripe has been rolling out some awesome no-code and low-code solutions that offer some powerful ways to get paid while still keeping that sleek, minimalist design that makes my heart sing.
What I would use this for:
Pricing tables
Subscriptions
Client Portals
Payment Links
Quoting
What it costs: 2.9% + 30¢ which is the same rate as you’d be charged for accepting credit card payments through your site. (There are some additional features that come with additional fees, but most elements are included at no extra charge. See Stripe’s pricing page here.)
Flodesk Checkout
Most people know Flodesk for their great-looking email templates and easy-to-use email marketing platform, but they recently released Flodesk Checkout, which allows you to sell services, digital products, access to a course, or membership - whatever it is you sell! The process is smooth and, in true Flodesk fashion, pretty stylish too! This is an especially attractive solution because Flodesk automatically segments customers based on purchase activity, so you can seamlessly send targeted follow-up emails.
What I would use this for:
Digital goods or services
One-click upsells
Mini sales pages
Targeted email campaigns as a result of a purchase
What it costs: $35/mo as a standalone product; $59/mo to access all of the Email features in addition to Checkout. There are no other platform fees or limits, just the standard Stripe processing fee of 2.9% + 30¢ per transaction.
ConvertKit Commerce
ConvertKit is another popular email marketing platform (and the one I love most), and it has its own built-in way to get paid for things like ebooks, music, presets, or coaching. The biggest difference between Flodesk Checkout, above, and CovertKit Commerce is that you can set up subscription options. This means that in addition to all the regular digital or service products, you could also use ConvertKit to set up a subscription-only email newsletter or other services with recurring billing.
What I would use this for:
Digital goods, services, or subscriptions
Embeddable “buy now” buttons
Multiple pricing options: standard, subscription, donation, or payment plans
Targeted email campaigns as a result of a purchase
What it costs: ConvertKit has a free plan, but most people will want to be on the Creator plan, which starts at $9/mo. Commerce purchases are charged a 3.5% + 30¢ transaction fee.
Gumroad
Gumroad is a great option if you’re interested in spending less time tinkering around with the platform you’re selling on and more time creating whatever it is you sell! You can really get up and running in no time at all on Gumroad because it’s just so simple and well-designed. Another thing that sets Gumroad apart is that you can create a little community of people, not just customers. People can follow your page, and you can even embed a “follow” button on your website. They also recently launched the ability to offer upsells (an upgrade to whatever they intended to purchase) and cross-sells (new products that might pair well with what they’re purchasing. You can offer discounts on these and completely customize the experience for users.
What I would use this for:
One-click upsells & cross-sells
Digital services, memberships, subscriptions
Selling software or other licensed products
Selling multiple versions of products
Accepting payments in multiple currencies
What it costs: 10% flat (plus the standard i.e. 2.9% + 30¢ per transaction for Stripe).
Buy Me a Coffee
If you’re looking for a simple alternative checkout method that allows you to accept donations, sell memberships or offer commissions, you should definitely consider Buy Me a Coffee! You can even use it as a digital tip jar (like I do here 😉) or build wishlists for your fans to buy from. I really like the public-facing landing page that Buy Me a Coffee creates for you, and there are also options to embed your BMAC link on your site or even create a QR code for people to scan and pay you. It’s overall just so easy to use for all!
What I would use this for:
Memberships, services, donations
Commissions and physical products
Embeddable widgets
One Tap Payments
What it costs: There is no fee to create a Buy Me a Coffee account, and you can use all features like email and publishing for free. There is a 5% transaction fee charged for things aside from donations, in which case you’re just charged Stripe’s transaction fee (2.9% + 30¢ per transaction), which you can opt to cover for your customers or choose to have them pay for.
Paperform
I’ve written before about how Paperform can be used to create a custom order form for Squarespace, but the commerce capabilities really need more of a shout out! On Paperform you can create products, set up subscriptions, book paid appointments or other services on a calendar, and collect as much or as little extra information as you need from your customers in the process. I love how customizable Paperform is and how simple it is to create a really nice-looking checkout process that you can either embed on your own site or link out to, depending on the flow you’re going for.
What I would use this for:
Services or bookings
Subscriptions
Complex or highly customizable products that require advanced calculations or conditional formatting
Any instance where you also need to collect extra info at the time of checkout
What it costs: There are no transaction fees charged by Paperform - just the standard processing fees by Stripe or Paypal. Paperform subscriptions start at $24/month but I would suggest an annual Pro subscription ($40/mo) for most.
Proceed With Caution: Drawbacks to Keep in Mind
If you decide to implement one of the options above, you’ll need to keep in mind that doing so bypasses Squarespace Commerce entirely, which means that you’ll need to take care of things like order confirmation emails and reporting on your own somehow. Most of the options listed have some of their own options for things like this, but some don’t.
Just know that any products, services, classes, subscriptions, or downloads you sell through an alternate checkout method will NOT show up on Squarespace, and you may need to take some extra steps to do things like generate shipping labels (for physical products) or make sure your customers receive adequate communication from you about their purchases.
This isn’t to say that one of the above options isn’t a perfectly good solution for your unique business needs, just a reminder to think about the whole experience from start to finish for both you and your customer!

How to Display Your Products on Google for Free
I bet you didn’t know that one of the easiest tools you have out there to get your products seen in Google search results and across Google is not only easy to set up, but it’s also completely free to do so! Here are the steps you need to take to set up a free Google Merchant Center account and sync your Squarespace eCommerce site up to it.
I bet you didn’t know that one of the easiest tools you have out there to get your products seen in Google search results and across Google is not only easy to set up, it’s completely free to do so! Here are the exact steps you need to take to set up a free Google Merchant Center account and sync your Squarespace eCommerce site up to it.
Bonuses:
🚫 No confusing CSV files to format.
🚫 No manually adding products to Google one-by-one.
🚫 No need to update Google anytime you make a change to your shop’s inventory.
🆓 (Did I mention it’s free??)
What is Google Merchant Center & Where Do Products Display?
Google Merchant Center is the place where you’re basically telling Google what it is you sell and how you sell it. It’s where you can set up and manage free product listings that control how your products are displayed across Google’s various products, such as:


Create a Google Merchant Center Account & Connect It To Squarespace
Connecting your eCommerce site to Google Merchant Center is the way to go because it allows you to automatically sync all your products to Google versus having to add them one by one or worrying about formatting everything correctly. Here are step-by-step instructions on how to display your Squarespace products in Google Product Listings:
On your Squarespace site, go to the Commerce panel and then click on Google under Sales Channels.
At the bottom of the page click on “Sign Up With Google.” Assuming you don’t already have a Google Merchant Center account, you’ll be presented with a few prompts to help you create a new account. (Alternatively, you can also go directly to Google Merchant Center here and create your account first. The steps will be the same from here.)
Once you’ve create your Google Merchant Center Account, click Verify & Claim Website and copy the code provided for the HTML tag.
Back on Squarespace, click on the "Paste Google verification code into site header” button which will jump you to that section of Squarespace. (You can also get there by going to Settings > Advanced > Code Injection.) Paste the code provided by Google into the Header Code Injection area which is the top box on that page.
Click Save!
What happens next?
Now that you’ve connected your site and store to Google, all the physical products that you sell will be automatically synced and sent to Google Product Listings. If you’d like to check on the sync status, you can always head back to Commerce > Google right within Squarespace.
Squarespace + Google Merchant Center FAQs
-
A google-based email address (note: this does NOT mean you need a gmail.com address but just a business email address that’s through Google Workspace)
A business phone number that you can receive a phone or text on for verification purposes
-
If you’re having issues creating a Google Merchant Center account or connecting it to Squarespace, make sure you meet the following requirements:
You sell physical products. Google Merchant Center doesn’t work for service-based products. (Note: you can sell both on your site, but only the physical products will sync.)
Make sure your site language is set to English (United States). (Sorry, this is the only one it works with for now!)
Make sure that you’ve already set up at least one shipping option in Squarespace.
-
LOL I understand the skepticism.
Of course, Google would love it if you also decided to pay for Google Ads after you have all your products set up BUT, yes, displaying your products and store on Google is completely free.
Think of it this way: adding your products to Google allows them to be seen in search results just like how your site shows up on Google BUT if you want to jump to the very top of that list you’ll need to pay for it.
-
Yes! Why wouldn’t you take every free opportunity out there to get your products on Google’s radar? You can set this all up and never mess with paid Google ads if you don’t want to. But the potential payoff here is pretty big considering the set up process is so simple!
-
Once you’re all connected (meaning your site is claimed & verified by pasting the Google code on your Squarespace site), you can always check on the sync status for your physical products by going to Commerce > Google.
If you want more information, you can also log in directly to Google Merchant Center.
-
Nope. It’s all or nothing for all the physical products you sell. However, if you log in to your Google Merchant Center account you can see some more options for managing how your products are displayed.
-
Once your Squarespace site is set up and connected to Google Merchant Center, any product changes you make on Squarespace are automatically synced to Google meaning you never really need to do anything else. Magic! 🔮
If you’ve got 15 minutes, you can get your Squarespace products synced to Google!

The Definitive Guide to Squarespace Sales Tax
Understand Squarespace sales tax in a clear and simple way. Includes a step-by-step guide on setting up automatic sales tax rates on Squarespace with TaxJar!
Updated: November 2022
Squarespace sales tax — I agree, not the most fun topic! Taxes are fun for no one. Unless you’re my husband. But he’s a CPA so that’s different. For most people, the fact that they have to manage and collect sales tax when selling online is usually seen as a hassle or (worse) an afterthought. But, it’s a necessary evil and the last thing you want to do as a small business owner is screw around with not paying taxes. So, time to buckle down and just get this done - it’s an important step if you’re just getting started on setting up your first eCommerce shop. First, a quick primer on sales tax in general, then how Squarespace’s integration with TaxJar makes the whole process as easy and painless as possible.
*** Disclaimer: I am not a tax specialist. I am not familiar with all the laws and particulars in every state or country or every industry or business type. So consider this my best advice based on owning/running my own small businesses and working in eCommerce for eons. You should absolutely, 100%, no-doubts-about-it get yourself in touch with your very own tax professional who is familiar with 1) your business, 2) the laws in your state, and 3) your industry. It’s on you to make sure you get the best accounting + legal team in place to protect yourself and your business. ***
Figuring Out Sales Tax in 3 Easy Steps
Even though it seems like we’ve all been online shopping for forever now, sales tax laws have been somewhat slow to catch up and the whole thing is still a little bit of a wild west. There are several factors that determine how tax should be calculated, if at all. One of the biggest factors is where your business is located since the majority of US states require you to collect sales tax from online sales but here’s the thing — they all have completely different rules to comply with. As a small business owner, it’s kind of unreasonable to think that you’re going to be able to keep up with all of them but as an online seller, you’re still responsible for charging your customers the right amount of sales tax and remitting the amounts collected back to the various states you sell in 🤡 Don’t worry, we’re going to break it all down here.
STEP 1: Is what you’re selling taxable?
This is the first thing to consider is whether whatever it is you’re selling is taxable where you are selling it. States all have different rules and criteria to consider so this requires a bit of research. For example, some states tax food, and others don’t. Some have different rates for certain products versus others. Each state decides which items are taxable and which aren’t so you need to check by state-by-state on this. (In some instances, what product type you’re selling also matters but I’ll get into those specific use cases down below!)
STEP 2: Where do you have nexus? (And also, what is nexus?)
All of the sales tax articles you’re going to read online are going to refer to “Nexus” which can seem like a kind of overwhelming concept. The bottom line is that “nexus” is just a legal way of describing how connected you are to a particular state. For example, if your business is based in California, you automatically have nexus in California because you’re pretty significantly connected to it! Think of it as if you had a brick-and-mortar business - you would be physically connected to wherever your shop is located.
Now, add in online sales. Instead of just selling to local people from your shop, you’re selling to people from many different states all across the country. Well, all of these places have different sales tax rules and they want their cut! This is where nexus comes in and it basically means that if you sell enough in a particular state that you are required to collect and remit sales tax to that state. The thresholds for what constitutes nexus in each state are - you guessed it - completely different. For example, you’ll need to sell over $500k to Texas residents before you are considered to have a significant presence there. By comparison, if you’re selling to residents in Florida you’ll only need to have sold $100,000 to reach nexus.
There are other reasons some states may consider you to have a physical presence in their state even if your main office is located elsewhere and you don’t sell to any of their residents. This can be anything from having a contract salesperson who lives in that state to using a third-party distributor based there or even if you’re just storing inventory in a warehouse. Long story short, there are lots of varying factors that go in to determining nexus!
STEP 3: Are you in a destination- or origin-based sales tax state?
Most (but not all!) US states have what is called destination-based sales tax. This means that tax is charged based on the buyer’s shipping address regardless of where the product originates or ships from. This means that where you are located as the online seller really doesn’t have much to do with the amount of sales tax you collect. But here’s where things get wild…
In most states, like where I live in Washington, there’s not just a state tax to contend with but lots of different local, city, and county taxes that are factored in based on zip code. So even though the base sales tax in Washington state is 6.5%, the amount of tax I need to collect on a sale to a customer downtown Seattle ends up being 10.1% but only 9.2% to a customer on neighboring Bainbridge Island. Things were set up this way because it assures that every local area receives the sales tax income based on the purchases their residents make.
On the other hand, origin-based sales tax states charge tax based on the seller’s location regardless of the buyer’s shipping address — so the complete opposite of a destination state. This means that if your business is located in Salt Lake City and you ship to a customer in Park City that you will charge every customer 7.75% (the SLC tax rate) and not 9.05% (the Park City rate). While this is somewhat easier for small businesses to administer, it only applies to in state purchases and most eCommerce shops have a wider reach than that! This is why even if you live in an origin-based state, it’s still important to understand tax implications of selling to those outside your area.
The Quick Version of All The Above
Some things sold online are taxable and others aren’t.
The amount of tax that needs to be collected can vary down to a zip-code level basis so that local sales taxes can be collected from online sales regardless of where they ship from.
Some states will require you to collect and remit sales tax even if you’ve never stepped foot there.
Some states factor in where an order is being shipped to and others factor in where an order is being shipped from.
All of this varies state by state.
How to Automatically Calculate US Sales Tax on Squarespace
Back in ye olden days of the internet, sales tax complications were a huge obstacle for most small businesses. Why? Because previously you had to enter in sales tax rates manually by zip code for everywhere you were required to collect and remit taxes. 😱 And every time those rates updated, you had to update your website. This was a painstaking process that involved downloading spreadsheets provided by states and coding in lookup functions to your cart. TL;DR not the best of times.
Now, we can take all of the above that we just learned about sales tax and effectively shelve it, or at least most people can. It’s good to know how it all works but it’s also nice to not have to manage it all yourself by simply taking care of all the intricacies of calculating Squarespace sales tax automatically using the built-in Squarespace TaxJar extension. The Squarespace extension uses TaxJar’s real-time sales tax data to calculate the correct sales tax at checkout based on all the criteria we discussed above. (Note that there are a few exceptions - see the FAQs below for notes on these!)
Step-By-Step Guide on How to Enable Automatic Rates on Squarespace
To be able to set up automatic tax rates, you’ll first connect the TaxJar extension in your Squarespace account and then flip over to TaxJar to finish setting up your business profile there.
In Squarespace: from the home menu > Commerce > Taxes > in the TaxJar box click Connect and follow the prompts to select your site and create your TaxJar account login info.
In your new TaxJar account: click on your email address in the top right and select Business Profile. Just fill out the missing fields and click Save.
Still in TaxJar: click Add State Regulations. Under “Nexus States" select your state from the dropdown and fill out the fields that come up (they may vary by state). Check the box that says “Enable TaxJar's API to calculate sales tax for this state” and click Save. Repeat this step for any other states where you have nexus.
You’re all set! The correct sales tax will now be calculated for orders in all the states you added in TaxJar.
Squarespace Sales Tax FAQs & Exceptions
-
Solution: set up tax categories! This will allow you to assign different products to different tax categories so that they are taxed at different rates at checkout. For more on tax categories in TaxJar, click here. Once you have these set up you can assign products to a category in the product editor within Squarespace.
-
In this post, I recommend that pretty much everyone selling on Squarespace should be on a Commerce level plan (either Basic or Advanced) which includes a free TaxJar account for calculating automatic sales tax rates.
Even though technically you can set up automatic tax rates if you’re on the Business plan, you won’t qualify for a free TaxJar account and the cost of upgrading to even the most expensive Squarespace Commerce plan is cheaper than a paid TaxJar account.
-
If you’re only interested in automatic tax rate calculations and you’re on a Squarespace Commerce plan (see above), you do not need to subscribe to a paid TaxJar plan. Your TaxJar account is included as part of your Squarespace subscription.
If you’d also like to take advantage of TaxJar’s sales tax filing, economic nexus monitoring and reporting features, that does require an additional subscription. TaxJar’s professional plan starts at $99/month for up to 200 monthly orders and has a tiered pricing plan for larger order volumes.
If you’re already working with a sales tax professional or accountant (as you should be!) I would say that you likely don’t need to also pay for TaxJar since they will be taking care of tax reporting and filing for you. Ask your accountant if they will be doing this to be sure!
-
If you offer local pickup or curbside delivery in your online store, you’ll want to add a manual tax rate that reflects the current sales tax percentage at your location. Then, when you’re setting up your local pickup option people will be charged tax based on your address instead of theirs.
-
Just go to Commerce > Taxes and make sure that there is a green “Connected” message in the TaxJar area.
If you’d don’t see a green “Connected” message you probably just need to complete the set up process on TaxJar. Follow the steps above to finish setting up your TaxJar business profile and adding in any states where you have nexus then recheck.
If things still don’t seem to be working or calculating correctly, be sure to read the FAQ below about exceptional use cases!
-
There are a few reasons why this may have happened:
The most common reason is that the order was placed for a state that you do not have nexus in and/or did not set up by adding it in TaxJar. If this was in error, go back to TaxJar and add the state to prevent this from happening again.
If you’ve set up tax categories in TaxJar make sure they are assigned correctly to each product in Squarespace.
If the order was for an international address, you’ll need to set up those rates separately. TaxJar only automatically calculates rates for US addresses.
-
If you’re already on a pro plan with TaxJar and want to keep it for reporting and filing, you can still connect it Squarespace to automatically calculate sales tax. When you’re connecting TaxJar to Squarespace just sign in using your existing TaxJar account info and follow the rest of the steps/prompts the same way as detailed above.
If you’re on a Squarespace Commerce plan, you do qualify for a free TaxJar account for tax rate calculations only. If that’s all you need, reach out to TaxJar here to get help moving it to the free version.
-
If you connect the TaxJar extension to Squarespace you can delete any manual tax rates for everything except:
Your location’s tax rate, if you offer local pickup.
International tax rates for any countries that you also have shipping zones set up for.
-
For US-based sellers who ship internationally OR sellers based outside of the US, you’ll need to set up rates manually. Check out this Squarespace help article for more on manual tax rates for Canadian provinces and this one about collecting VAT or GST for those details.
-
Yes but ONLY if you have nexus there. So don’t freak out if you only sell sporadically to some states and those orders come through without tax! It most cases, it’s actually illegal to charge and collect sales tax in a place you do not have nexus.
-
If you sell digital products or services and are located in an origin-based state, Squarespace does not ask for a shipping address. Because of this, TaxJar uses your client’s shipping address to lookup what tax rate should be charged. This is incorrect UNLESS you have nexus in other states aside from your own.
What do do? If the specific use case outlined above describes you, TaxJar’s product will currently NOT WORK for you. Disconnect TaxJar, turn off automatic rates and set up rates manually on a state-by-state basis instead.
If you only have nexus in your home state, add your tax rate to all locations you ship to manually.
If you have nexus in any other states as well, add those states tax rates manually and then use your home state rate for all remaining states.
-
List of origin-based sales tax states:
Arizona
California - Hybrid origin / destination
Illinois
Mississippi
Missouri
Ohio
Pennsylvania
Tennessee
Texas
Utah
Virginia
States without sales tax:
Alaska (No state tax but some locations charge local tax)
Delaware
Montana
New Hampshire
Oregon
Any state not listed above is a destination-based sales tax state.

10 Simple Ways to Prep Your eCommerce Shop for the Holidays
Getting ready for holiday sales doesn’t have to be overwhelming! The 10 simple things on this list will help you make sure that you’re ready for the influx of orders and inquiries that come with running an eCommerce business this time of year.
If you’re looking to make sure that your site and store are all prepped and ready for online sales this holiday shopping season, you’re in the right place! Even though I personally tend to prefer a strategic product drop or flash sale that doesn’t depend on seasonality, it never hurts to make sure that your site is in tip-top shape. The 10 simple things on this list will help you make sure that you’re ready for the influx of orders and inquiries that come with running an eCommerce business this time of year!
1. Make sure you’re using Squarespace to track your inventory.
And that your inventory counts are accurate and up to date! Correct inventory counts can help you know what you need to order more of, what you should discount or put on sale, prevent overselling, and create a sense of urgency to buyers. If you sell on multiple platforms or need to sync inventory into Quickbooks for accounting purposes, try Trunk (review in this post) which keeps everything synced up automatically!
2. Customize your store’s notification & cart abandonment emails.
While this is something you want to do anyways, making sure that your emails are personalized is a great tip around holiday time. Including special information about shipping timelines or return policies can help reduce the number of customer service inquiries you receive so that you and your team can focus on fulfillment instead. Personalizing your shop’s emails can also help you build a sense of community around your brand, helping boost loyalty and repeat business. And don’t forget about your cart abandonment email! Updating it so it feels relevant to the season can make it stand out and provide a gentle little nudge to come back to your site and complete their purchase. For more on customizing your Squarespace eCommerce emails, click here!
3. Connect a shipping extension to your site to make fulfillment easier.
I mean, unless waiting in line at the post office on Christmas Eve is your thing I guess? 🤷♀️ A shipping extension is basically the friendly little office assistant you never knew you always needed. The right one will select the best courier, generate labels for you and automatically update Squarespace to mark the order as fulfilled with the tracking number. You can check out this post for a review of all the available shipping extension options on Squarespace but my fave by far is Easyship.
Bonus: sign up for a new account using code GWZMUM and get a $20 account credit. Thanks, Easyship!
4. Offer FREE shipping.
The reason behind this is simple: shipping fees kill conversions. Even if you don’t want to include free shipping as part of your strategy year-round, adding a free shipping tier will help you be more competitive during the holiday shopping season. You don’t have to give it all away, though! Use an automatic discount to limit free shipping on only orders over a certain amount. This will help boost conversions AND increase average cart value! (For more on this topic, check out How to Set Up a Profitable Shipping Strategy on Squarespace.)
5. Set up local pick-up.
If recent years have taught us anything it’s that the number of people shopping online for the holidays has totally inundated carriers like UPS, FedEx, and USPS. To prevent shipping delays causing major holiday disappointment, offer your local customers the option to pick up their online orders in person. This means they can shop right up until the last minute (something they can’t do from other online retailers who’ve had to cut off shipping for the season) and could also lead to some last-minute in-person buys. Win-win! For more on exactly how to set this up, check out this post.
6. Update your FAQ page.
I love a great FAQ page. Done right, it can help your customers find instant answers to their questions and reduce customer service inquiries about basic or routine things, freeing you up to focus on more important issues. Setting up an FAQ page on Squarespace is easy (here are some tips on how to do it!) but the most important thing is obviously the content. Anticipate the needs of your customers and make it easy for them to have everything they need to feel comfortable shopping with you.
7. Add an announcement bar to highlight shipping & promo info.
Among all the built-in features to help you sell on Squarespace, I really love using an announcement bar around holiday time to keep people up to date on shipping cutoffs, promos, or any other relevant information that might motivate them to buy. If you have a lot of info, don’t try to cram it all into your announcement bar. Instead, use that real estate to link out to your FAQ page or a landing page dedicated to holiday info.
8. Offer gift cards.
Of all the things you can sell on Squarespace, gift cards are probably the easiest to set up and make perfect sense for the holidays! While I usually move gift cards to the bottom of the heap in larger stores, during the holidays I would actually do the opposite and move them right to the top! You can even feature them in a pop-up or in a prominent place on your homepage to make them a convenient option for people looking to give an easy gift.
9. Be smart about your discounts & sales.
Even though the holiday season can feel like a total frenzy doesn’t mean that you shouldn’t take the time to be methodical in what you put on sale or what discounts and promos you plan on running. All of this is a long way of saying don’t just go marking things down or making up offers willy nilly. Start by making sure you understand how discounts work on Squarespace and then make sure to check your Squarespace commerce analytics panel.
10. Hit up your mailing list!
You’ve put in all this hard work and now it’s time to tell everyone all about it! Stats always say that it costs way less to sell to an existing customer than to acquire a new one and there’s no time like the holidays to take care of your VIPs! If you’ve been using customer profiles to track your customers and their activity throughout the year, it’s easy to add frequent customers or big spenders to a special segment of your email list. Send them things like special offers or advanced notice of sales via Squarespace Email Campaigns -- everyone loves feeling like they’re in the insider’s club!

How to Set up a Wholesale Shop on Squarespace
Wondering how to sell wholesale on your Squarespace site? I've got you covered with several different ways you can make this happen! Plus, who should (and shouldn’t) give wholesale selling a try, my recommended wholesale tool and 4 wholesale tips to help you sell more confidently.
Updated: Sept 2023
There’s a lot to love about Squarespace Commerce (exhibit A, exhibit B, exhibit C, etc.) but if you’re interested in adding wholesale to the mix, you may have found you need something… more. This is because, in addition to normal eCommerce functionalities, B2B sellers might need to offer things like tiered pricing structures, alternate invoicing or net payment options, or ways to keep wholesale prices hidden from the public, among other features.
Ultimately, I think the fact that these things aren’t necessarily built-in to Squarespace isn’t a shortcoming at all; you wouldn’t be upset if your shipping software didn’t also manage your social media posts – these are just very different tools! In the same way, traditional eCommerce and wholesale are two very different things.
So let’s dig into a bit about wholesale, who should do it (and who shouldn’t), my recommendations for how to get started, and tips from some of my friends in the biz that know wholesale better than anyone. Stick around for some wholesale FAQs at the bottom of this post. Here we go!
First, is your business too small for wholesale?
Adding a wholesale arm to your eCommerce business can be a beneficial thing for many small to medium businesses (even startups!) and I would say the biggest mistake is waiting too long to get started! Establishing even a few solid wholesale connections early on can help you get your name out there and help you build a following.
This isn’t something just for the big guys or those who’ve already made a name for themselves. I would even say that forging some strong wholesale relationships early on can be a great indicator of long-term success. So if this is something you’ve been considering or sitting on - don’t wait!
Options for Setting up a Wholesale Shop on Squarespace
Once you’ve decided to start selling wholesale, you probably started tinkering around with the specifics of how to actually make that happen and quickly became stuck. I don’t blame you! If there are a million moving parts to traditional eCommerce, there are a billion more for a business looking to sell wholesale. But it doesn’t have to be scary or overwhelming! Below are some ideas on how to start selling wholesale on your Squarespace website.
Create a second shop and password protect it.
This solution is pretty low-tech (Squarespace does all the heavy lifting for you) but it’s not without several drawbacks. Running two mirror images of the same store (one for retail and the other for wholesale) may technically work but you’ll need to think about how you’ll manage inventory levels, what to do about duplicate SKUs and how you’ll take care of the administrative side of things.
Also, since commerce settings are set at the website level on Squarespace things like what shipping methods you offer and what payments you accept need to be able to apply to all shop pages on your site; there’s no way to offer different options that would be tailored to a wholesale customer’s needs and keep those out of sight to your retail customers.
And don’t even get me started on what happens if and when you need to change the password on the wholesale shop! What do you do then? Email all your wholesale customers with the new password?! Awkward.
Use a Wishlist Plugin
If you’re only selling wholesale and want to be able to have potential customers essentially “request a quote” from your online shop, you could look at using SF Digital’s Product Wishlist Extension. This plugin replaces your traditional cart functionality with a custom form that allows customers to send you their “wishlists” without needing to enter any payment or shipping information. I’ve used this plugin for just this purpose before and it works great with a few (kinda) major caveats.
The first big thing is that you cannot use this plugin on any site that you also want to have a traditional eCommerce shop on. So this may work well if you don’t have a retail shop and are only selling wholesale but not if you’d ever like to be able to do any B2C selling on your site.
The other things to consider are similar to the duplicate shop scenario, above. With the Wishlist Plugin, you’ll need to have systems in place to manually calculate shipping, process payments, and communicate with your customers. You’ll have all your inventory set up on Squarespace but all the commerce functionality as far as getting paid and sending notifications, etc. will need to occur off the platform. Where and how is up to you.
Use Custom Coupon Codes
Ok, ok. So we’ve encountered two not-so-perfect scenarios. What about just creating coupon or discount codes for each wholesale buyer? Not a bad idea at first. The good: you can control who has access to discounts on an individual account basis and can provide different wholesale buyers with various discount levels.
I’ve had some clients set up systems like this for things like influencer marketing, creating individual codes to distribute to each person they’re working with. Depending on how many accounts you have this system can quickly be hard to manage though and it’s very difficult to gain access to helpful metrics and analytics on usage. (Tip: in the case of influencer marketing, I would check out my tips for setting up an affiliate or referral program instead.)
For wholesale, I would say this is also a passable but imperfect solution. Just like in the duplicate shop scenario, it also assumes that your wholesale customers are interested in the same shipping and payment options as your retail customers and I can see the mess of tracking spreadsheets and semi-canned emails quickly making you swear off what could otherwise be a profitable venture.
Try Candid Wholesale (My Recommend Method!)
I’m always keeping my eye out for solutions that I feel I can wholeheartedly recommend to you and you know I’m keen on keeping a lean tech stack, meaning I never recommend adding third-party solutions haphazardly. They’ve got to do what they say they will, and they’ve got to do it well.
Meet: Candid Wholesale
Candid Wholesale is an official Squarespace Extension that makes managing the wholesale side of your business a breeze. Remember what we said about choosing the right tool for the job? This is it.
At its simplest, Candid is a wholesale order management tool but it's really a robust CRM system geared towards helping you grow your entire wholesale business. With Candid you can take orders, send quotes, set up custom invoices, create a custom wholesale storefront, manage your customer relationships, and more.
Candid is going to take care of the problems some of our other imperfect solutions couldn't, such as: syncing up SKUs and shipping information, providing meaningful data to help you make informed decisions, and creating a wholesale experience for your customers that’s as great as your products are.
You can keep your current retail side of things exactly as they are and Candid will automatically keep the wholesale side of things in sync. You can choose which products you want to show in your wholesale catalog, how you want them organized, and quickly set prices for your wholesale customers.
Other Notable Candid Wholesale Features:

Create collaborative order forms that you can send directly to your wholesale clients.
An integrated message system keeps conversations in one place.
Accept payments online - or not. (Perfect if you accept check payments from accounts with net terms.)
Send reminders for past-due invoices.
Track shipments and invoices in real-time.
Control access to your wholesale catalog.
All plans include unlimited orders and no commissions, you just pay one flat monthly fee. There are three pricing tiers and while the Pro Plan is going to be great for most, I really love the embedding feature of the Complete plan!
Wholesale Tips from The Pros at Candid Wholesale
I recently had a great conversation with the co-founders of Candid Wholesale, Avery Bloom & Dave Lowensohn. In addition to talking about Candid's features and some of the “why” behind the business, I asked if they had any sage wholesale advice to share. Here were their top tips:
Consider the benefits to your brand that come with being featured in someone else’s shop. Selling wholesale is about more than just the individual sale; a retailer that’s willing to stake their own business on your products is the ultimate endorsement! This can be a great way to get your name and brand out there and build relationships with more established sellers with their devoted followers.
Don’t think of wholesale as a feature that you can just turn on or off. Selling wholesale is more than just offering discounted prices in your regular eCommerce shop, as you can tell from the pros and cons of some of the solutions outlined above. You want to be able to offer payment terms, a clear and easy ordering process, and an experience that’s tailored to the wholesale experience.
Think about economies of scale. Selling wholesale can help you take advantage of price breaks on your raw materials or other components that go into your products. Instead of buying 10 of something, you’re able to buy 100 at a better unit price. Hint: this can also help you improve profit margins on all those retail orders as well!
Focus on building relationships. While we talk a lot about ways to personalize and customize the traditional eCommerce shopping experience, wholesale is in many ways still pretty old-fashioned. Great wholesale partnerships can last decades meaning it’s worth it to invest in the tools and systems to make those relationships successful and ensure you can consistently deliver on your promises.
Wholesale FAQs
-
Yes! Wholesale is not for everyone. Wholesale probably isn’t a good fit for your business if:
You’re selling products with already very thin profit margins. In this case, you probably don’t have any room to discount to a point that would be attractive to wholesale buyers. You never want to be swapping high-profit margin retail sales for lower-profit margin wholesale ones if you can’t do both.
You don’t have a way to keep up with accounts or manage the additional sales volume. It’s easy to let things fall through the cracks without good systems in place and failing to deliver for your wholesale clients can send things south fast.
-
Oh, I’m glad you asked! First, if you’re unfamiliar with Faire – it’s an online wholesale marketplace where sellers can post their goods and buyers can browse from a bunch of sellers all in one place. Think of it kind of like Etsy meets Match but for wholesale.
Faire’s pitch to sellers is seemingly attractive at first glance. They promise no setup fees, no long-term commitments, and access to thousands of eager buyers. It would be easy to assume that you’re just going to sign up and then sit back and watch the wholesale orders come rolling in. The reality is pretty bleak, though.
The truth is that if you sell on any sort of online marketplace, including Faire, you’re not doing anything to build your own brand. You don’t own the relationships you’ve built there and you don’t have any control of how your company is represented. There’s no promise that the marketplace will continue to exist - or that you won’t get kicked off the platform at any point for selling to customers 1:1, which is a violation of their terms of service. And where would you be then? (Hint: I take the same stance when it comes to selling exclusively on social media.)
It’s simple when you think about the economics of a marketplace that only makes money when they connect buyers to new sellers. Simply put: it means that it’s in Faire’s best interest to introduce your customers to your competitors. Faire may not charge a commission if those customers bought from you, but they make 25-30% if they connect them to your competition.
Bottom line: in an industry built on long-term personal relationships, be wary of anything that promises anything sounding too much like a “get rich quick” scheme. If it sounds too good to be true, it probably is.
-
One of my favorite myths to bust! Just like Squarespace, Shopify is a traditional B2C eCommerce platform. This means that all the same issues I talked about above for Squarespace apply to Shopify as well. They are simply not a wholesale platform out of the box. However, there are technically three ways to sell wholesale on Shopify which I’ll quickly cover here.
The first is via Shopify’s wholesale marketplace called Handshake. Let’s just say that all my warnings about Faire apply 100% to Handshake as well. I’m not even going to link to it. Caveat emptor.
The second is by adding the wholesale sales channel to your existing Shopify store to (wait for it) create a separate, password-protected storefront. Sound familiar? And don’t assume that just because it’s on Shopify that it’s somehow better than on Squarespace (it’s not). First of all, the fine print on the wholesale sales channel is that it is only available if you’re on Shopify Plus which starts at $2k per month and goes up from there based on sales volume.
Assuming you’ve passed on both of the options above, you could always head over to the Shopify app store and search for a suite of plugins to add to try to emulate wholesale functionality in a meaningful way. You’re going to need something for price lists, another for user/login management, something to create and manage client portals, another thing to host your catalogs, and something else to manage your bulk shipping options. Never mind that each of these apps comes with its own monthly cost, the likelihood of everything working together as it should and details not slipping through the cracks is crazy small. Another inelegant solution.
A Final Note on Wholesale
First and foremost, you’re never too small to give wholesale a try! Successful wholesale relationships can become a source of stable income and help you get your business and products out there. Using the right tools for the job, such as Candid Wholesale, can make the process smooth and easy for both you and your wholesale partners. Just remember to always keep your eyes on your margins and focus on building your own site where you can own and control the experience.
Ready to give wholesale a try? Get Started With a 7 Day Free Trial of Candid Wholesale PRO!

Should You Offer Free Shipping?
Free shipping is popular but may not be the best solution for everyone. Learn when it works, when it doesn’t, and 6 strategies to explore if you’re thinking of offering it as a shipping option for your online store.
If there’s an area where every single online seller seems to struggle, it’s trying to figure out what to charge for shipping and delivery. It’s such a challenge because there’s a very fine line between a solution that eats into your profits as little as possible and one that doesn’t completely turn customers off at checkout.
I tell nearly every client I work with that they absolutely should be offering some form of free shipping. It can be a hard pill to swallow but if you consider that more than 80% of U.S. shoppers say that shipping cost (combined with shipping speed) is one of the biggest factors that influence whether they’re going to buy at all.
That’s right. Your products could be amazing and the fact that you’re charging too much for delivery that takes too long is what’s tanking your sales.
So, what is it about things like free shipping that make us all feel like we just got away with sticking it to the man? Why don’t we like transparency when it comes to shipping costs? As an online seller, what are the pros and cons of offering free shipping? How do you offer free shipping without seeing red?
As a store owner, should you even consider offering free shipping?!
Keep reading for answers to all these questions + 6 strategies to explore if you’re thinking of offering free shipping in your online store.
First, Why We All Love Free Shipping
There’s probably no better way to explain it than via meme:
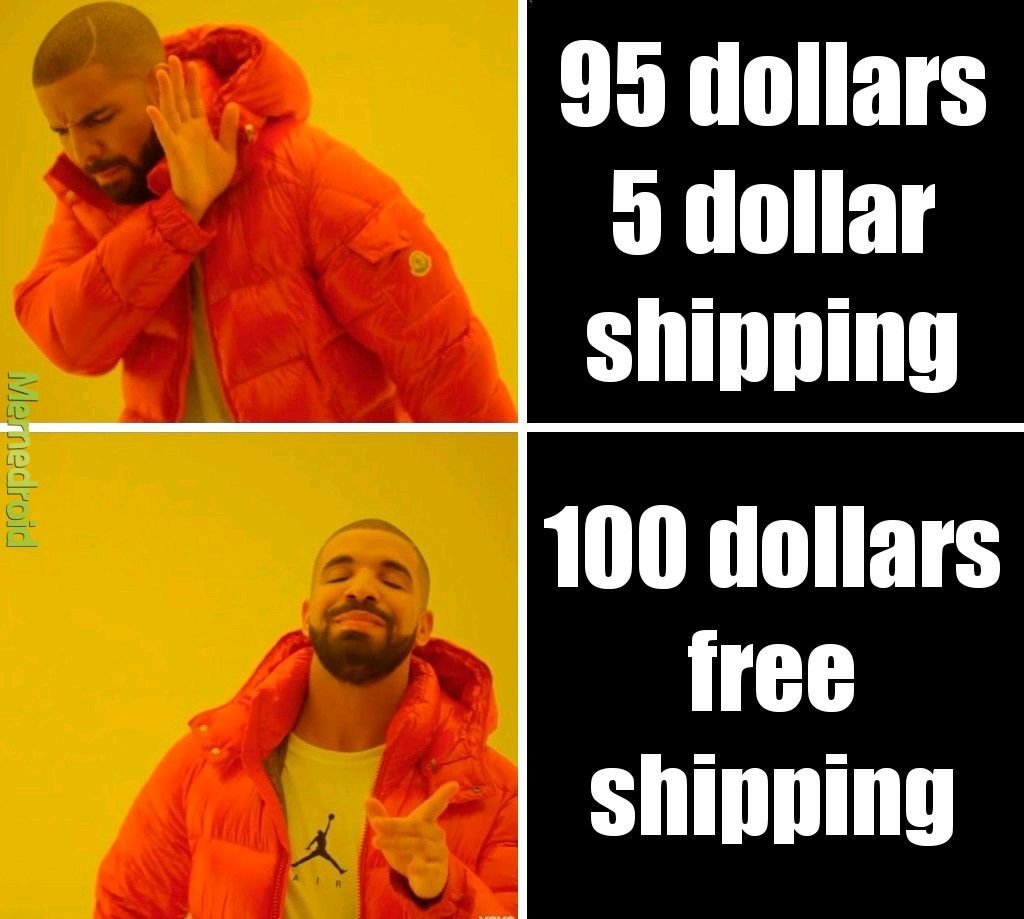
So true, right? To the average shopper, there’s just something magical about free shipping. This is probably because for most shoppers, we assigned a higher value to the cost of shipping than it actual is. (Or, transversely, perhaps we’ve undervalued the cost of whatever it is we’re buying.) Whatever it is, we like the word free. Seeing a free shipping offer is like an aphrodisiac to any online shopper - enticing us to buy things we honestly may not have otherwise.
When viewed from this standpoint, offering free shipping is really no different than running any other sale or promotion. It's a marketing tactic deployed based on the assumption that people wouldn’t buy without it. The shipping cost is just the amount of money we’re willing to spend to get the sale. (Hold this thought. We’re going to circle back to it in a minute.)
Why We Love Transparency (Except for When It Comes to Shipping Costs)
It’s funny when you look at trends in one area of business and how they compare/contrast to trends in other areas. Case in point: brands that have publicly embraced “transparency” as one of their core values are seemingly everywhere these days. There’s something raw and authentic-seeming about a company that will just lay it all out there and tell you everything: how much their CEO makes, where they source materials, how things work behind the scenes.
Instagram and social media has helped as all feel like we know the people and happenings behind the brands we shop from - and this can be a major marketing tactic.
There’s just one area it seems no one wants to see the real truth of: shipping.
I’m sure there is some psychological pricing word for this but it seems to boil down to the fact that most of us just don’t want to know how the sausage is made. We kind of just want to know the total cost and be offered some sort of guaranteed delivery date and we don’t really care how the places we buy from make that happen.
It used to be that “shipping & handling” was seen as just a necessary evil of shopping online. If you wanted something that was sold somewhere not local to you, it made sense that you’d have to pay to ship it. But we’re all too savvy & spoiled for that now. Basically, we want free 2-day shipping to apply to everything we buy ever. So the total cost matters more to us than the breakdown. We’d rather pay $30 for something and get it shipped for “free” than buy a $25 product with a $5 shipping cost.
Free Shipping Pros
Free shipping is super simple for buyers to understand
Free shipping has become an expectation for many shoppers
Free shipping can reduce cart abandonment rates
Free shipping can increase conversion rates
Free shipping can reduce customer service costs for returns (if things ship for free there’s no reimbursement of shipping costs)
Free Shipping Cons
Free shipping isn’t actually “free”
More orders don’t necessarily mean more profits
It can be hard to forecast and budget for the unknown
There may be cheaper ways to “advertise” depending on your product(s) or target demographic
Bottom Line
So, what’s the bottom line? Should you or shouldn’t you offer free shipping?
I say that if you’re a high volume shipper with products that are relatively small, lightweight, and/or similarly sized (i.e. not a lot of variation in product dims and weight) it would probably work well for you. On the other hand, if you sell products with a lot of variability in size, weight, or destination or have too low of volume to be able to average out the highs and lows, there may be better solutions (see some ideas below such as only offering free shipping on specific products, or only if a certain order minimum is met, etc.).
The last thing to consider (and I hinted at this above) is that this really boils down to a difference in mindset (and accounting). If you would like to do a promotion for free shipping or you think that offering it might help you increase the number of sales in the short term, the cost of shipping is essentially a marketing expense.
If offering free shipping is a long-term strategy or something that you just consider “the cost of doing business” then it would be considered a direct cost and classified as a Cost of Goods Sold. (BTW, just because you include it as part of your COGS doesn’t mean you can’t market it as a perk you offer on your website.)
The reason I mention this is because all too often I talk with merchants who only think of shipping costs as an expense. They then turn around and spend thousands on things like Google ads or promoted social posts. If they thought of free shipping as a marketing tool and invested in it the same way, I can almost guarantee they’d see a better ROI than any of that ad spend.
How to Offer Free Shipping And Not Lose Your Shirt
If you decide to offer free shipping, or just want to try it out for a while to see how it affects your conversion rates and the bottom line here are some tips to keep in mind:
If your product isn’t a highly commoditized one, just bake shipping costs into your product prices and just raise prices. (This is my #1 piece of advice for a reason!)
Make limitations on the shipping method that will be “free” i.e. only ground shipping is free but overnight or 2-day is an upcharge. Interestingly, people are willing to pay for express shipping so long as it is their choice to do so and they know that they had an opportunity for free (slower) shipping. In this way, any express shipping orders are a bonus since you’ve already included the cost of “free” shipping in their prices.
Offer free shipping only to certain geographic locations (sorry Alaska, Hawaii, Canada and others!)
Set a “minimum order” requirement to qualify for free shipping. This is a great way to boost average cart values as people are very often willing to spend a little more on product so long as shipping is free.
Offer free shipping only as a short term promotion for a limited period of time. This can be a good way to try it out and see how your customers respond to it.
Add free shipping as a membership perk or to reward your most loyal/repeat customers. This can give you some recurring/passive income in the form of membership payments that can then be used to offset shipping costs.
Bonus! If you decide you don’t want to offer free shipping, try these other “free” alternatives which can be just as enticing: free in-store pickup or local delivery, or free returns/exchanges.
My last piece of advice is to pick a strategy and stick with it - at least for a while. Customers will appreciate that they know what to expect when shopping with you and you’ll have enough time to gather data to determine whether your initiative was successful. You can always tweak down the road as needed. That being said, I do think that offering free shipping in some form is useful for nearly every online seller so I hope you give it a try!

Ecommerce Pricing Strategies That Will Help You Increase Your Bottom Line
Pricing strategies are some of my favorite things to explore because it's just so fascinating how our consumer brains work. These aren't tricks, just proven ways to help you sell more on your eCommerce site.
Updated July 2022
Something everyone in business struggles with is pricing. If things sell quickly, we worry that maybe we could have priced higher and made more money. If things aren’t selling at all we are quick to cut prices, rationalizing that “any sale is better than no sale” and eat away at our profits in the process.
The thing about pricing is that getting it right isn’t just dumb luck. There are strategies (with actual science and psychology to back them up) that can help you figure out how to position your products and services to optimize profit.
1. Cheaper Isn’t Always Better
This is an example of how what you say about your pricing matters almost as much as what the actual price is. (Copywriters worldwide are applauding me right now!) Imagine someone selling fake designer sunglasses on a street corner. Their only sales pitch is that they are cheaper than their competition (either other fakes or the real thing). They don’t tell you why (inferior materials, cheap labor, potentially stolen goods, whatever), they are just telling you that you’re not going to find a cheaper pair of sunglasses anywhere. Do you buy it? Of course, you don’t! Because your mind immediately thought it was a scam or a trick. Why would they be pointing out their competitor’s pricing if there wasn’t something great about their own product that they could promote instead? Leaning on price alone as a differentiator is a race to the bottom.
Takeaway: Don’t mention your competitors or their prices unless you can also provide damn good reasons why you’re a more affordable alternative. Explain that you have better purchasing power or a more refined process or more high-tech manufacturing facilities or whatever it is. Let that be the differentiator and the pricing won’t matter.
2. Give Them a Price Anchor
Price anchoring is a nifty little pricing psychology hack that I often compare to the jewelry case at Costco. Have you ever lingered a while at the Costco jewelry case? It’s a price anchoring master class. Why? Because there is always that one singular engagement ring that is glittering and giant and comes with a price tag of something like $99,193.74. This makes you laugh in horror because who in their right mind would buy this? No one. But you know what suddenly looks super awesome? That very reasonably priced and almost as sparkly stunner right next to it. Why does Costco put this anchor ring in the case? To make the prices of all other rings seem like a bargain. Once your mind has been shocked by the first price, all other prices will seem reasonable by comparison.
Takeaway: When giving people options, make sure there are perceivable differences in cost and value. On the off chance someone goes for your super-premium option you’re in the money but in the everyday scenario, the item you really want to sell will seem like the best deal by comparison.
3. Play With The Digits
There are tons of different articles, strategies, and theories out there about how the way we present the price of what we’re selling affects the bottom line and they can all agree on this: when in doubt, shift the digits up or down.
Down Shift (Charm Pricing)
Charm pricing is so ubiquitous that it’s everywhere and even though we’re all super aware of it, none of us seems to be immune to it. It is wildly effective! It’s basically reducing the price by one cent to a number that ends in 9 (or 5, but 9 is more popular).
So: making something that is $10.00 ➞ $9.99
Why this works: scientists aren’t 100% in agreement on why but one theory is that because the price is specific that we feel like its value is calculated very precisely. Others say that because we calculate the value of a product or service based on the perceived loss that we read $9.99 as cheaper than $10.00 or that we feel like we’ve saved money by buying something for $9 rather than $10.
Up Shift (Prestige Pricing)
On the flip side, shifting prices up by a cent or rounding them to even numbers and removing the decimals can have equally powerful effects.
For example: making something that was $197.82 ➞ $200
Prestige pricing works well in situations where you’re selling based on emotions and feelings and less on rationale. For example, if you’ve positioned your product as the premium option in the market shifting the price up to a round number can help validate the copy and drive up sales. Where $197.82 would be perceived as a “sale” price or markdown, $200 feels like the right type of price for something premium.
Takeaway: Depending on your positioning, shifting your prices up or down a digit can have a big impact. The most important thing is that the pricing layout (how the numbers themselves are actually presented) aligns with the copy and positioning of your product. Buyers are quick to suss out any sort of dissonance between what they’re being told and what they’re being sold so if your copy says premium but your price says discount, they’re going to click away.
4. Use Price Tiers to Your Advantage
This principle seems to almost contradict #1 above but there’s a method to the madness, I promise! This one comes from Priceless: The Myth of Fair Value which is a great book if you’re into this topic like I am. If this book doesn’t exactly sound like your idea of a fun weekend read, no worries, here’s the breakdown of one of the studies which may blow your mind a little at first but will definitely help you structure your price tiers better!
The study looked at beer purchasing patterns (as all good studies should).
Round 1: Two beer options
Out of 100 Beers Sold:
Outcome: People preferred the fancy beer 4 out of 5 times.
Round 2: Two original beer options + with a new option priced lower
Out of 100 Beers Sold:
Outcome: Now the premium beer seems too expensive and since the cheap beer is priced so closely to the mid-range beer, the midrange beer seems like the best option.
Round 3: Two original beer options + with a new option priced higher
Out of 100 Beers Sold:
Outcome: Surprise! People like nice things and some people will always buy the most expensive option but now the mid-range (formally premium) choice seems like the smartest way to go.
Takeaway: If you’re going to bracket your prices into tiers, always anchor up as opposed to down. Cheers!
5. Limit Their Choices
It has been proven time and again that among our many great skills as humans, making decisions amongst too many options is not one of them. Shoppers given too many things to choose from will often opt to do nothing or defer a purchase because 1) we know we suck at making decisions and fear making the wrong one and 2) we tend to over-analyze things that are presented as very complex sending us into “analysis paralysis.”
In the example of using pricing tiers (above), a safe max is three. And if you’re thinking right now that if three options are good then 10 must be better let me tell you NO. Wrong. Stop this.
Takeaway: If there isn’t much difference between similar products or services you offer, consider eliminating or consolidating to present fewer options to your customers or clients. Offering a curated selection of products or services will almost always beat offering an endless array of options shoppers feel bewildered trying to sift through.
The Bottom Line (Pun Intended)
When working on pricing for your online shop or eCommerce store, it’s important to think about all of the different factors that can impact whether that “Add to Cart” button gets clicked. It’s certainly not simple but it doesn’t have to be a guessing game either. Taking some time to familiarize yourself with various eCommerce pricing strategies can help you feel more confident in setting your prices while also improving your bottom line.

eCommerce Lessons from an Online Shopper
I've been waiting my whole eCommerce career to use the line "I'm more than just an eCommerce web designer, I'm also a shopper" and the time has finally arrived.
One of my earliest memories of online shopping in its modern form was when I first discovered sephora.com while cruising the internet at the job I had during my last semester of undergrad. It was 2002 and I worked in reservations at a golf resort. In between booking hotel rooms, coordinating spa treatments and reserving tee times, I spent most of my time in my little half-cubicle online shopping.
I loved that I could see all of the things and take all the time I wanted to compare products. I had a particular fondness for “value sets” of products and often made little spreadsheets calculating what the savings were for buying a bundle vs. buying individual items separately. I was lured by free gifts with purchase. I found great joy in the unboxing of things I bought just days earlier when I probably should have been working. It was a weird transitional time in my life but also one of the first times I had a regular 9-5 job and the splurges on high-end skincare were a salve for much more than my face.
To this day, it stands in great debate as to whether I quit or was fired from that job. What is true is that it definitely set in motion my love for all things e-commerce. And it wasn’t just because I thought it would be easier to have everyone just book their rooms and spa treatments and tee times online themselves so that I could be free to shop online.
It was just that even then, from a business standpoint, I thought it would be much smarter to invest in ways to empower resort guests to make reservations themselves in the same way Sephora allowed me to browse virtually. I knew I spent way more online than I ever would in person at the mall.
There was something way less confrontational about being able to read product details at my leisure, without the pressure to buy. There was room to explore, to discover, to truly take it all in. Whether booking hotel rooms or buying designer perfume, it was novel then to be given the authority to manage things yourself and I liked it.
Around this same time, there were the cries from small businesses everywhere that online shopping was either going to kill brick-and-mortar altogether, or that it was just a fad not worth investing in. The vestiges of these beliefs exist to this day - less so for startups who tend to be more open to seeing the value in technology - but definitely in the small business sector. You either see yourself as a local business that only serves other locals and therefore has no need for a website… or you understand the power of ecommerce but are not sure where you fit into the whole scheme of things.
Interestingly, in a new role sometime after the end of my storied stint at that resort I did go on to work for a company where I was given the opportunity to actually develop an entire eCommerce platform. I didn’t necessarily have any professional experience in the field yet but I had the overconfidence that comes with being fresh out of college and someone willing to give me a chance. If I knew nothing else, I knew that so long as I built interactions that would satisfy me as an online shopper that there was a pretty good chance it would resonate with others. I was right. That platform is still in use to this day and generates multiple millions of dollars for the company every year.
Here are some lessons from my early days as an online shopper that are still just as relevant today and which have now been thoroughly vetted through my involvement in successfully bringing hundreds of businesses to life online, many for the very first time:
1. Constantly give me new things to look at and explore.
If you want me to keep coming back to your site time and time again, you better give me some exciting reasons to do so. Change up that homepage hero banner and link it to some fresh content. Create a “new” category in your shop so that I can see everything that’s dropped since my last visit. Make me feel like I need to check back in often or else run the risk of missing out on something big.
A frequently updated website draws people (and Google) in and creates the ultimate sense of FOMO. Use this to your advantage.
2. Answer all the questions I didn’t know I had.
Your FAQ page matters more than you know. I feel like I can always pick up on how well a company treats their customers based on an FAQ page alone. People like me do, in fact, read every single question and answer – and not just because I want to learn more about your products or services. I do it because I want to see how you answer questions. Is your tone sassy? Sweet? Direct? Blunt? Does it sound like you would truly help me if I had a problem or does it sound like you’re just setting yourself up to cover your own ass with rules and fine print?
A great FAQ page is your secret, hidden way to show your customers a bit of your brand personality. Yes, that should come through in the copy on your other pages but those pages are where you talk about everything going right. An FAQ page is generally the only place where you talk openly about all the things that could go wrong. And it’s in those moments where I want to know you’ve got my back.
3. Show up in my inbox.
If I truly like your brand or your company or your products, I’m signing up for your email list. So, entice me with a coupon code or lure me in with the promise of special offers, whatever it is - I want to be in the loop and I’m willing to give you my email address in exchange for the good stuff.
The crazy thing about email marketing is that I know how the sausage is made and I still want some. I know the messages I get in my inbox aren’t really personalized, written just for me and catered to my personal shopping whims. I know that emails are, for the most part, trying to sell me something. And yet, for brands that I really love - I do not care. I like being invited back. I like feeling like I’m part of the family. I know I’m being marketed to and yet, done right, I don’t mind one bit.
4. Treat me like the VIP I think I am.
Perhaps you haven’t noticed a trend yet but most of what I like about shopping online are the ways it mimics (and sometimes goes beyond) the in-person experience. The best online retailers understand this and follow through with awesome ways for me to feel like I’m their #1 customer. There are so many ways to roll out the red carpet for your online guests and not all of them need to be expensive or complicated:
One of the easiest things you can do is enable customer accounts so that repeat customers like me can easily access my order history.
You can add a live chat widget so I can skip the customer service phone queue and not stress over sending a cold email.
Roll out an affiliate or referral program that recognizes repeat business or encourages customers to share your brand with friends.
Set up a simple, automatic returns process so that if I need to swap out a size or just return something that’s not exactly what I thought it would be I can do so in the easiest way possible.
Customers have a lot of options when browsing around online and all of these things just boil down to making each and every customer feel like they're your best one. Think of ways you can make their lives easier. Be empathetic to their needs. Reward them for their loyalty.
5. Send me packages that show me you love your own brand.
Lastly, the experience with your eCommerce brand lasts longer than you think it does. It goes way beyond the checkout page and extends right to my front door and beyond. Make a lasting impression with packaging that excites me. This means it needs to be 1) on brand, 2) potentially contain a little surprise and 3) anticipate my needs. And, yes, packaging can do all these things.
A branded box and packaging that’s filled with branded tissue or fill, and topped with a branded sticker or card – that’s the holy grail for an online shopper. This is the pay off for not just getting in the car and heading out to the store. The unboxing experience is the whole thing. That’s what we’re here for.
And it just says so much to me when I order something that shows up in a plain old, boring box with not so much as a thank you note. There’s something special about interacting with a company that’s confident enough in their own brand that they want to slap it all over everything and send it all over the world. Whatever it is, packaging matters.
The Bottom Line
20 years on from my short-lived stint as a hotel reservationist and I can tell you to not underestimate the power of eCommerce. It doesn’t matter your business or industry. I could be booking a facial, buying shoes, accessing exclusive digital content, or scheduling a meeting – and all of them are chances for your business to impress me, influence me and convert me into a fan for life. It’s not a coincidence that even after all these years, there’s still a magical delight in receiving one of those black-and-white Sephora packages at my door.

The Best Technology Combos for Your eCommerce Business
Looking to keep your monthly costs in check or just not pay for subscriptions you don’t need? This post breaks down my best technology recommendations for different types of eCommerce business models. Discover which software and apps work well together to do exactly what you need.
Updated: September 2022
It seems like all business tools these days come with some sort of SaaS subscription-based pricing model. And at first, all the accounts seem to make sense. You sign up for one service that does this thing, and another service that does that thing… but before you know it your bank account is getting hit several times a month for all sorts of things! And it isn’t just a financial drain. Running multiple services side-by-side means you’ve got to keep track of multiple logins, track which programs are in charge of which tasks, and (my favorite) try to get them to all play nice together.
Using tools like Zapier can help ease the pain of connecting various apps and software together but at some point I think we’ve all wondered if there was a way we could pare things down - if only for our own sanity. In the tech industry, the buzzy word for all the software and tools that you use to build your product is a “technology stack.” When I look at my client’s businesses I see all the software, services, subscriptions, apps and extensions as their personal technology stack and the goal is always to keep it as efficient as possible.
An optimized technology stack:
Reduces potential for errors or bugs,
Is easy to manage for individuals and small teams,
Ensures you’re not underutilizing and resources and getting the most for what you’re paying for,
Helps create a consistent UX for your customers or team as they move between platforms,
Allows you to see the big picture, and
Keeps costs low.
With these things in mind, there’s one platform I find to be the perfect starting point for any small to medium business or startup: Squarespace.
Building a Strong Foundation
Start With Squarespace
I love Squarespace not just because it allows you to access nearly everything you need for your business with one login but it does so at a super affordable price point. Using Squarespace as your foundation allows you to skip extra payments for things that often require additional subscriptions and costs with other website platforms. In addition to the actual website builder you can eliminate the need for these extra services because they’re all included with your Squarespace subscription:
Domain including WHOIS privacy & protection
Hosting with Unlimited Bandwidth & Storage
SSL Certificates
Site Security
SEO Features
eCommerce Functionality (yes, some web platforms charge you to add this!)
Squarespace is a minimalist’s dream because you can access nearly all of the things you’ll need to run your online business with one password and one subscription. It’s infinitely customizable to suit your unique product/service mix and business goals and easy to build on to as needed. It’s the perfect foundation to build your eCommerce business on.
(Related post: Why I Love Squarespace for eCommerce)
Now for as robust as the Squarespace is, the cheese doesn’t stand alone. Most businesses are going to need to pair it up with some additional software/services to really make things hum. Keep reading for the software combos I turn to time and time again for running smart eCommerce businesses!
Best Email Marketing Combos

Best combo if you’re just getting started
There’s a lot to love about Squarespace’s built-in email marketing solution and if you’re just getting started it should definitely be on your radar as a great all-in-one tool.

Best combo if you want to build your list but don’t need commerce-based automations
Flodesk is a good option if you’re looking for something that has a great user interface and if image-based emails are important to you. It integrates well with Squarespace but more so for traditional email marketing & list building than for eCommerce-specific automations.

Best combo if you want to get serious about email marketing AND eCommerce
If you’re as serious about email marketing as you are about selling online, ConvertKit should be at the top of your list of tools! It’s powerful where it needs to be and simple where it matters; it’s clear that everything about it is geared to convert.
General eCommerce Technology Must Haves

Best way to build a great eCommerce experience
One of the best ways to make an impact with new customers (and continue to excite loyal shoppers!) is through a great on-brand unboxing experience. If you’re selling anything that requires packaging noissue makes it easy with low order minimums and help making sure you always look good.

Best way to keep your shop protected
Termageddon is my gold standard when it comes to making sure the sites I work on have the best iron clad privacy policies, terms of service and even cookie policies. The best part? Once you’re set up the first time, your policies will auto update whenever laws change meaning you’ll never be left hanging.

Best if you want to start an affiliate or referral marketing program for your shop
If you’ve been thinking of adding affiliates or referrals to your marketing arsenal, you’re so smart! Adding these types of programs help you keep control of your marketing spending, expand your reach and boost awareness. Peach’s is the best partner to Squarespace on this front and the only one I recommend!

Best way to add a custom order form to Squarespace
For complex order forms, quote request forms or forms that require conditional logic or other advanced features, I recommend Paperform. You can integrate forms seamlessly onto your Squarespace site or even use them to add on features and functionalities to your store.

Best way to sell wholesale on Squarespace
Whether you’re just getting started selling wholesale or have been doing it for a while and looking for a way to do it better, Candid Wholesale is the way to go. This platform syncs up your Squarespace inventory and allows you to create custom wholesale order forms, custom pricing and a whole platform of other features to build your wholesale business.
Best Options if You’re Selling & Shipping Physical Products

Best for low to medium volume shippers
Easyship makes it easy to fulfill and ship orders and in addition to never having to stand in line at the post office ever again, you’ll also score a sweet shipping discount over paying retail - win-win-win!
Best for medium to high volume shippers
Help customers help themselves by providing a great experience that extends beyond the order confirmation page. With Aftership Tracking + Aftership Returns you can create branding tracking pages and even allow customers to do self-service returns.

Best if you sell on multiple platforms
If you’re selling on Squarespace + other platforms like Etsy, Faire, Amazon, Shopify or Squares - you NEED Trunk! Trunk makes inventory management super simple and makes sure that your inventory counts are accurate across the board. Bonus - it also makes selling bundles and kits on Squarespace a dream!

Best if you use a third-party logistics company for fulfillment
ShipStation integrates with literally every 3PL provider I’ve ever encountered and it makes fulfillment by a third-party really seamless for Squarespace shop owners.
Best if you’re selling online AND in person
The free Squarespace app allows you to basically run your business from anywhere and have full visibility into things like orders and inventory. You can accept mobile payments, scan shipping labels, fulfill orders, update stock levels and more - all from your phone or tablet.
Best Options if You’re Selling Digital Products, Courses, Memberships, Events & Classes

Best for in-person or virtual meetings, events or workshops that require payment and/or registration
Squarespace’s add-on Scheduling works really well and the thing I like most about it is that all of the language can be modified to suit whatever it is you do. You can even create packages of courses and sell gift certificates or subscriptions for any of your events, webinars or classes.
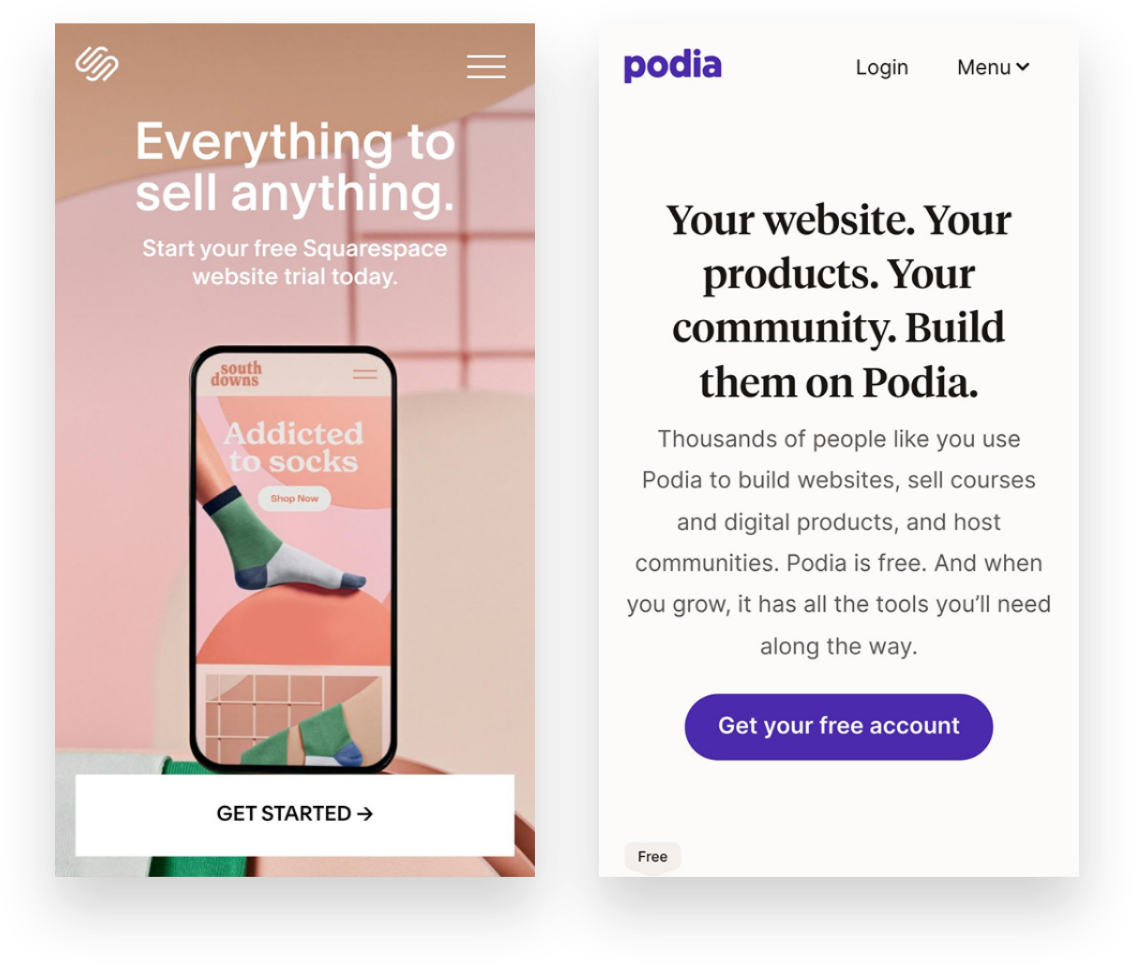
Best for online courses, coaching, memberships or communities
Podia is great at the items above but it’s also not too shabby if you’re selling digital products making it a great all-inclusive add-on to Squarespace. Podia is rare in that it is very feature-rich but still super simple for you (and your customers!) to use. It’s easy to create bundles of your products or services and market them using the built-in tools.
The Bottom Line
Thinking strategically about what features you really need to move your business forward is smart whether you’re trying to keep your budget in check or just wanting to streamline the website tools you use. When in doubt, I always say that there’s no shame in starting small. You can always upgrade plans to add features later on or incorporate new platforms if need be.
Having too many services and software subscriptions for your eCommerce business can be a headache, though - especially if you’re just getting started with eCommerce. You’ll likely end up overpaying for features you don’t use, leaving yourself in a bad spot when it comes to budgeting for the tools you really need.
Hopefully, my strategic pairings and combos above will help you create the perfect technology combos for your eCommerce business!

It’s Time to Make the Move to Sustainable eCommerce Packaging
Making the switch to sustainable eCommerce packaging doesn’t have to be expensive or complicated! Check out some of my favorite packaging swaps for your eCommerce shop.
Did you know that it's predicted that 95% of purchases will be online by 2040?! Great news if you're an eCommerce retailer but not so great news for our planet when you think of all the wasteful packaging that will be created. I'd like to challenge you to make a brand commitment to using environmentally responsible packaging.
Getting started doesn’t have to be a daunting task. Start by just doing an audit of the layers of your packaging to ensure there’s nothing unnecessary that could be eliminated. From there, look for packaging made from non-renewable materials that can be switched out for more eco-friendly options.
All the packaging from my fave packaging partner noissue is either compostable, made from recycled/recyclable materials or reusable so if you’re not sure where to even start they’re a pretty good option. It doesn’t hurt that they have low order minimums and make it easy to customize your own branded packaging!
Check out the ideas below for some easy packaging swaps!

Remove bubble wrap as a layer
Replace with:

Ditch the cellophane & wrapping paper
Better pick:


Replace plastic poly mailers with earth-friendly options

Use pre-used materials (like plastic or paper)

Even changing just one layer out for a more responsible option makes a difference, so don’t be discouraged by starting small – it still has an impact!

How to Move Your Etsy Shop to Squarespace
Etsy raised its rates. AGAIN. So are you wondering about how to move your Etsy shop to Squarespace? I’ve got answers to all your burning questions such as why you should choose Squarespace over Shopify, how much it’s going to cost, and what to do with your Etsy shop once you make the switch. Bonus: I’ve got complete step-by-step instructions on exactly how to make it all happen.
Updated March 2022
If you’ve been selling on Etsy and landed on this blog post, my guess is that you know it’s time to make the switch and you’re wondering just how to move your Etsy shop to Squarespace. You wouldn’t be here if you weren’t already thinking about it.
But I also know that it’s a big move that you probably have 1,001 questions about.
You’re wondering if you should choose Squarespace or Shopify.
You’re wondering how the math shakes out.
You’re wondering how to actually.. . you know, MOVE everything from one platform to another?
I’m going to answer all those things and more, but first - for anyone who’s still unsure about whether or not they should be selling on their own website vs. Etsy:
Why You Should Be Selling on Your Own Site:
So you can build your own brand, on your own domain. I’m guessing you didn’t start your business just to be known as another user on someone else’s platform. Having your own website is step one in building not just a business but a brand.
So you can own your contacts and build your email list. Your best future customers are people who have already bought from you. Using your own website to build an email list is one of the smartest ways to future-proof your business.
So you make your own rules. Don’t let someone else tell you what shipping options you can offer, how you can discount your own products, or limit how you market your own business.
So you can stop bleeding money in the form of fees - Etsy may seem like a good idea if you’re just getting started and want to test out new products or see what kind of traction you can get. But once you start selling? Hoo boy - it’s fees on fees on fees. (See my more thorough breakdown of the money math down below.)
So you can control the customer experience. On your own site, ideas you have for upsells or add-ons are easy and you can build a deeper connection with your audience through content and marketing.
So you can sell anything you want. Etsy is supposed to be a place that’s limited to handmade or vintage items but there are so many opportunities for you to increase your bottom line by augmenting your product lineup with other products. (Don’t worry, I’ve got ideas for you on that!)
So you can keep customers focused on your own work. Sure Etsy may get a lot of traffic but even if you can manage to show up on the first page on Etsy, you’re just another listing sitting right there side-by-side everyone else. On your own site, you can show off the quality and value of your work instead of being reduced to the seller with the cheapest listing price.
So you can sell to all the customers NOT on Etsy. There’s a myth out there that you just can’t quit Etsy because of “all the traffic” on the site. Well, what about all the people NOT on Etsy? What about them? I’m assuming you’d like to sell to them, too? Having your own website will help make your work visible to anyone on the internet searching for what you offer.
Why Etsy Sellers Should Choose Squarespace over Shopify

Imagine this is tea and I’m spilling it.
A lot of sellers moving from Etsy think they should make the leap over to Shopify. I think it’s because someone’s aunt’s best friend’s brother who works in “tech” told them so? ¯\_(ツ)_/¯ But let me tell you: that is not a good enough reason to choose a web platform.
I’ve used them all, tried them all, worked on them all for clients, and hands down I come back to Squarespace every time. Especially for sellers moving from Etsy. Here’s why:
Squarespace offers more design options and control than Shopify. I know you care about aesthetics and creating “cute” page layouts on Shopify is NO FUN. I mean, I spend almost all day up to my elbows in HTML and CSS and even I shudder at the thought of it.
Squarespace offers more marketing capabilities than Shopify. Thinking about blogging as a part of your marketing strategy (you should, it’s great for SEO!)? Good luck making that work on Shopify.
Squarespace is less expensive and requires fewer paid add-ons to work. Shopify looks all fun and games until you realize that if you want to add something as simple as a contact form to your website you’ll need to add a paid app. I mean, half the reason to get away from Etsy is that you’re sick of being nickel-and-dimed!
Bottom line: in my experience, there are so many clients who end up talking to me after they gave Shopify a try and regretted it. They wish they went with their instinct to move to Squarespace instead right from the get-go. Basically, when it comes to design freedom and the ability to customize and sell anything you want (all while not getting dinged by a thousand paid apps in the process) the grass is definitely not greener in Shopify land.
Let’s Do The Math
Not convinced yet that moving to Squarespace from Etsy is a great idea? Let’s take a look at the math! Before we jump into an example, here’s a quick review of the pricing options and fees associated with the different Squarespace plans vs. Etsy (yes, I made a spreadsheet for this):
Side-by-side it’s actually kind of hard to tell which plan is best because of the different pricing structures so let’s use a real example.
In this example, we’re going to pretend that you only sell one product that is priced at $40 (about the average of an Etsy item).
We’re also going to assume that you sell everything without needing to renew your listing so that you only pay the Etsy listing fee of $0.20 once. (This may not be the reality, which would only serve to make the Etsy costs even higher.)
Let’s pretend that you sell 750 units per year which works out to be roughly 60 sales per month or 15 per week.
Based on these numbers your gross sales would be $30,000 per year.
Running these numbers through all of our Squarespace plans and Etsy pricing, here’s what each platform and plan would cost you.
Squarespace Basic Commerce - $1,381.50 (4.61% of sales)
Squarespace Advanced Commerce - $1,645.50 (5.49% of sales)
Etsy - $3,307.50 (11.03% of sales)
Moving to even Squarespace’s most expensive plan would save over $1600 a year right off the top! But that’s not even the whole picture.
Etsy also has this sneaky little thing called their “Offsite Ads program” which you cannot opt out of once you have reached $10,000 or more in annual sales. This program means that they can (without your consent, approval, or oversight) place ads in search and on social media and then charge you an additional 12-15% in fees. This could end up costing you thousands — $3,600 in our example above to be exact!! The details on this program are super nebulous but you can get the gist of them here.
Basically, it’s easy to see how Etsy fees can really start to have an impact on your bottom line as your sales grow.
On Squarespace, the sky’s the limit when it comes to growth. You won’t pay more the more you sell and, in fact, as your sales grow the fixed costs of owning and operating your own eCommerce website will go down with each additional order that comes in!
Step-by-Step Instructions on How to move your Etsy shop to Squarespace
Step-by -step instructions on How to Move Your Etsy Shop to Squarespace
One of the reasons why you may have chosen Etsy in the first place is because it made it fast and easy to get started. But you can do the same thing over on Squarespace. Let me show you how!
1. Start With a Great Free Template
There are lots of great free and paid templates on Squarespace (check out some of my faves here and here).
But if you’d like me to cut to the chase and just tell which template I think would be a great start if you’re moving from Etsy, I say pick the Maru Template.

Here’s why:
It’s simple - in a good way! There’s not a lot of filler content to have to delete or write over and it has just the pages and elements you need to start.
It’s shop-focused - just replace the demo products with your own and you’re in business!
It can adapt to pretty much any style - so it doesn’t matter if your design is a little funkier or a little more conservative than the demo shows! Once your own fonts and colors are set, it will take on the perfect mood!
Get started by signing up for a free 14-day trial of Squarespace using the Maru template using this link and then clicking on “Start With This Design.”
2. Add Your Content - But Keep it Simple!
On Etsy, you have very little space to get to write about your business so moving to your own website can sometimes feel overwhelming because you have so much real estate to fill up! It’s like living in a tiny studio apartment and then moving to a huge mansion - there are so many empty rooms to fill!
With this in mind, I would encourage you to keep things simple. Start by just using the content areas shown in the demo and overwrite it with some words of your own. You don’t have to furnish the whole new house at once!
If it’s too much, I would also say to go ahead and skip the about page (you can always hide it from public view for now). Remember, even with just a simple home page, your shop, and a contact page you already have 3 more pages of your own online than you did on Etsy!
Just focus on getting a few things out there and you can always add on later.
3. Commerce Settings

Just like on Etsy, there are a few eCommerce settings you need to set up once, and then they are taken care of until something changes. Truly, set it and forget it!
Fun fact: when I first got started doing websites exactly 1,487 years ago, I basically just clicked on every single settings menu available no less than 32 times each to make sure I didn’t miss anything!
Why? Because it’s a lot and you can totally feel like you’re missing a tiny checkbox somewhere!
Or that somewhere there’s a hidden setting that’s going to have lifelong impacts on the stability of your business.
DO. NOT. WORRY.
All my clicking around and the core of eCommerce boils down to three really simple basics.
So even though there are lots of settings in the Squarespace Commerce section for now we’re just going to focus on how you want to get paid, what shipping options do you want to offer, and how you’ll handle sales tax. That’s really all you need!
I’m going to save you some headaches of your own and give you the simplest, most straightforward, get right-to-selling options to go with:
Payments - I recommend Stripe (+ Afterpay if your products are $100+)
Shipping - I recommend just offering free shipping to start
Taxes - I recommend setting up TaxJar and turning on automatic sales tax calculations
Related posts you may find helpful:
All of the settings above are taken care of in the Commerce panel (just click on Commerce from the left-hand dashboard menu). Remember, the goal here is just to launch. Taking care of payments, taxes and shipping will get you in business. You can always keep refining other settings and options later on as you grow!
4. Import Etsy Products Into Squarespace
Ok, you may be wondering how we could conclude the Commerce section above without addressing the most important thing - your products!
That’s because moving your shop from Etsy to Squarespace COULD NOT BE EASIER thanks in large part to the built-in import tool from Squarespace.
Your awesome products are what got you this far so I wouldn’t dare ask you to ditch what you’ve already worked so hard on!
Before we jump into the specific steps needed to import products, here are some quick tips:
What info does Squarespace import from Etsy:
Product titles
Descriptions
Photos
Inventory
Prices
Shipping dimensions of products
Note: Only active and sold out products are imported. (If for some reason you don’t have any active or sold old products then draft, inactive, and expired products will be imported.) Also, in order to import everything accurately be sure to temporarily turn off “Vacation Mode” on Etsy. You can turn it back on right after import which should only take a few minutes or so!
How to Import Etsy Products Into Squarespace:
Quick version: Commerce > Inventory > Import > Etsy > Get Started > then just follow the on screen prompts!
Full version: You can find complete step-by-step instructions in the Squarespace help center here.
After you import your products into Squarespace, there’s still a little work to do but I promise it’s 1,000 times easier than adding all your products one-by-one!
Tips & Tasks for After Import:
Review how your products look. Sometimes what works on Etsy seems out of place on your own site. For example: did you write really long, oddly detailed product names on Etsy so that you could stand out in search results? Yeah, you don’t have to worry about that here! Clean up names so that they are short and sweet and remove any references to Etsy processes from your product descriptions.
Add product categories & tags. This is so key in making sure your shop is easy to browse and that all products are super discoverable! (For more on how to use product categories & tags in Squarespace, check out this post.)
Add, delete or rearrange product photos. Put your best foot forward and make sure your product thumbnails are all the best pics you have and that they are consistent in style.
Add product variation images. This is one of the best things you can do to make your product page feel really interactive and really helps people have a crystal clear picture of what they’re ordering.
“One of the best things about moving from Etsy to Squarespace is that you don't have to lose what you've already built.”
5. Bonus Step! Import Reviews
One of the biggest reasons I hear that people want to stick around on Etsy is because they have some great reviews they don’t want to leave behind! Those are coming with us, too, though!
What Etsy Review Info Imports Into Squarespace:
Customer names & images
Product titles & images
Review text & dates
Star ratings
Notes & Tips:
You need to make sure you import products BEFORE trying to import reviews otherwise this won’t work!
Reviews aren’t synced so if you plan on continuing to sell on Esty and you get new reviews, you can repeat the process below to pull in fresh reviews.
Following the steps below will add ALL Etsy reviews you have to ALL products. Depending on your situation, this could be ALOT. If you’d rather just show some select reviews here and there I would recommend adding them to your new site manually.
Ready to import those reviews? Here are the steps:
Quick version: Commerce > Product Reviews > Import from Etsy > then just follow the on screen prompts!
Full version: You can find complete step-by-step instructions in the Squarespace help center here.
6. Launch Your New Site!
It’s finally time to launch your new site but there’s one last task that I would take care of first: be sure to add a newsletter sign-up box to your site!
After all one of the biggest reasons why you’re moving over is because you know how important it is that you own your own contacts. I would recommend adding a newsletter box to the footer of your site but you can also link to one in a popup or even ask customers at check out if they’d like to subscribe. Easy!
Subscribe & Launch!
When you’re ready to launch, you can just hit the upgrade button that should be at the bottom of your trial site or go to: Settings > Billing & Account > Subscriptions > Website > Upgrade and follow the prompts from there. (Not sure which plan to pick, see the FAQs below!)
Make sure you turn your site visibility to public so that everyone can see your work and buy from you! To do this to to: Settings > Site Availability > Public > Save.
Congrats! You’re in business! 🎉
At its simplest, these are the steps on how to move your Etsy shop to Squarespace and launch a new online shop for the first time. This will get you to a place where you can do business online on your very own website! There are lots of ways to continue to improve and expand from here whether it’s working on email marketing, SEO, order management, shipping/fulfillment, promotions and offers… the list can really go on and on.
But the goal is just to start, to have something you can grow and build on. Congrats!
FAQs
-
Now that you have your own shiny, new Squarespace website what should you do with your Etsy shop? Well, the way I see it you have a few options:
Option 1 - Use Etsy for what it is: as a glorified search engine & lead generator. Keep a handful of your best sellers active on your Esty shop but add a note in the announcement section promoting your new site. And since the best future customers are often people who have already purchased from you, you could even go a step further and include a card in all shipments from your Etsy shop promoting your website as a way to discover your full product line.
Option 2 - Put your Etsy shop into vacation mode. This will allow you to leave everything as is on Etsy while you give your new website all the attention.
Option 3 - If you’re fully ready to ditch Etsy, you can say goodbye and deactivate your account following the steps here.
FWIW, I recommend going for Option 1 for a couple months, then going to Option 2 for a bit and then finally Option 3. This will allow you to make a nice transition for your existing Etsy customers and also still have your info available in Etsy in case you realize you forgot or overlooked something on your Squarespace site.
-
Sure - why not? I mean, to me they are two completely different audiences so if you feel like you have the bandwidth to manage both (and are willing to pay the fees to do so!) then you could definitely sell on both.
In this post, I review a product called Trunk as a tool to keep inventory in sync between Squarespace and Shopify but you can also use it to make sure that Squarespace and Etsy are always up to date!
If you do decide that you want to continue selling on Etsy alongside your new Squarespace site, I would highly recommend adding Trunk to your arsenal to prevent overselling on one platform or another!
-
On Squarespace 7.1, you can import up to 300 products from Etsy.
-
You can import up to 250 reviews from Etsy.
-
If you’re not sure which plan to go with I would recommend checking out this post but the TL;DR is that most sellers should choose the Basic Commerce at a minimum.
Whichever plan you go with, I recommend paying for your subscription annually vs. monthly so that you can score a free domain name and free custom Google workspace email in addition to a few other bonuses!

The Best Upsell You Can Offer Is a Bundle
Product bundling is one of the easiest things you can do to boost sales - it beats other tricky upsell tactics every time! Find out why this strategy is so effective and learn how to implement it on your Squarespace shop today.
A lot of eCommerce talk is all about how to boost sales. And when that happens, invariably people start thinking about how to upsell customers as a way to increase average cart values. By upsell I mean that if customers have added Product A to their cart, thinking of a way to entice them to also add Product B. This is typical thinking and I can see why a lot of sellers try to go about things like this but there’s an easier way:
Product Bundles.
We're all pretty familiar with product bundles. Anyone who’s ever been through a drive-thru and ordered a combo meal has purchased one. Why do they work so well? Well, there are SO many reasons that we’ll get into in a moment but I know I’m not the only one who panic orders a #7 at Taco Bell even though they don’t even drink soda.
Product bundles are the perfect upsell. They allow you to boost sales, grow revenue, and up your AOV (average order value) all at once.
Bundling, Defined
Price bundling is a marketing strategy or a pricing strategy where you combine two or more products and typically sell them at a lower price than if the items were sold individually. There are two types of bundles: pure and mixed.
Pure bundles are things that you can ONLY buy as a bundle (think: a buffet meal - one cost includes all and you can’t buy things ala carte).
Mixed bundles are things that you can buy either separately OR as a bundle. Example: my taco bell value meal. I could buy the tacos and soda on their own or as a combo.
For eCommerce purposes, I think mixed bundling is the way to go so most of what we’re going to talk about from here on out is going to be with that model in mind. Now, on to the good stuff:
Why Bundling Works So Well
Let me count the ways!
“Using an upsell product bundling strategy can be 68% more effective than trying to grab a new customer.”
Simplified buying process - as humans, we’re geared to freeze up if given too many options to pick from, a phenomenon called Hick’s Law that I go into depth on in this post. The bottom line on this is that more choices = more decision time. Providing a smaller number of choices decreases the mental load required to make a purchasing decision which leads to happier, more satisfied customers. Bundling takes advantage of this by not asking customers to try to pair up or select items on their own. The fear of choosing the “wrong” thing is much lower with bundles, especially when they’re positioned as problem-solving and are features/benefits-focused.
Increased perceived value - people love a deal so even if they weren’t necessarily planning on buying everything in the bundle, sometimes the “savings” is just too good to resist. Think of my Taco Bell value meal. I don’t even drink soda and I understand pricing strategy so I KNOW that I could probably save money by just ordering the items I want ala carte. But the ease of ordering by number plus the “savings” is a strong motivator. There’s a sense that you’re getting more but paying less.
Easy to market and promote - it’s easy for customers to see the value in bundles of complementary products which makes your job selling to them just that much easier. From an analytics standpoint, since bundles increase your average order value you can spend a lot less per conversion to sell the same number of products. Not to mention that if you do go the pure bundling route (where your products are available to purchase only as bundles and not individually), you only need to promote the number of bundles SKUs you have, not the total number of product SKUs. This means things like fewer Instagram promoted posts to come up with, less marketing copy to write, and fewer branded photoshoots required! Lastly, studies have shown that it’s 68% more effective to market a product bundle to an existing customer than trying to acquire a new one.
Lower shipping, distribution, and fulfillment costs - as long as you’re packing a box for shipment, you might as well make sure it’s filled to the brim! There’s a fixed cost associated with shipping and fulfillment that may be hard to meet when you’re selling products piecemeal but that’s easy to beat with product bundles. Think about it: how many times have you received a giant, empty Amazon box with one lone item in it? The box, packing inserts, and even the shipping label itself cost pretty much the same whether you’re shipping one item or three. So if you’re struggling with getting ahead on shipping, bundling may be just the ticket.
Reduced friction & increased sales - People are so busy that even if they wanted to check out allllll of your products to find just the right one, they just may not have the time to do so. Bundles are a convenience that are appealing for just how fast and easy they are to order. There’s also a little psychology at play here - one line item in your cart at checkout just “feels” less expensive than a cart with multiple items. At checkout, a cart with multiple items may give some shoppers pause and even compel them to start removing things to “save for later”. A bundle is a one-and-done package deal that you can’t second guess. If you sell services or other complementary products as a bundle, people also won’t feel “nickel and dimed” by multiple line items of associated costs. The bundle price is what it is and that’s it.
Bundling Tips
Ready to incorporate bundling into your eCommerce strategy? Here are some tips!
Combine low-volume, low-priced items with high-volume, premium ones. This not only helps you move slower inventory, but it can also help people discover new favorite products that they otherwise might not have tried. Think of this as the when you buy shampoo and it comes with a little, free travel-size bottle of styling gel by the same brand. You may not have tried the styling gel on its own but as part of a bundle, it was low risk for you and helped the brand move some of its lower volume products. Win-win.
Promote your bundles as great gifts. Position product bundles as a way to solve a specific problem, benefit a certain type of person, or celebrate a holiday or special occasion. Buyers shopping for someone else are always looking to experts like you to ensure their gift is a success. To get the most out of this segment, create a category for bundles in your shop! This way people have the option to skip right to them and won’t have to even worry about sifting through individual products trying to find the right thing.
Try bundling instead of discounts. Discounting decreases a product’s perceived value so I’ve never understood how quick some sellers are to look to discounting strategy instead of bundling strategy. Bonus - not only does bundling boost the perceived value of the products being sold but also of the company itself! You don’t want to be known as a discount seller.
Combine bundles with free shipping offers. Set your free shipping threshold (i.e. “Orders over $100 ship free!”) at the price of your best bundles. As we discussed above, bundling can help you get ahead on shipping costs because you’re shipping more in roughly the same amount of packaging and for the same fulfillment cost. This can help you avoid shipping orders for lowe priced products that cost more to ship than you’re making.
Give your bundles a great name. I always say to focus on the benefits and features of products and product bundles because that makes them harder to compare to others. When you position your product bundle as solving a specific problem, you no longer have to worry about your competition; they’re selling commodities and you’re selling solutions. This has another benefit of people ignoring a higher cost for a bundle than buying just one of the goods. Any sort of price-based comparisons fall away as people focus instead on how the products are going to improve their lives or solve some sort of problem.
Bundling FAQs
-
I mean, higher discounts are always nice but be careful you’re not devaluing your products or brand. There’s no perfect percentage but studies have shown that at only a 20% discount people may prefer to buy items separately while higher discounts steer people towards bundles instead. I would also make sure you’re pricing your individual products appropriately so that there’s room to bundle them effectively. Individual products should be priced at a premium to bundled goods.
-
The answer to this may surprise you! Studies have shown that when the bundle cost is on the high side bundles that include fewer products perform best. Conversely, low-cost bundles do better when they contain more items.
I think the secret to this is that both expensive bundles with lots of products in them and cheap bundles that skimped on inclusions can come across as cheap.
-
Upselling (aka suggesting an alternative product to the one a customer originally intended to buy) really only works when the upsell is less than 25% higher than the original item. Upsells work best for low-risk and low-value items otherwise you run the risk of making people feel like they were bait and switched!
Cross-sells (suggesting companion products that would pair well with the product purchased) can be as simple as showing related products on the page or before checkout and also do well for items that are priced lower than the first item.
Both of the above can be beneficial but shouldn’t really be the heart and soul of your selling strategy. p.s. I go into more on upselling & cross-selling in this post!
For more about selling bundles on Squarespace check out this post!

My Favorite Source for Custom eCommerce Packaging
Custom, branded packaging makes such an impact - not just in the unboxing experience but in building brand loyalty, referrals, and repeat visitors. Bonus points for you when it’s affordable, eco-friendly, and looks as great as your eCommerce website itself!
Half the fun of shopping online is that whenever the mail comes you get to unwrap a little present to yourself! And yet so many startups and small businesses kick the can down the road and put off investing in custom packaging because they think it’s going to be expensive or difficult to source.
But I say that if you’re spending all the time and energy working on your custom eCommerce website, why let your customers down when it comes to unboxing?
Custom, branded packaging makes such an impact - not just in the unboxing experience but in building brand loyalty, referrals, and repeat visitors. There’s nothing worse than shopping from a cute online shop just to see your order show up in a free USPS box 😬
I’ve finally found a source that I can confidently recommend to you for custom, eco-friendly packaging: noissue! Learn more about why I recommend this awesome source:

Creative, Mix & Match Packaging Options
Packaging isn’t a one-size-fits-all situation! What works for you is going to be based on what you’re shipping, how you need to package it and, ultimately, what suits your brand. With noissue you can combine just the right items for you and they’ll all work great together.

Low Order Minimums
One of the biggest reasons why startups and small businesses default to free boxes over custom packaging is because it used to just require too much upfront committment and cost. But if want to try things out with, say, just 25 custom boxes to start you can do just that!

Easy Design Tools
The easy design editor makes it super simple to create cool patterns out of your logo or customize any product. There are also some pre-designed items that you can add like simple kraft boxes or mailers - great to mix and match with some of your own custom elements like tissue paper or cards. noissue also has a pre-press team that will make sure your design is going to print perfectly!

Sustainable Products
Everything - seriously, every single thing - in noissue’s product lineup is either compostable, recycled, or reusable. They are very transparent about their supply chain and sourcing which is super rare in the print industry, especially at this price point. Eco-friendly packaging is something online customers are looking for and you can proudly feature that you ship using earth-friendly materials on your website.

Noissue offers eCommerce packaging that not only protects your products and promotes your brand - it’s all super earth-friendly!
Ready to add custom packaging to your eCommerce arsenal? Click below to check out my fave source! It’s a small investment that is so worth it!

Kristine Neil
Fractional Web Partner
I'm Kristine Neil - a communications strategist who has spent 20+ years designing websites, first running a full-scale design and marketing agency, and now leading my own studio. I've been the creative director managing the work, the coder quietly fixing what others couldn't, and the strategist in the room asking why before how. Somewhere between the MBA and the other degrees, I decided web design was just one tool in a much bigger toolbox - the real work is figuring out what you're trying to say, who needs to hear it, and what's getting in the way. A website is just where all of that comes to life.
I build on Squarespace, and after years deep in the platform I know how far it can go and when to push past its limits. These days, I'm especially drawn to working as a fractional partner - getting to know an organization over time and helping with whatever moves them forward, whether that's a full redesign, an ongoing hand with content and strategy, or just being the person who knows their site best. I write here about eCommerce, web strategy, and making the complex feel a little more human.